Expenses
Using Nexonia Mobile
- Creating and Submitting Expense Reports (Nexonia Mobile)
- Adding and Linking Receipts to Expense Reports (Mobile)
- Getting Started with the Nexonia Expenses Mobile App
- Nexonia Mobile App Single Sign On
- Creating a Location-Based Mileage Expense on the Mobile App
- How to Switch between Nexonia Accounts on the Mobile App
Adding Receipts & Expenses
- New Expense OCR Transcription Platform FAQ
- Adding Expense Receipts on the Web
- Adding Expense Receipts via Email
- How to Adjust the Resolution of Expense Receipts
- Manually Uploading Personal Card Transactions
- Getting Started with Nexonia Expense
Managing Credit Cards
- Integrating Business Credit Cards to Nexonia Expenses
- How Long Do Company Credit Card Transactions Take To Import To Nexonia?
- How to Integrate the Cards Gateway for AMEX Business
- Enabling the Nexonia Cards Gateway
- Integrating the Cards Gateway
- Corporate Credit Card Feeds
Managing Expenses
- PDF: Configuration Guide for Nexonia Expenses
- Enabling and Using Bulk Splits
- Creating a "Credit Card Vendor" User Role
- How to Enable Nexonia OCR Receipt Scan
- Managing a Cash Advance/Return Expense Category
- Creating a Per Diem Expense Category - Fixed Rate
Reviewing Expense Reports
- Resetting Exported Expenses
- Filtering Expense Reports
- How to Download a CSV File of an Expense Report
- Acting as a Temporary Approval Proxy
- How to Move Expense Items to Another Expense Report
- Policy Blocker: "Entry has a receipt but no image is linked"
Approving Expense Reports
Regular Maintenance
- Managing Expense Policy Rules
- How to Enable Email Notifications for Expense Approval
- Opting Out of Emails
- Allowing Project Managers to View User Data Related to their Projects
- Creating Structured Multi-Tiered Categories
- Enabling Duplicate Detection for Credit Cards
Export Maintenance
Running Reports
- Configuring a .CSV Formatted Export File
- How To Create Reports
- Reporting Column Definitions - Expenses
- SOC/SOX Report
- Reporting Types
- Reporting Template: Mileage Report
Using Integrations
- How to Obtain a Sample CSV File for Exports
- Viewing Export Error Messages
- Un-suspending an Integration
- Exporting Payables Bill Due Date to Intacct Due Date
- Card Transactions Not Exporting and Failing to Generate an Error Message (NetSuite/QuickBooks)
- Enabling the Emburse Integration Role in NetSuite for Nexonia and NetSuite Integrations
Reimbursing Using Direct Deposit
Training Calendar
Submitting & Approving Expenses
Alternating schedule
How to login, upload your receipts, create and expense reports for approval, and approve expenses.
Submitting & Approving Time Off and Timesheets
Alternating schedule
A walkthrough of how to create, submit, and approve Timesheets and Time Off requests.
Reporting Module Overview
Alternating schedule
An overview on how to create and generate reports.
Configuring Expense Settings for Admins
Alternating schedule
How to manage your company's data and settings.
Configuring Timesheets & Time Off Settings for Admins
Alternating schedule
How to manage timesheets and time off settings and policies for your company.
Managing Nexonia with Intacct
Alternating schedule
An overview of how Nexonia is integrated with Intacct. Learn how to import and export data between Nexonia and Intacct, manage users, expense categories and Intacct dimensions.
Managing Nexonia with QuickBooks
Alternating schedule
An overview of how Nexonia is integrated with QuickBooks Desktop or QuickBooks Online. Learn how to import and export data between Nexonia and QuickBooks, manage users, expense categories and QuickBooks dimensions.
Managing Nexonia with NetSuite
Alternating schedule
An overview of how Nexonia is integrated with NetSuite. Learn how to import and export data between Nexonia and NetSuite, manage users, expense categories and NetSuite segments.
Travel Booking & Analytics
Alternating schedule
Review how to book travel, run reports, & view unused tickets.
Watch Nexonia's easy-to-follow brief tutorial videos here.
Training Videos
Creating and Submitting Expense Reports (Nexonia Mobile) Adding and Linking Receipts to Expense Reports (Mobile) Getting Started with the Nexonia Expenses Mobile App Nexonia Mobile App Single Sign On Creating a Location-Based Mileage Expense on the Mobile App How to Switch between Nexonia Accounts on the Mobile App
-
Users can create and submit expense reports on the Nexonia mobile app.
Creating a New Report
Step 1: From the home screen, tap New.
Step 2: A new report is created. Edit the report title and tap Save.
Creating Reports from Receipts
Step 1: In your Receipt Wallet, select an unassigned receipt.
Step 2: Tap the Move To button at the bottom of the screen.
Step 3: On the Select Report screen, tap New.
A new expense report is created. The receipt will appear unlinked until a new expense item is added to the report.
Creating Reports from Transactions
Users can create expense items using credit card transactions on the Nexonia mobile app. The user must be assigned a credit card feed, and there should be transactions in the feed, for which the expense items can be created. On the home screen of the app, users can see how many unused transactions are in their feed.
Step 1: To create an expense item, tap 'New' next to the Reports section.
Step 2: Tap on 'Add item' and opt for 'Add from Credit Card' from the menu.
Step 3: Choose from the transactions available in the feed, enter details to the expense item and save.
Within the expense report, users can identify card transactions by the credit card icon that displays on expense items.
Submitting an Expense Report
Once all expense items, receipts, and transactions have been added to an Expense Report, tap Submit at the bottom right of the screen.
-
Receipts are uploaded in Nexonia Mobile through the users' camera application. Users can either directly capture a receipt using their phone's camera, or upload a receipt from their camera roll. From there, users can add the receipt directly to an expense report.
Step 1: Tap the + icon on your mobile dashboard.
Step 2: Upload a receipt by capturing it using your phone's camera, or uploading an image from your phone's library.
Step 3: The receipt appears in your Receipt Wallet. Add the receipt to an expense report or expense item by clicking on your Receipt Wallet, selecting a receipt, and tapping the Move To icon.
.
Linking Receipts to Expense Reports
Nexonia allows users to link receipts to expense items on the mobile app just like it does on the Web.
Once you have moved your receipts to an expense report from your Receipt Wallet, you can link upload and link it to an expense item by doing the following:
Step 1: Click on the expense report that you want to link your receipts to.
Step 2: Tap on the Receipts tab.
Step 3: Select the receipt you want to link to the expense report and tap the "Link" button in the bottom left corner.
Step 4: You will be given the option to choose to link the receipt to a new expense item, a new expense item from Credit Card, or to an existing expense item.
If you choose to link the receipt to a new expense item or new expense item from Credit Card, the expense item creation menu will open.
If you choose to link the receipt to an existing expense item, a list of all eligible expense items will populate and you can select which item to link the receipt to.
Step 5: Once the receipt is linked to an expense item, the paper clip icon on the main expense report will turn green. -
Downloading the Mobile App
The Nexonia Expenses mobile application is available for free through all the major app stores. It will require you to log in with your Nexonia credentials to use. Once you’ve done so, you’ll be able to do expense reporting from your mobile device, such as a smartphone or tablet - create expenses, photograph receipts, and even submit or approve expenses on the mobile application.
To download the Nexonia Expenses mobile app, go to the corresponding app store or market for your smartphone or mobile device.
Link: Apple App Store for iOS devices
Link: Google Play for Android devices
Search for “nexonia expenses” and install the “Nexonia Expenses” application. The app icon should look similar to or the same as the icon below:
Once installed, tap the icon to open the App.
Logging in to the Mobile App
Once you’ve installed the application, you’ll need to open the app and login with your Nexonia credentials. You only need to do this once, the first time you open the application (or if your Nexonia password changes). The application will allow you to stay logged in.
The first time you open the Nexonia Expenses App, the application will ask if you’d like to give the application the following permissions (you can change these later if needed in your app or phone settings):
Allow “Expenses” to access your location while you use the app? - this allows you to use Nexonia’s location based features when entering addresses for mileage entries.
“Expenses” Would Like to Send You Notifications - this allows Nexonia to send you notifications and alerts on your mobile device, such as notifying you when expense reports are approved or submitted.
You’ll then see the “Welcome to Nexonia” screen. Once you hit "Continue...”, you’ll be taken to the login screen.
Enter the email address associated with your Nexonia profile (usually your work email address) and your password.
You also have the option to use Google single-sign on if your work email is managed by Google.
Tap “Login”, and the application will log you in. Provided you are connected to the internet on your mobile device, the application will do an initial synchronization to ensure the information from your web profile is copied to the mobile app, and back again.
Syncing Your Data
Nexonia’s mobile application syncs your mobile Expenses app data to the Nexonia server. This transfers any new information, such as recently added receipt images or newly created expenses, between your web profile on the server and your mobile application. For example, if you emailed a receipt to your report, but aren’t seeing it on the mobile app, it may not have synced yet.
By default, the application will sync when you start the app.
The sync is triggered in one of two ways:
Background Sync (default) - the application will sync when you first open the app and every 5 minutes in the background after that, as long as you have an internet connection to your device.
You can see the last time the app synced under your name on the homescreen.
Manual Sync - you always have a manual sync option, located on the homescreen. Tapping it will sync any new data immediately, as well as update any setup changes your administrator made to the company profile (i.e. new customers, new expense categories)
You can also do a manual sync by swiping down from the homescreen, or inside an expense report.
You can limit when the app syncs, depending on the internet connection:
On the mobile app homescreen, tap "Settings" and scroll to the setting "Background Sync".
Your options for this setting are:
- Enabled: Sync whenever you’re connected to the internet;
- Wifi: Only sync when you’re connected to wifi;
- Disabled: Turns off automatic sync. You can still sync manually.
Adding Receipts
Step 1: Download the Nexonia Expenses Mobile App on your iPhone or Android mobile device.
Step 2: Login to the app with your Nexonia username and password.
Step 3: Tap the Receipt button and choose an expense report to add to.
Step 4: Snap a photo of your receipt and click Use Photo.
Step 5: Enter in any necessary details and click Save.
-
If your organization has enabled Single Sign On (SSO) logins for Nexonia, you have the option to login to the Expenses and Timesheets mobile apps using your corporate SSO login.
This article shows you, a Nexonia User, how to login to the Expenses and Timesheets mobile apps using SSO.
Step 1: Open the app and click Corporate SSO.
Step 2: Enter your SSO login information and tap Sign In.
You're now ready to start using the Expenses/Timesheets mobile app.
-
Nexonia allows you to enter mileage on the mobile app using Google Map integration to help automate the process. Your mileage entries can be one-way or multiple stops. The reimbursement rate will be preset by your organization.
Note: Location-based mileage is enabled by your internal Nexonia administrator.
Location Based Services (Google Maps)
The most common way mileage is managed in Nexonia is with Location Based Services. Using Google Maps to automatically calculate your distance is achieved by entering in Waypoints (addresses or mapping points), which also generates a Google Map attachment as a receipt. Waypoints can be entered into the Locations field with as little as 2 stops (one-way) or as much as 6 (multi-stop).
Creating a Mileage Expense
To create a mileage expense on the mobile app, from the home screen, create a new expense report or open an existing one:
Tap on the Add Item button:
Add the item to an existing or new expense report.
Select the Transaction Date (1) for the mileage entry
Select your mileage category from the Category (2) dropdown.
Tap Locations (3) to open up the location service.
Tap Add Waypoint (4) to start adding your waypoints. Each waypoint you add will return you to the Locations screen. You can add up to 6 waypoints.
Adding a Waypoint
You can add a waypoint in several ways:
Manually - you'll see two fields:
- Label (optional): label for this waypoint
- Address (required): address or GPS coordinates for this waypoint
Type in Address, tap Save.
GPS/My Location - Tap My Location and the mobile app will enter your GPS coordinates where you're currently located. (Note: during your initial installation of the app, Nexonia will ask permission to access Location Services on your mobile device. This can be managed in your phone settings as well.)
Retrieve - Tap an icon to retrieve an address:
Import address from Contacts on your mobile device
Tap to retrieve a previously used waypoint
Tap to retrieve a home (A) /work (B) /favourite (C) location.
From the Locations screen:
Tap Generate Map (5) to generate the distance and Google Map attachment.
Tap Save to save the mileage expense.
Additional Options on the Locations Screen
- Tap and drag the waypoints to re-order them.
- Tap on the down arrow "V" to the left of the waypoint to bookmark the waypoint for future use.
- Slide the Round Trip switch to the right (Green) to make this mileage entry a round trip.
- If you make any edits to the draft mileage expense, tap Generate Map to update the mileage entry with your edits.
Tip: You can create and save a draft mileage expense with a single waypoint - you could use My Location to create your starting point, save the mileage expense, and update it when you reach your destination.
-
1. Launch the Nexonia mobile app (Timesheets or Expenses).
2. Tap on your Name at the top.
3. On the Account Selection screen, tap the account that you want to log into.
4. You will be asked if you would like to load the data. Tap OK.
5. You have now successfully switched to another account!
New Expense OCR Transcription Platform FAQ Adding Expense Receipts on the Web Adding Expense Receipts via Email How to Adjust the Resolution of Expense Receipts Manually Uploading Personal Card Transactions Getting Started with Nexonia Expense
-
Emburse Nexonia is excited to roll out an improved Expense OCR transcription platform. Read our FAQ below to learn more.
What is OCR transcription?
Emburse’s OCR (optical character recognition) transcription is an AI-powered receipt- and invoice-capture technology that intelligently scans, extracts, and categorizes receipt and invoice data with unmatched accuracy.
Why is Emburse changing its OCR transcription technology?
We are committed to continuously improving the quality and global reach of our OCR capabilities, and that’s why we are making this change. The new engine uses an AI-powered OCR transcription technology that offers significantly higher accuracy and can process documents in multiple languages. This upgrade is designed to address previous limitations and deliver more reliable results, ensuring better performance and overall user experience.
What changes can customers expect with the new OCR technology in terms of features, field support, and regional support?
Our first objective is to improve the accuracy of receipt capture with upgraded technology. We are also increasing the number of supported countries.
What other use cases will Emburse’s AI technology be used to solve?
Since most downstream processes depend on accurate data being extracted during OCR transcription, leveling up to the latest technology is our top priority. Next, we will leverage the new OCR transcription technology for other related use cases, such as folio itemization. At the same time, we will improve processes that help organize users' expense data, such as card and receipt merge logic. Additional opportunities to improve our solutions with AI will be explored over time.
How accurate is the new OCR transcription technology?
The OCR transcription technology is highly advanced and more accurate than previous versions. The concrete accuracy improvements depend on the country, product, and field. However, we are seeing an average increase of more than 20% across all different use cases.
How has accuracy helped automate other parts of Emburse’s expense solutions?
All expense-related processing benefits by being downstream from OCR transcription. For instance, even if no other processes are optimized, improved transcription accuracy will automatically enhance the accuracy of merging cards with receipts. Automated expense categorization will also become more accurate as a result.
Can the OCR transcription handle multiple languages?
Yes, our OCR transcription is highly proficient across many languages. It performs especially well with such widely spoken languages as English, Spanish, French, and German. However, accuracy may vary for double-byte languages with logographic or syllabic writing systems, like Chinese, Japanese, and Korean, as well as for less commonly spoken languages or dialects. Further improvements are expected in the near future.
How is Emburse AI trained?
Emburse AI is developed using a multi-layered approach that combines multiple enterprise Large Language Models (LLMs) to label and process millions of documents. Importantly, this is done without ever storing customer data outside of Emburse’s secure infrastructure and, in strict adherence to our contractual and compliance obligations, no external models are trained on customer data.
The labeled data is used to fine-tune open-source models that are deployed and operated exclusively within Emburse’s infrastructure. These models are optimized to understand structured financial documents like invoices and receipts. The training pipeline is designed to ensure accuracy and adaptability across document formats while strictly safeguarding customer data.
Does customer data train Emburse AI for other Enterprise clients?
Emburse AI is a general-purpose model used across all Enterprise clients. When we fine-tune the core model, we do so once, using a curated dataset that may include data from multiple customers. However, this is done within Emburse’s secure infrastructure, and no external parties or third-party models ever access this data.
While the resulting model is shared, no customer-specific data is exposed or identifiable within the model. The training process is carefully designed to learn general patterns and structures from the data, rather than storing or reproducing any specific customer content. This allows Emburse AI to generalize well across use cases while maintaining strict privacy and security standards for all clients.
How does Emburse’s OCR transcription handle privacy and security concerns when using AI-powered services?
Privacy and security have been given due consideration during the development of the new OCR transcription technology. All data submitted is never stored outside of Emburse’s data infrastructure and is never used to uptrain external models. Please visit our Trust Center to learn more about how Emburse is keeping your data safe.
How do you ensure our data cannot be extracted from Emburse AI via prompt injection on receipt images or otherwise?
Prompt injection is a technique where hidden instructions are embedded in input text or images to manipulate an LLM's behavior. Emburse AI is protected against prompt injection through a strict pre- and post-processing architecture.
- Pre-processing inspects and sanitizes all inputs before they reach the model, ensuring no user or document content can manipulate the behavior of the LLM.
- Post-processing enforces strict output validation, ensuring the model’s responses conform to a predefined schema aligned with our product and security expectations, (e.g., enforcing consistent date formats like yyyy-mm-dd and disallowing free-text output that could expose raw data).
These controls are designed to prevent any form of prompt injection or model manipulation, maintaining both data integrity and output reliability.
Who can I contact if I have any problems?
Our Support team can assist if you encounter any issues related to document upload or processing-related issues. Please note, although we are continuously improving the underlying parsing engine, OCR extraction is not a perfect science. The format of the receipt and the quality of the photo taken may impact the transcription accuracy. Systemic issues, particularly those where a specific vendor or merchant's receipts are not parsing correctly, will be reviewed by our team. Issues with individual receipt images do not need to be escalated to our Support team, as many of these smaller issues will correct themselves over time.
-
Receipts are uploaded to the Receipt Wallet and assigned to an expense report. From there, receipts can be linked to specific expense items within the report.
Adding Receipts from the Receipt Wallet
When logged in to your Nexonia account on the web, navigate to the Expenses module.
Step 1: Click on Receipt Wallet to start uploading or assigning receipts to expense reports.
Step 2: Add receipts to the Wallet via Email or by Uploading them from a desktop.
Upload: Prompts you to upload a receipt image from your computer. The following file formats are supported: JPG, PNG.
Note: you can also easily drag and drop files to a designated area in Nexonia to start the upload.
E-mail: Opens a dialogue box with detailed instructions and easy-to-follow links that allow you to email receipts into your report. You can email receipts to receipts@nexonia.com as either image attachments or by forwarding an email, whether they are an attachment or a text-only email. See Adding Expense Receipts via Email to learn more!
Note: receipts added via Email will be available in your report within 5 minutes. You’ll be emailed a confirmation when the receipt has been added.
Step 3: Select the receipt, then click the Arrow/Checkmark icon to move it to an expense report.
Step 4: The Select Report window opens. From here, users can either add the receipt to a new expense report or an already existing report.
Adding Receipts to Existing Expense Reports
From inside the expense report, receipts can either be added directly from within an Add Expense Item window or from the Manage Receipts area found inside the expense report.
"Add Expense Item" window
"Manage Receipts" area
-
In Nexonia's Expense module, users have the ability to adjust the resolution of their expense receipts between high resolution and low resolution, which adjusts the image quality of the expense receipts for viewing in an expense report.
This article provides directions on how to change a receipt from high resolution to low resolution within an expense item or expense report, as well as directions on setting the default resolution for expense receipts.
Note: This feature is not available in the Receipt Wallet.
Setting the Receipt Resolution in Expense Reports
The steps below provide directions on how to switch a receipt's quality between high resolution and low resolution when viewing the receipt in an expense item or expense report.
Step 1: Go to Expenses
Step 2: Open an expense report, then open the desired expense item.
TIP: The feature is also available via the Manage Receipts feature within an expense report
Step 3: On the right side of the expense item is the Receipt viewing panel. At the top, you can click the circle resolution icon to toggle between low resolution and high resolution.
TIP: If the receipt is not loading or an error appears where the receipt should be, try switching to high resolution.
Setting the Default Receipt Resolution
Each user can customize their default resolution setting for expense receipts within their own account. The steps below provide directions on how to adjust your own default expense receipt resolution for expense receipts in your account.
Step 1: Select your name in the top right corner
Step 2: Click Account Settings
Step 3: Click Edit
Step 4: Go to Low resolution enabled and select 'Yes' to default all receipt views to low resolution, and select 'No' to default all receipt views to high resolution.
Step 5: Click Apply when done to save the changes.
For additional guidance on uploading and managing receipts, please see Adding Expense Receipts on the Web.
-
There may not always be an available connection for your personal card in Nexonia. If you have tried integrating your personal credit card Nexonia using any associated financial institutions and are unable to connect, you can manually upload the transactions using an upload template file.
This article will show you how to manually upload personal card transactions.
Step 1: Open the Expenses page
Step 2: Click Cards.
Step 3: Click Manage Cards.
Step 4: The Cards window opens. Click Add Card for Manual Upload to set up an automated import of your personal credit card.
Step 5: This is the Card Transactions window. This is where you can set up the upload format for the credit card. Enter the following information:
- Name: This is the name that will be displayed when you view the transactions. For example (your name): Personal Card.
- Description: This is the description of the card. You can use the same information entered in the Name field.
- Card Type: Pick the type of card you're adding (American Express, Visa, MasterCard)
- File Format: Select the File Format of the credit card transaction file. This is how the upload knows which information is which. Copy the format columns that appear to the right of Select - (card name) into the header line of a .csv spreadsheet.
- Lines in Header: This is typically set to 1, as you will have the Header row populated with the columns you pasted into the spreadsheet in the File Format section.
- Encoding: Leave at the default of ISO-8859-1
- Active: Check this box.
Step 6: Click OK when complete.
Step 7: The upload format for your card has now been created. Click Close to complete.
Step 8: Now that the card is entered, download a .csv file of the prepared spreadsheet containing your transaction data. Then, navigate back to the Card Transactions page within the Expenses tab.
Step 9: In the top left corner, you'll see the name of the card you'll upload the statement for. If you have more than one card for your profile, there may be a drop-down menu where you need to select your personal card.
Step 10: Click Upload. This will bring up a window where you'll be asked to select a file to upload. Choose the .csv file with your transaction data.
Step 11: Click Choose File. This will open a window in your computer where you can navigate and find the .csv file you want to upload.
Step 12: Select the file you want to upload. Click OK.
Please note: The file you upload must be in .csv format.
Step 13: The imported transactions will now be listed under this card and can be linked to your expense reports.
-
Is it your first time using Nexonia Expense or maybe you need a refresher? This article leads you through Nexonia's best practices for creating and submitting expense reports.
Create your Expense Report
Step 1: On your Nexonia (Web) homepage, click the Expenses tab.
Step 2: Click Add Report.
Step 3: Enter a Title for your new report, and click Save.
Step 4: Your expense report is created. From here, add receipts or expenses. For more in-depth information, view our video on Submitting Expense Reports.
Please note: You can log in and submit expenses in Nexonia on behalf of another person. For example, as someone's assistant or secretary. For information on doing so, view our article on How to Proxy on the Web.
Creating Expenses from Card Transactions
Step 1: On your Nexonia Expenses Mobile App homescreen, tap Transactions.
Step 2: Tap the transaction you'd like to add, then click Create new item.
Step 3: Choose an expense report to add the expense to.
Step 4: Add a receipt to the expense and add additional details. When complete, tap Save.
Step 5: Go to Nexonia to add card transactions online. From your homescreen, click the Expenses tab.
Step 6: Choose an expense report to add the expense to.
Step 7: Click Add from Card Transaction.
Step 8: Choose a category for your chosen transaction and click Create and Close.
For further information, view our article on Creating Expense Items from Card Transactions.
Adding Receipts using Nexonia on the Web
Step 1: On your Nexonia homepage, click the Expenses tab.
Step 2: Choose an existing report to add to, or click Add Report.
Step 3: Click Add Expense Item.
Step 4: Click Add Receipts and use one of the three listed methods.
- If uploading, choose a receipt from your computer. When complete, click Save and Close.
- To email a receipt, send an email to receipts@nexonia.com using the same email address associated with your Nexonia account. Attach receipts to the email, and each will be uploaded as a separate expense.
For further information, view our article on Adding Expense Receipts on the Web.
Approving Expenses
If you're an Approver in your company, start approving expenses by clicking the Approvals tab on your Nexonia homepage.
- Entire report: To approve a whole expense report, click Action followed by Approve.
- Individual expenses: To approve individual expenses, click into the expense report. Then, click Action followed by Approve.
For further details, view our Approving Expenses article.
View recorded End User and Administrator Tutorials.
Integrating Business Credit Cards to Nexonia Expenses How Long Do Company Credit Card Transactions Take To Import To Nexonia? How to Integrate the Cards Gateway for AMEX Business Enabling the Nexonia Cards Gateway Integrating the Cards Gateway Corporate Credit Card Feeds
-
Business (Company Paid) Credit Cards can be integrated with Nexonia by administrators, providing daily automated credit card feeds directly to your users. Automatically capturing credit card transactions in Nexonia allows you to conveniently link credit card transactions directly into your expense reports.
Card charges are imported into Nexonia after they have been posted to the statement by the bank. Depending on the merchant recording the charges, the day of the week, and other factors, this can take anywhere between one or two business days to one week.
Several factors typically account for the longer posting times. The day of the week when the charge is made can be a factor as charges are typically not posted on the weekend. A charge made on a Friday may not show up until the next Monday or Tuesday. Sometimes when a charge is made offsite from a vendor's typical location (e.g.: they have a booth at a trade show), those charges are not reconciled at the end of the business day but rather at the end of the event.
These instructions apply to integrating a business or commercial credit card issued by your financial institution with Nexonia. For a true Corporate Credit Card program, issued by a credit card provider, please contact help@nexonia.com for assistance with the initial integration.
These instructions will assist with integrating your Business Credit Cards with Nexonia, by going through the following steps:
- Configuring the Credit Card Transaction Source
- Entering your Credit Card credentials
- Initiating the First Transfer
- Assigning The Credit Card Feed to a Nexonia User Profile
- Corporate Credit Cards: Filtering out old Transactions
- Mapping Credit Card Exports for Integrated ERPs or Accounting Software
Note: the ability to add a company paid credit card is enabled by default. If it's not available, an administrator can enable the feature. Instructions can be found in this article: "Features for Automated Credit Card Transactions".
1. Configuring the Credit Card Transaction Source
To start with, you’ll need to login to Nexonia on the web as an Administrator.
Navigate to Integration* > Integration Setup tab.
*This tab is typically relabelled with the name of your accounting platform or ERP.
Towards the bottom of this page there will be an Add Corporate Cards button.
Click Add Corporate Cards to add a new card source.
Enter the Name and select Source Type
- Name = the name of the card as seen by the Administrator
- Label = the name of the card as seen by the User
- Description = type of card for reporting purposes
Source type: Business credit cards use a third party integration platform to retrieve transaction data and deliver it directly to Nexonia. Select an appropriate source type from the drop-down menu.
Helpful Tips when Selecting a Source Type:- Finicity - wide variety of institutions supported in the US and Canada.
- Yodlee - wide variety of institutions supported around the world.
- Plaid for credit cards in USA only. Plaid typically transfers sub-cards 24h after the primary card has been integrated.
- OFX for individual credit cards in the US, without sub-cards
- PEX Cards for PEX cards only
- SFTP and FTP are exclusive to Corporate Credit Cards and would not be used in this scenario
Once you select the source type, you'll see two tabs below:
- Source Configuration: These are the expense item defaults for any credit card transactions imported via this source
- Source Type Configuration: This is where you'll configure the integration for the credit card
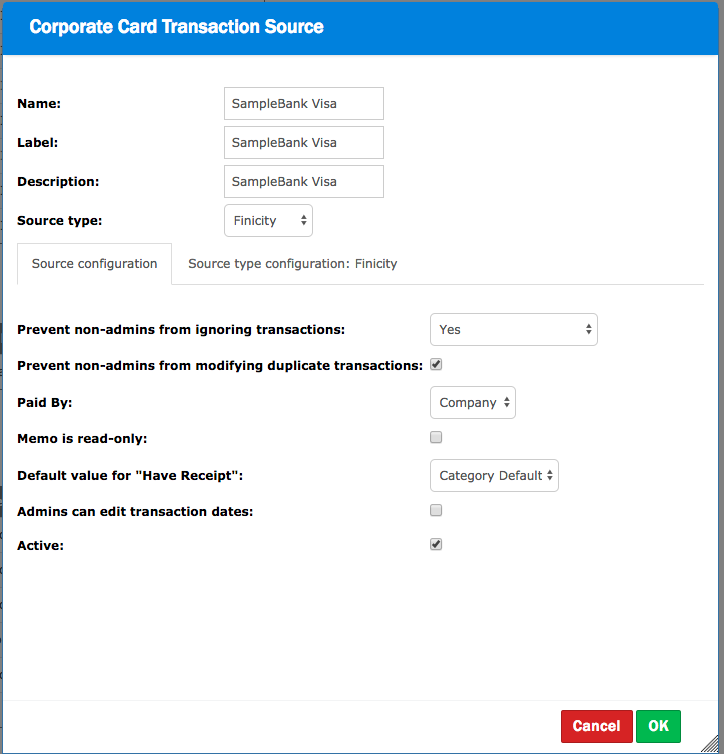
Corporate Card Transaction Source: Source Configuration
Select the Source configuration tab - these settings define defaults to be applied to the transactions brought in via this source. Source configuration settings will be automatically defaulted; however, you can change these default settings as needed. The main ones to be aware of are:
- Paid By - allows you to configure whether the credit card transactions are paid by the Company or reimbursable to the Employee. Typically, this is only changed if employees are responsible for paying the corporate credit card themselves
- Memo is read only (default = unchecked) - Credit card transactions arrive in Nexonia with extra information, such as Vendor, Reference, and Description. By default, these go to the Expense Item memo field. You can prevent them from being modified or deleted by non-Administrator users by checking this box
- Active allows you to “pause” or “un-pause” a credit card feed if necessary. As long as this box is checked, all charges will be automatically imported from this card source. If unchecked, the card is made inactive and no charges will be imported.
For more details on these settings, please read: Corporate Card Transaction Feed: Source Configuration
Corporate Card Transaction Source: Source Type Configuration
Under Source Type Configuration, you may enable the following common settings:
- Scheduling: click Edit > check Activate Scheduling and Everyday > OK. This setting requests the feed to import transactions on a daily basis.
- Institution (for Plaid, OFX, Yodlee): click Edit > select banking institution
- Override Statement: if the credit card feed doesn't provide a statement date, you can configure this setting to apply a recurring statement date to any transactions imported from this source. See: Setting an Override Statement Date.
- Marked as duplicate transactions: allows you to flag duplicate credit card transaction data based on matching amount and date. If this box is selected, you can further refine this detection feature by flagging transactions that also have matching reference number and/or vendor name.
- Send Errors to: enter email address where any error messages should be sent.
- Send Alerts for duplicate transactions to: enter email address where any alerts should be sent.
- Currency (Finicity, OFX): select the currency for the credit card feed.
Click the OK button to save your configuration settings.
Depending on which Source Type you've selected, you'll need to provide different values. Please refer to the links below for specifics depending on your Source Type:
Add a credit card feed with Source type: Plaid
Add a credit card feed with Source type: OFX
Add a credit card feed with Source type: Yodlee
Add a credit card feed with Source type: Finicity
2. Corporate Card Transactions: Business Credit Card Login Credentials (Finicity, Yodlee, Plaid)
Once you’ve completed the Corporate Card Configuration Settings, you’ll now see a tab to the left of Integration Setup called Cards. You will have to navigate to that tab to enter the login credentials for the cards and initiate the transaction feeds.
To add a credit card:
- Navigate to *Integration tab > Cards tab.
- Choose new feed from drop-down menu.
- Click the Add Cards button.
- Enter the online banking login credentials for the card you wish to add and click Authorize. The system may take a few moments to authorize the card integration. If the results show multiple accounts, check mark which account is to be imported to Nexonia.
Once the card is authorized and integrated, click OK.
Tip: When integrating a Business Credit Card with multiple sub-cards or "child" cards, it is recommended that individual logins are provided for each card as a separate feed is generally needed for each card. This means establishing separate card sources for each card.
Once the card is integrated, you'll want to run an initial import of any available charges.
3. Corporate Card Transactions: Credit Card Transactions Transfer
Once the card is added, click Transfer > OK to initiate the initial transfer and bring any recent transactions directly into Nexonia.
This will import transactions and display the number of transactions imported. Otherwise, it will display an error message. If transactions are imported, the next steps are assigning the card imported on the new feed, filtering out any old charges which you've already reconciled and mapping the card to the integration software. Transaction feeds may load anywhere from 30 - 60 days of historical transactions on the initial transfer.
Your Business Credit Card is now integrated with Nexonia. Credit card transactions will be imported automatically in Nexonia, allowing you to conveniently link transactions directly to your expense reports!
4. Corporate Credit Cards: Assigning Transaction Feeds to Users
Link: Assigning New Company Credit Cards to Users
5. Corporate Credit Cards: Filtering Out Old Transactions
Link: How to Ignore Corporate or Business Credit Card Transactions
6. Mapping Credit Card Exports for Integrated ERPs or Accounting Software
Link: Mapping Company Paid Credit Cards to QuickBooks
Link: Mapping Company Paid Credit Cards to Cash Management (Intacct)
Link: Mapping Company Paid Credit Cards to Accounts Payable (Intacct)
Link: Mapping Company Paid Credit Cards to Journal Entry (Intacct)
Link: Mapping Company Paid Credit Cards to NetSuite
-
Card charges are imported into Nexonia after they have been posted to the statement by the bank. Depending on the merchant recording the charges, the day of the week, and other factors, this can take anywhere between one or two business days to one week.
Several factors typically account for the longer posting times. The day of the week when the charge is made can be factor as charges are typically not posted on the weekend. A charge made on a Friday may not show up until the next Monday or Tuesday. Sometimes when a charge is made offsite from a vendor's typical location (e.g.: they have a booth at a trade show), those charges are not reconciled at the end of the business day but rather at the end of the event.
-
The Cards Gateway offers a dedicated interface for administrators to easily manage and securely import transactions and card data from AMEX Small Business card programs.
This document shows you, a Nexonia Administrator, how to set up AMEX Small Business cards using the Cards Gateway.
Card Integration Setup
Once the Cards Gateway permissions have been enabled, a Nexonia Administrator can start integrating AMEX Small Business credit card programs. For information on enabling the Cards Gateway, follow the steps outlined in Enabling the Nexonia Cards Gateway.
To integrate your AMEX Small Business credit card account to the Nexonia Cards Gateway, follow these steps.
Step 1: In the Cards tab, click the button to Add A Card Program.
Step 2: The Connect a Card Program window will appear. Select the American Express card program to integrate with Nexonia.
Step 3: After selecting a Card Program, you will be led to the American Express permissions page. Click Continue to American Express to give Nexonia access to the card programs account information.
Step 4: Enter the primary login information for this account, and click Log In.Step 5: Once connected, back in Nexonia under the Cards tab, the in-progress credit card program appears on the Cards page.
Please Note: It may take between 24 and 48 hours to complete the card setup between Nexonia and your chosen financial institution.Step 6: The AMEX card program, number of assigned/ unassigned cards, as well as the list of cards associated with the Emburse Cards account, will be visible once the setup is complete.
Step 7: Make sure to assign any unassigned cards. Cards left unassigned prompt an email notification reminder to be sent to the Administrator.
Credit Card Transactions
Once the AMEX Small Business Credit Card Program integrates with Nexonia, you can use the Cards Gateway to manage the virtual cards and import transactions for expense reports.
On the Cards tab, select a card user with an Active account status.
The Card Details page opens. From here, a Nexonia Administrator can view card information and transactions not yet assigned to a user's expense report, as well as assign cardholders.
An additional way to view unused transactions is by clicking the number in the Unused column of the user’s credit card.
Syncing Transactions
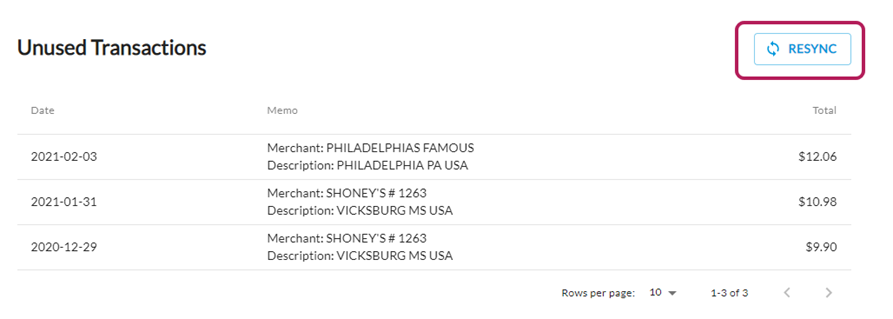
Card transactions should sync automatically for all active cards. However, if a transaction does not appear on the Unused Transactions page, click the Resync button to manually import credit card transactions.
-
Nexonia Expenses has integrated with Emburse Cards via a new Cards Gateway feature. The Cards Gateway offers a dedicated interface for administrators to easily manage card programs and securely import transaction feeds and card data directly from banks.
This article shows you, a Nexonia Administrator, how to enable the Cards Gateway for all users.
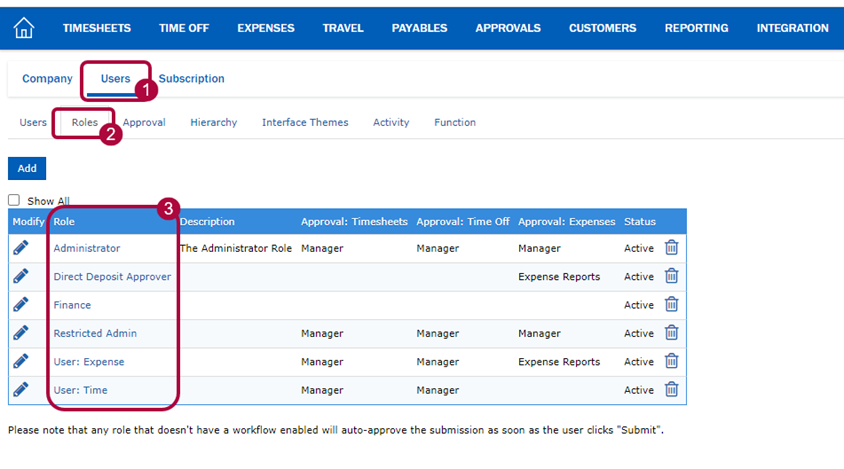
Step 1: Navigate to the Settings page>> Users >> Roles>> then select a User Role.
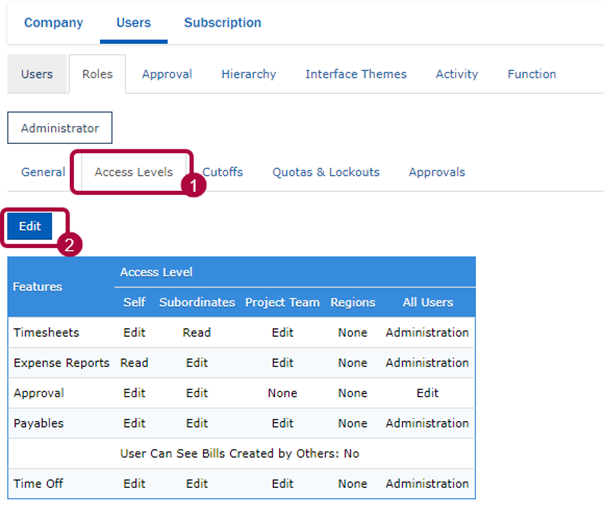
Step 2: Open the Access Levels tab, then click the Edit button.
Step 3: Under the Configuration section, enable the Cards Gateway by selecting the Read or Edit options.
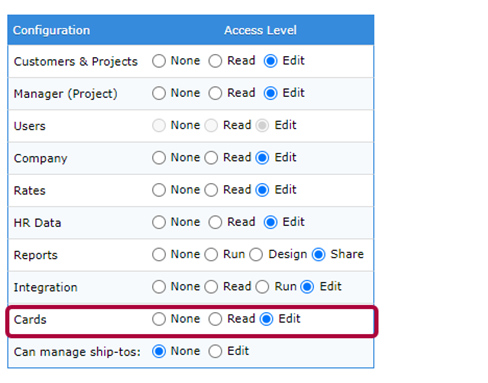
In the example above, selecting the Edit option allows Administrators to upload card programs to the Card Gateway, as well as manage the cards.
Step 4: After applying these changes, the Cards tab will appear in the navigation bar at the top of the page.

For more information on integrating card programs using the Cards Gateway, click here.
-
The Cards Gateway offers a dedicated interface for administrators to easily manage card programs and securely import transaction feeds and card data directly from banks.
Please Note: This feature is currently available only to companies using Emburse Cards, Capital One business feeds, and AMEX Small Business feeds. For all other card integrations, continue to use the Integration Setup page.
This document shows you, a Nexonia Administrator, how to set up credit card integrations using the Cards Gateway.
Prerequisites
- For Emburse Cards: If one does not already exist, work with the Emburse Cards team to sign up for an Emburse Cards
- For Capital One or AMEX Small Business: Contact Nexonia Support and let them know you are looking to integrate your small business feed with the Cards Gateway to confirm that your card program is eligible.
- A best practice is for Cards Admin to also be the Nexonia Admin completing the card integration.
Card Integration Setup
Once the Cards Gateway permissions have been enabled, a Nexonia Administrator can start integrating a credit card program. For information on enabling the Cards Gateway, follow the steps outlined in Enabling the Nexonia Cards Gateway.
Step 1: In the Cards tab, click the button to Add A Card Program.
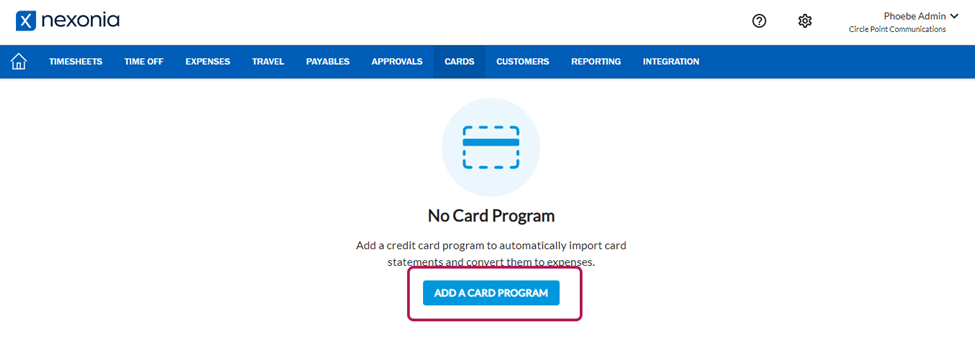
Step 2: The Connect a Card Program window should appear. Select a Card Program to integrate with Nexonia.
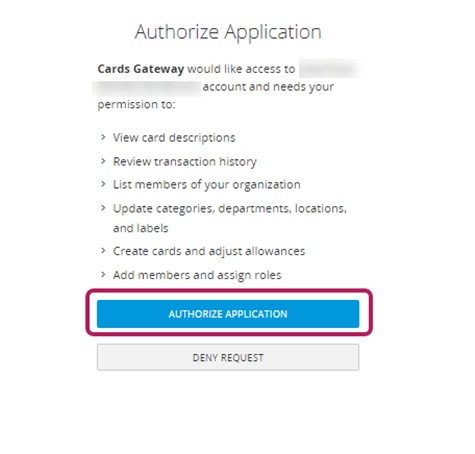
Step 3: After selecting a Card Program, click Authorize Application to give Nexonia access to card account information.
Step 4: The in-progress credit card program appears on the Cards page.
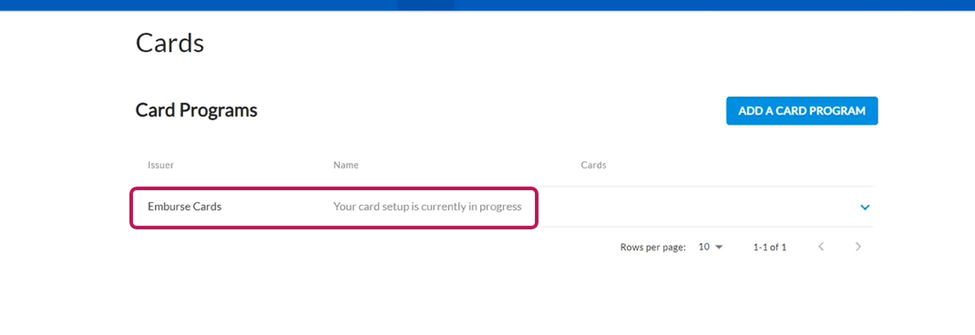
Please Note: It may take between 24 and 48 hours to complete the card setup between Nexonia and your chosen financial institution.
Step 5: The card program, number of assigned/ unassigned cards, as well the list of cards associated with the Emburse Cards account, will be visible once the setup is complete.
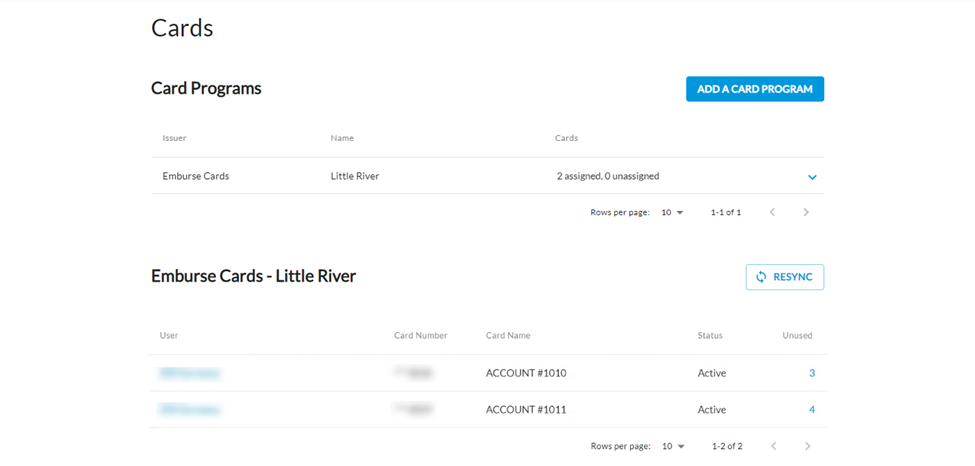
Step 6: Assign any unassigned cards. Cards left unassigned prompt an email notification reminder to be sent to the Administrator.
Credit Card Transactions
Once a Credit Card Program integrates with Nexonia, you can use the Cards Gateway to manage the virtual cards and import transactions for expense reports.
On the Cards tab, select a card user with an Active account status.
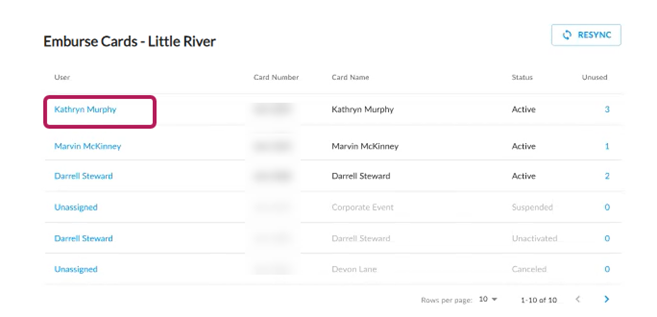
The Card Details page opens. From here, a Nexonia Administrator can view card information and transactions not yet assigned to a user's expense report, as well as assign cardholders.
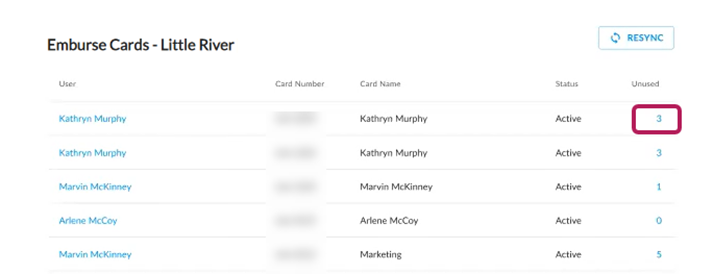
An additional way to view unused transactions is by clicking the number in the Unused column of the user’s credit card.
Syncing Transactions
Card transactions should sync automatically for all active cards. However, if a transaction does not appear on the Unused Transactions page, click the Resync button to manually import credit card transactions.

-
Nexonia has the ability to integrate your cards via an SFTP delivery method, which lets your bank send the transactions directly to our SFTP server, or to their own server where we can retrieve the data.
To get the process going, first reach out to your bank/card provider and request implementation of transaction file transmission via SFTP using one of the following formats:
- AMEX GL1025 (AmEx)
- CDF3 (MasterCard)
- VCF4 (Visa)
If they have the ability to do this, reach out to Nexonia Support via help@nexonia.com and let us know which types of cards you want to connect and confirm that the bank is able to support it.
PDF: Configuration Guide for Nexonia Expenses Enabling and Using Bulk Splits Creating a "Credit Card Vendor" User Role How to Enable Nexonia OCR Receipt Scan Managing a Cash Advance/Return Expense Category Creating a Per Diem Expense Category - Fixed Rate
-
This downloadable PDF document will cover how to configure your Nexonia Expenses account. It’s intended to provide basic instructions for setting up Expenses using the most commonly used scenarios and defaults. Additional configuration instructions are available via article links to our support website at help.nexonia.com provided throughout this guide.
If your configuration requirements are complex or beyond your available time or technical knowledge of Nexonia, please email help@nexonia.com to engage our professional services.
Once the account is configured, we recommend creating, approving, and exporting a sample expense report to ensure the workflow is working as expected, and the data can be uploaded to your accounting platform.
Note: if your Nexonia account will be integrated via web services API to an accounting platform such as QuickBooks Online, QuickBooks Desktop, Xero or Bill.com, you'll want to set up the integration first before you use this guide to configure Nexonia.
-
Nexonia gives you the ability to split expense items by bulk with the Bulk Split function. This lets you define a Customer, Project, and percentages for the sub-items that get applied to all items in the expense report. In this example, a bulk split is being applied so that each item is given four sub-items with 25% of the amount per each sub-item.
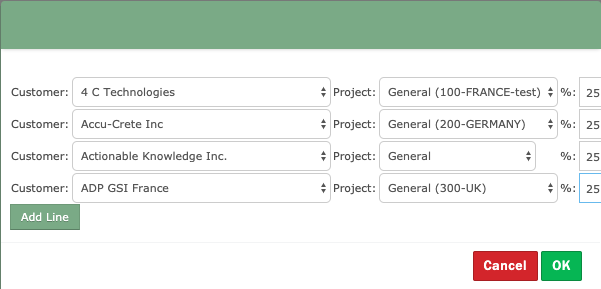
Please Note: This function splits all items in the report with the selected Customer, Project, and percentage values.
This article will show you how to enable and use bulk splits.
Step 1: From the Nexonia homepage, navigate to the Gear icon>>Company>>Features>> and click Edit.

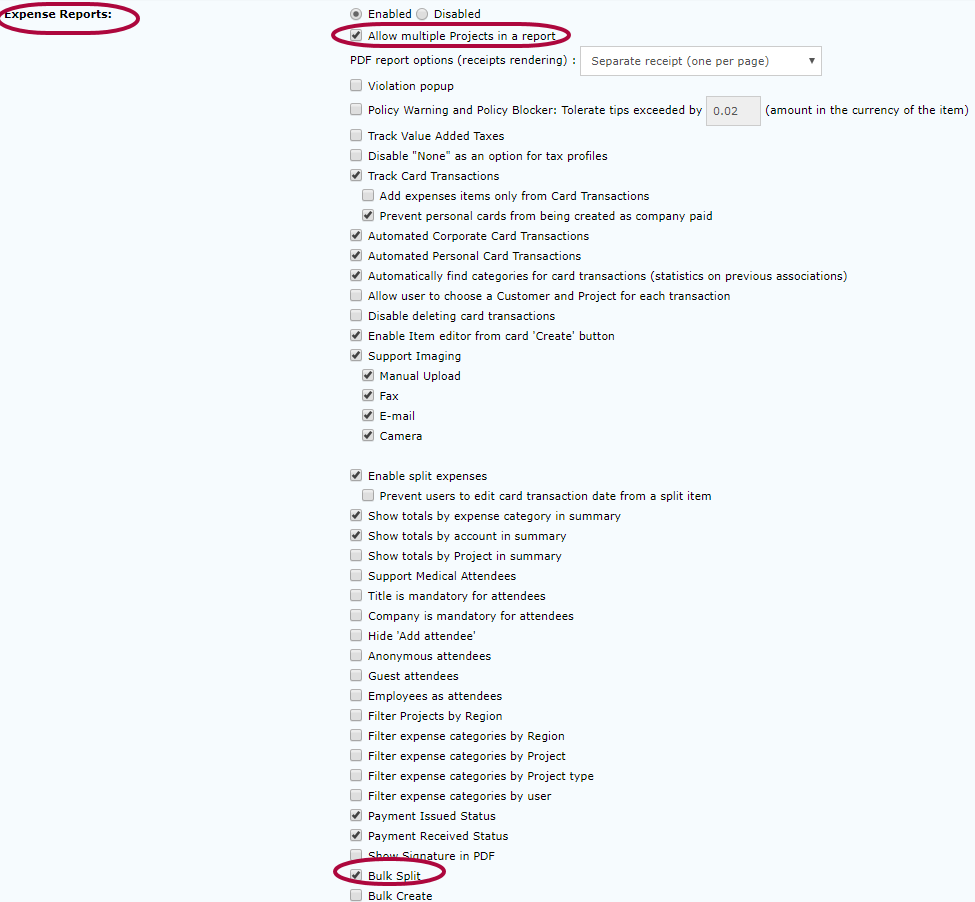
Step 4: Scroll down to Expense Reports. Click the checkboxes next to Bulk Split and Allow multiple Projects in a report.
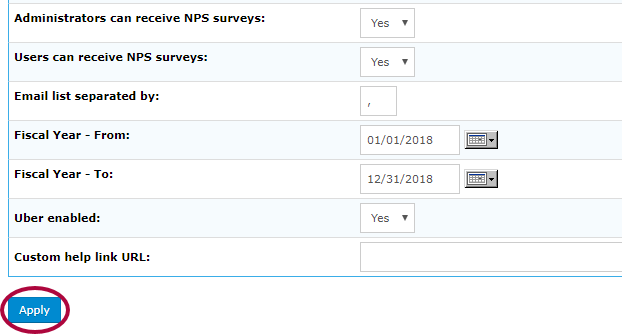
Step 5: Click Apply.
Step 6: To perform bulk splits, click Expenses.

Step 7: Click the Action menu and click Bulk Split next to an applicable report.

Step 8: Here, enter Customer, Project (these two may be renamed in your account), and percentages. Additionally, click Add Line to add sub-items. Click OK to perform the bulk split.
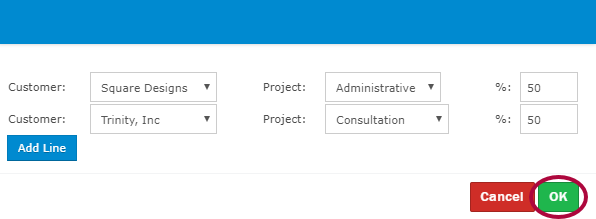
When you open the report, you'll see that each item will have been divided into the amount of sub-items defined previously with your selected Customer, Project, and percentage values.
-
Nexonia Expenses may require creation of a user profile for your credit card vendor, in order for proper mapping of company paid credit card transactions to your ERP or accounting platform.
We recommend creating a dedicated role for this type of user that removes them from the active user list for your Nexonia Expense module. This role would have no access to the Nexonia modules, but still be available for mapping purposes in the configuration parameters.
Creating the Credit Card Vendor role
1. Create a new role from Settings > Users > Roles > Add > Name the role > Apply.
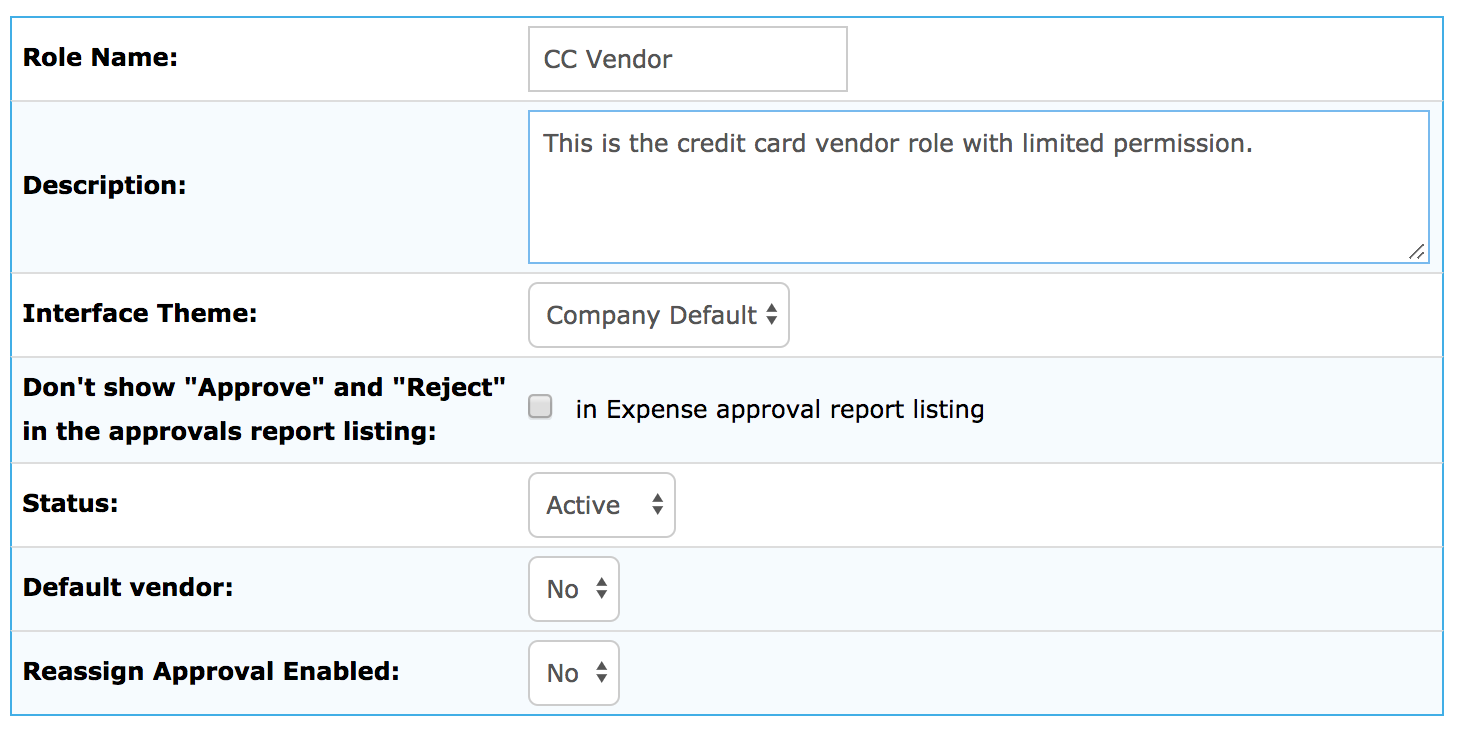
2. Once the role is created, click Access Levels > Edit.
3. Choose "None" access for each Nexonia module / user group.

4. Choose "none" for the Configuration Access levels for configuration and reporting:
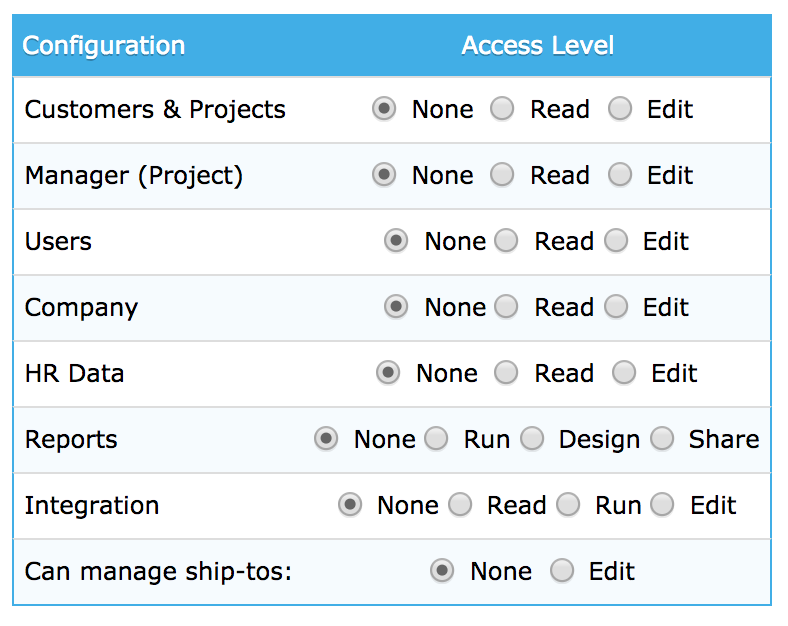
5. Click "Apply" at the bottom of the page to save your settings.
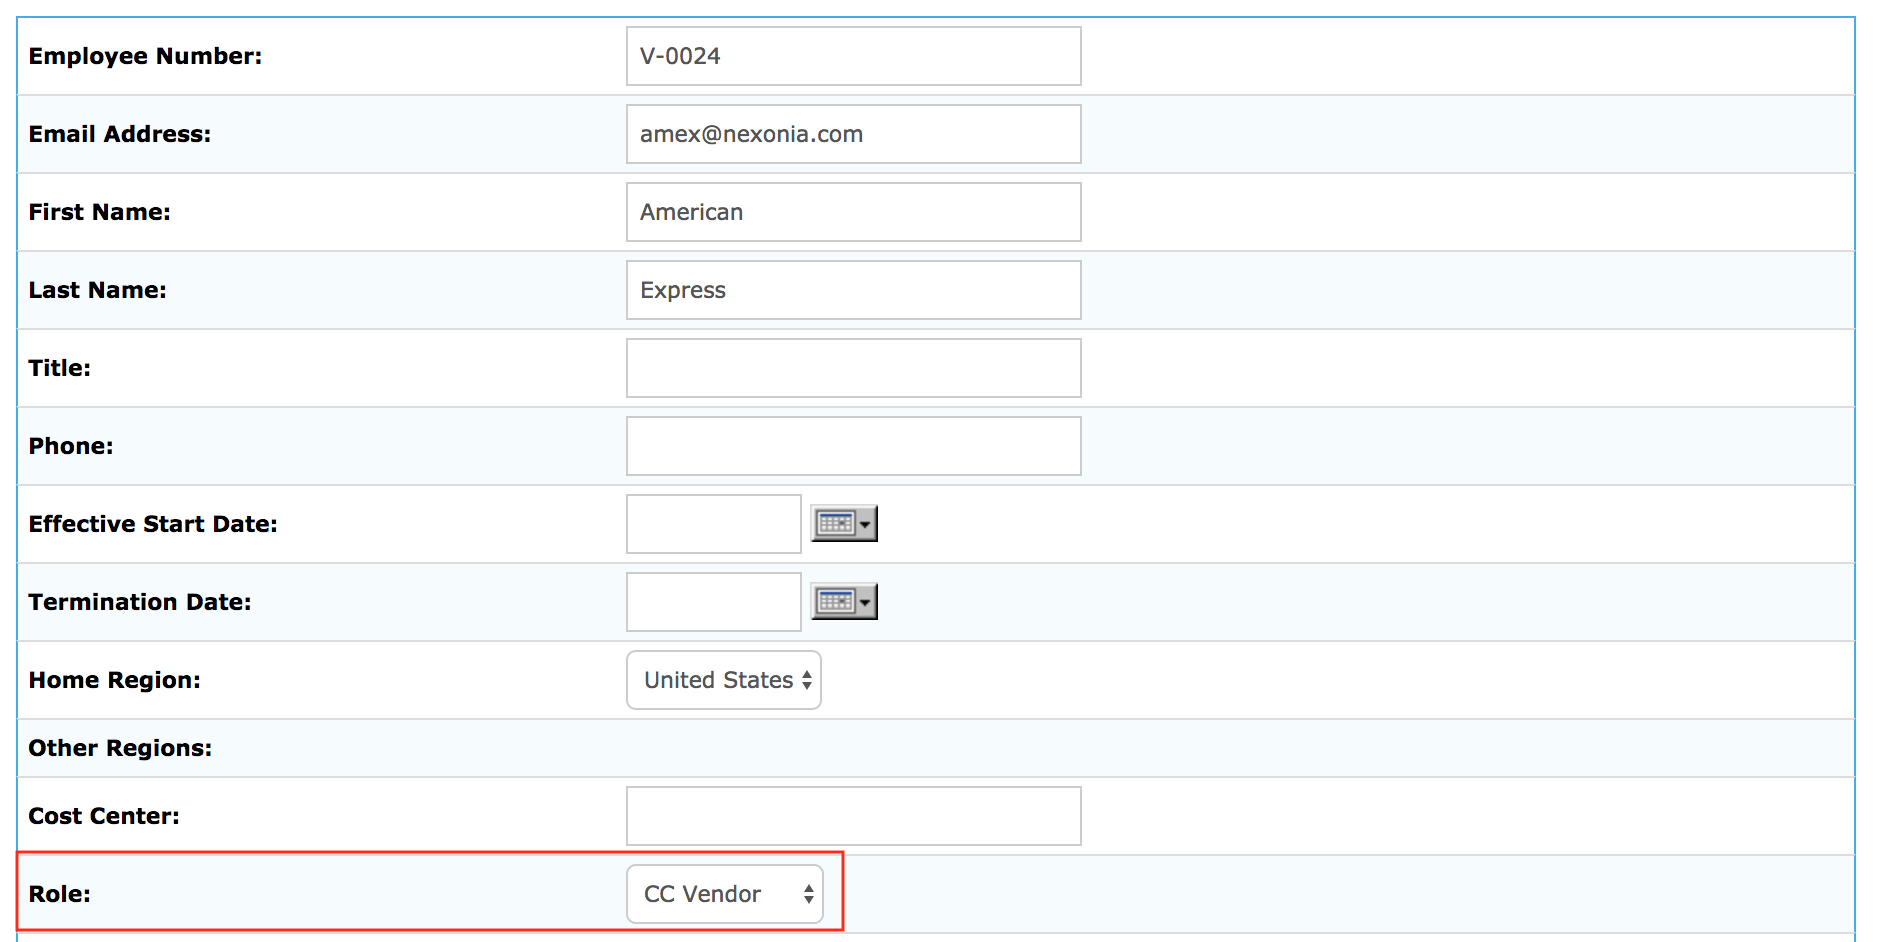
Once the role is created it can be assigned to a credit card vendor user, from Settings > Users > choose the user > Edit > Role: > select the role > Apply.
-
Users can utilize Optical Character Recognition technology (OCR) to scan expense receipts for receipt data, including the date and amount.
To ensure your account is enabled with Nexonia OCR, log in to your account on the web as an Administrator.
Navigate to Settings > Company > Expenses > Nexonia OCR

To enable the OCR, make sure that Active is check marked, then click Save. Your OCR is now enabled.
-
Cash Advance
The "Cash Advance" expense category type represents an advance payment from the company to the user. It can be used in an expense report to indicate the amount advanced to an employee, who can then report expenses deducted from the Cash Advance.
The expense report will show any remaining amount from the Cash Advance. Any remainder of the Cash Advance may be tracked with a Cash Return category if needed.
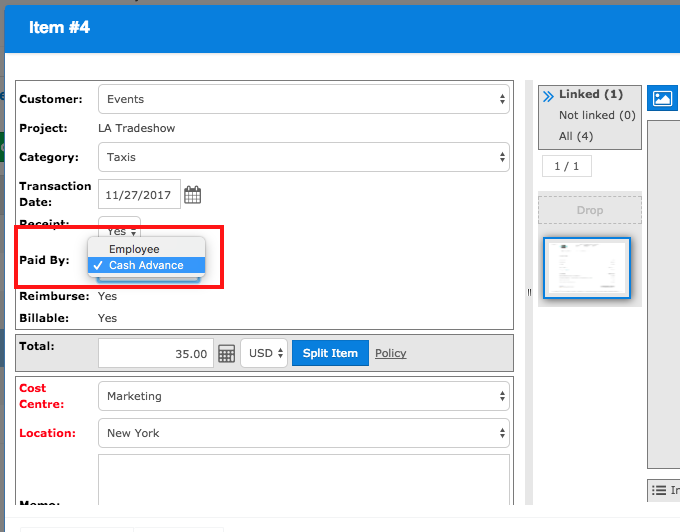
If an expense item of the Cash Advance category type is created in an expense report, any other expense item in that report that can be paid by the employee will contain a new selectable option to be paid by cash advance.
Below, you'll see an expense item from a report with a Cash Advance. For any expense items created, the user has an option under "Paid By" to indicate if the expense item was paid out of the cash advance.
In the example below, Aaron has a $500 cash advance (Item 1), and has paid for his trip expenses against it (Items 2 - 6), with a remainder of $7.00 shown under "Total Due" at the top of the report.

Cash Advance, Foreign Currency
If the Cash Advance is issued in a foreign currency, any expenses created using that advance will need to be in the same currency. The default exchange rate used for the item paid by cash advance will be based on the date from the item of category Cash Advance.
Cash Return
The Cash Return type represents a reimbursement of a previous cash advance from the user to the company. The opposite of Cash Return is Cash Advance, and because of this the amount of an expense item of this category type cannot be negative.
Creating a Cash Advance or Cash Return Expense Category
Logged in to Nexonia on the web:
- Click on the Settings icon
- Navigate to the Company > Expenses > Categories
- Click the Add button to add the new category and enter the details for category.
Note: for Intacct or NetSuite integrated accounts: create the new expense type(s) in your ERP, and run the Nexonia configuration sync to automatically create the new Nexonia expense category.
When configuring a Cash Advance/Return category, the main required setting is Type. Choosing either Cash Advance or Cash Return will enable the correct system behavior for this category.

Expense Category settings to consider:
Memo Requirement: if you want to ensure the expense submitter includes comments on the Cash Advance or Cash Return, make the memo "Required".
Receipt Default Value: if no supporting documentation is expected for a Cash Advance or Cash Return, switch the default value to "No". If you have any sort of document you expect the user to provide, they could attach it as a PDF "receipt" on the expense item - if so, switch default to "Yes".
Once you've completed the configuration for the Cash Advance or Cash Return category, scroll to the bottom of the menu and click the Apply button to save this category and its settings.
You may also be interested in the following articles:
If only certain users should have the Cash Advance or Cash Return category as an option, refer to: How to Filter Expense Categories by Roles
If you want additional details recorded for Cash Advance or Cash Return, please refer to: Creating Custom Fields in Nexonia Expenses
-
"Per Diem" is a daily allowance an employee is given for expenses incurred during business travel. The amount is typically a fixed amount. Nexonia has Per Diem expense categories available for use. Rates can be either fixed by the administrator.
To use other per diem options, please consult the following articles:
Creating a Per Diem Expense Category
Logged in to Nexonia on the web:
- Click on the Settings icon
- Navigate to the Company > Expenses > Categories
- Click the Add button to add the new category and enter the details for category.
Note: for Intacct or NetSuite integrated accounts: create the new expense type(s) in your ERP, and run the Nexonia configuration sync to automatically create the new Nexonia expense category.
When configuring a Per Diem category, the main required setting is Type. Choosing either Per Diem: Meals or Per Diem: Lodging will expose the per diem settings for the category.

The Per Diem related settings are:
Name: name of the expense category visible to the users.
Number: optional identifier for the category, typically an internal ID or description.
Type: for Per Diem, choose either:
- Per Diem: Lodging allows you to set a rate (fixed, manual, or GSA table) for Lodging
- Per Diem: Meals allows you to set a rate (fixed, manual, or GSA table) for Meals
Memo Requirement: if you want to ensure the expense submitter includes comments on the per diem, make the memo "Required".
Per Diem Rate Mode: this is how you define what rate will be used for the expense:
Fixed: a fixed rate and currency is set by the administrator.
Per Diem Rate: indicate the per diem amount and the currency.
Travel Day Option: for Per Diem: Meal type, enables a percentage allocation based on a portion of the trip not being business related.
Meal Breakdown: for Per Diem: Meal type, enables percentage allocation based on meal types to represent meals related to business.
Receipt Default Value: if no receipt or documentation is expected for this type of expense, switch the default value to "No".
Once you've completed the configuration for the per diem category, scroll to the bottom of the menu and click the Apply button to save this category and its settings.
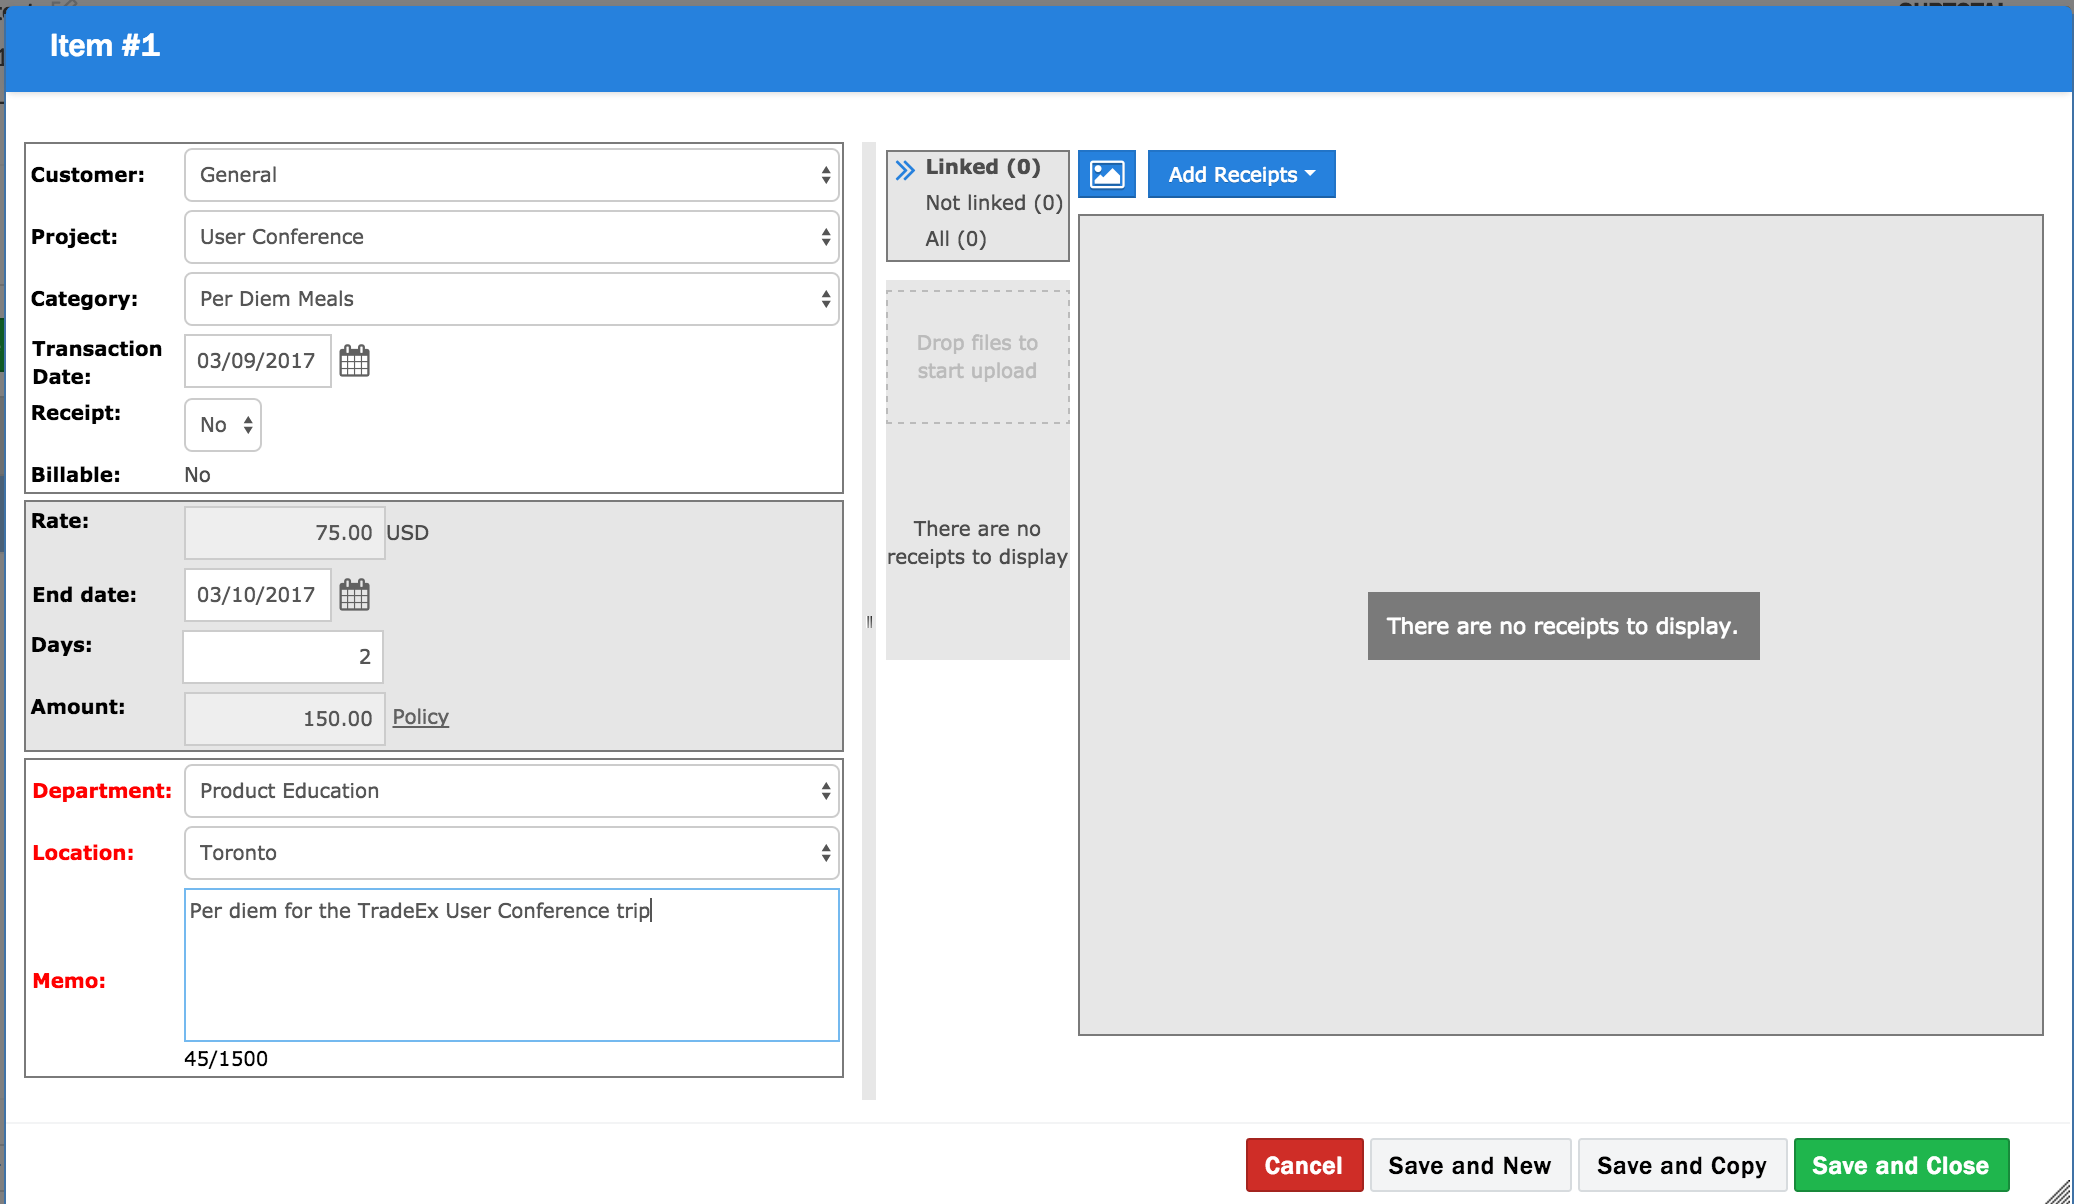
Here's how a Per Diem expense item would look to the expense submitter when added to an expense report:
Resetting Exported Expenses Filtering Expense Reports How to Download a CSV File of an Expense Report Acting as a Temporary Approval Proxy How to Move Expense Items to Another Expense Report Policy Blocker: "Entry has a receipt but no image is linked"
-
As a Nexonia Administrator, you can reset the export flags of expense data that was exported to your ERP from Nexonia. This allows you to re-export that data.
You might want to use this functionality if reports containing incorrect data was exported to your ERP and you want to re-export it with the correct data.
Please Note: Resetting the export status of expense data is reflected in Nexonia only; the corresponding data in your ERP will not be modified in any way.
This article shows you, a Nexonia Administrator, how to reset exported expenses. You can either reset individual reports/items, or a whole exported batch of expense data.
Resetting the Export Flags of Individual Reports/Items
Step 1: In order to reset the export flag of individual reports/items, start by going to Expenses.
Find the report(s) you want to modify. Click Actions next to the report, then Reset Export.
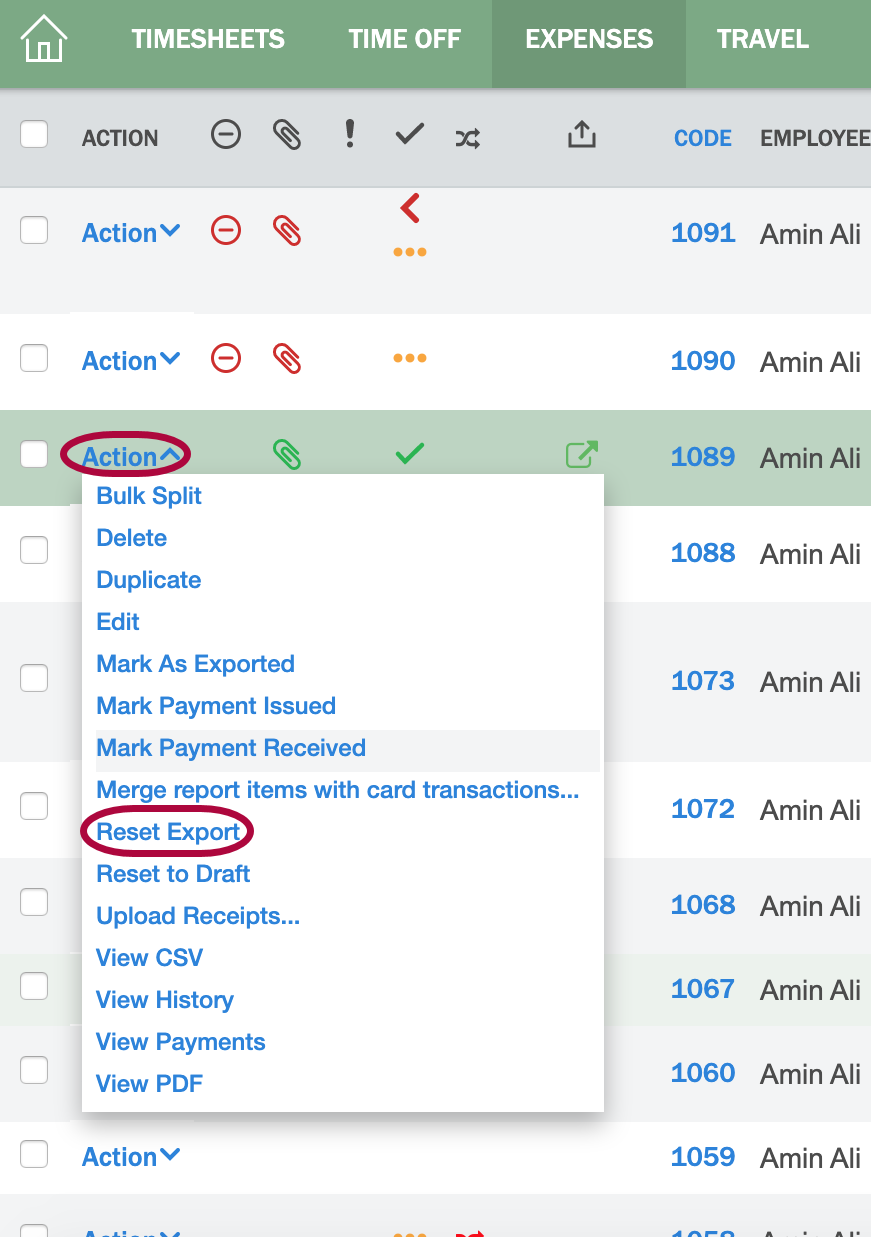
Step 2: A pop-up window listing all expense items in the report will appear. Leave all the items which should have their export flag check marked and provide a note in the Memo field. Click OK.
This will reset the export status of any of the items that were check marked for that report. Nothing further is required in this case.

Resetting the Export Flags of Whole Expense Batches
Step 1: To reset whole expense batches, navigate to Integration>>Expense Reports >> select the applicable integration.

Step 2: Click Actions next to the export batch you wish to reverse. You can use the View option to see a list of all expense reports contained within that export batch.
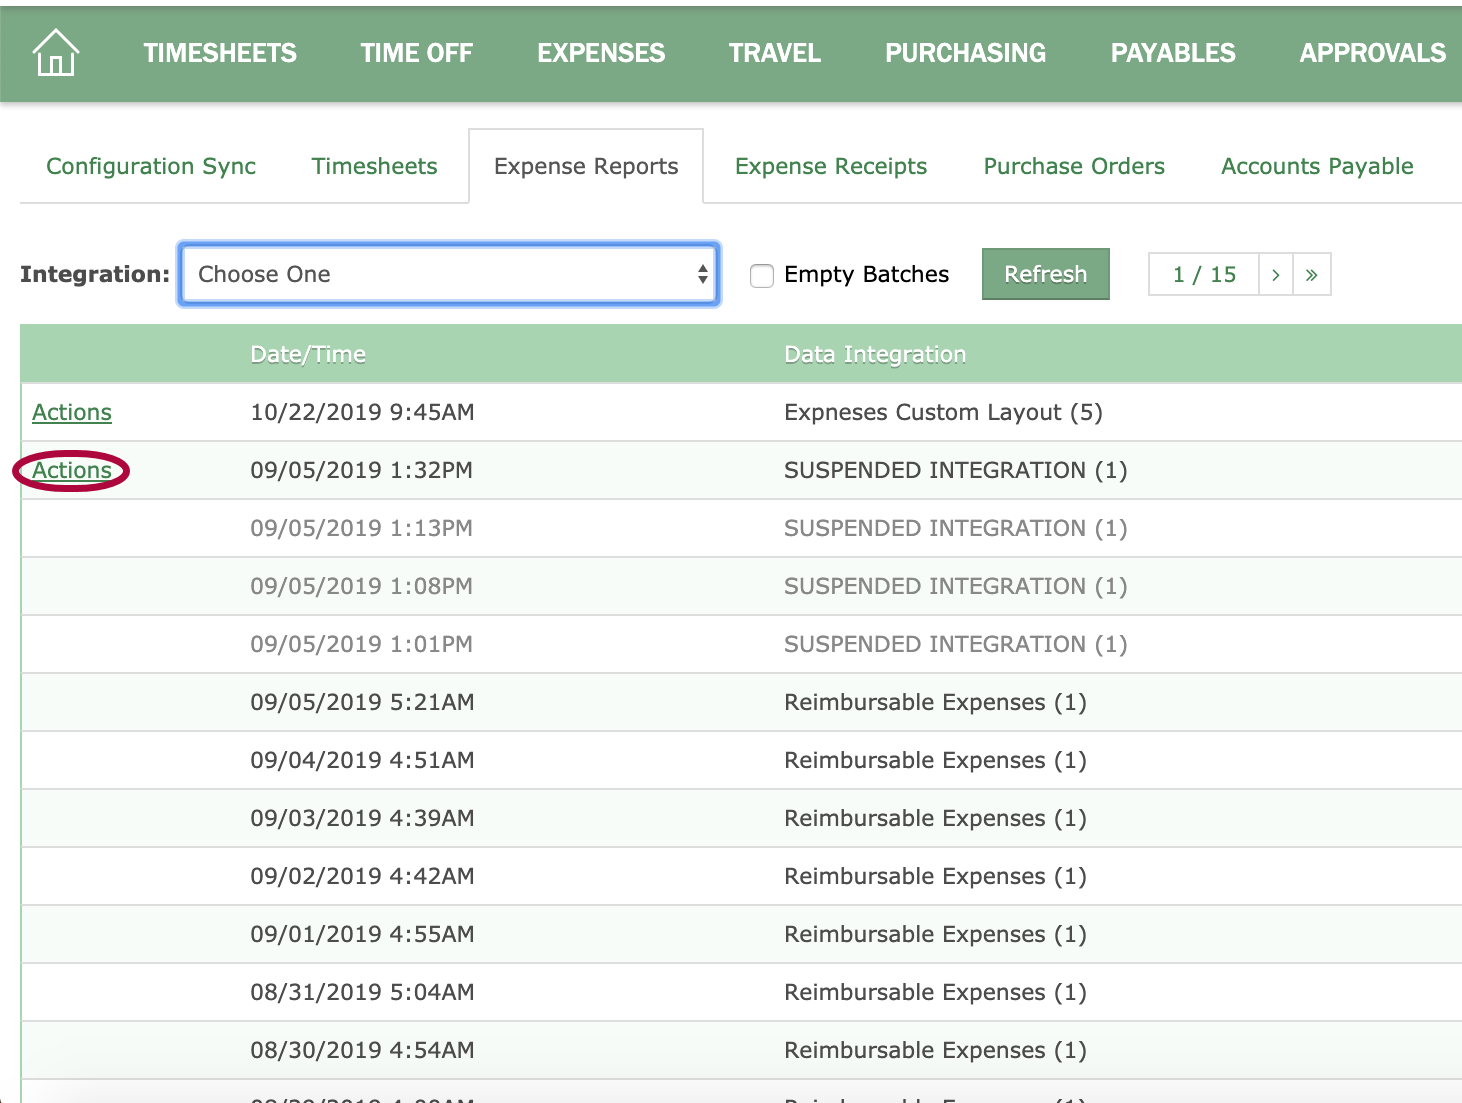
Step 3: The below message will generate. Click OK to reset the export status of the batch.
The exported flags of all the expenses contained in that batch have now been reset so that you can re-export all the reports contained in the batch again.

-
Filters in the Expenses module can be applied to determine which expense reports you want to display. This can be helpful if you have a long list of reports and only want to see specific ones.
This article will show you, a Nexonia Admin, how to filter your own expense reports or those of other users whose expenses you can see.
Step 1: On your Nexonia homepage, click the Expenses tab.
Step 2: Pick the applicable user in the drop-down menu.

Step 3: Click Filter by.

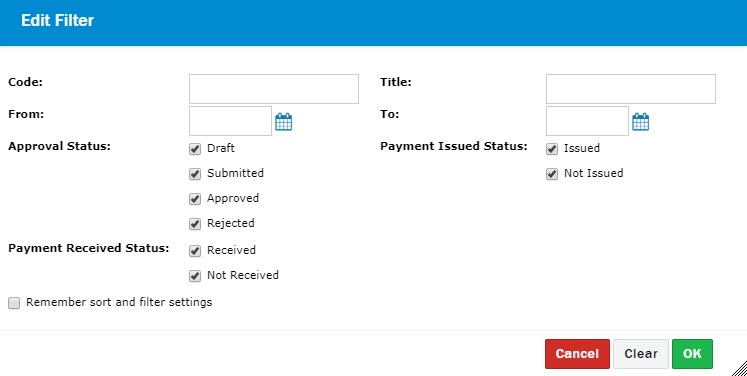
Step 4: A pop-up window will appear listing all your filtering options:
- Code: The number associated with the report.
- Title: The name of the report.
- From and To: Can be used to set a date range for the expenses. This will look at the item/transaction date, not the creation date.
- Approval Status: Pick any of the available options
- Payment Issued Status: Choose a status
- Payment Received Status: Choose a status
- Remember and sort filter settings: Check mark this option if you want the filter you defined to be saved any time you view your expenses.
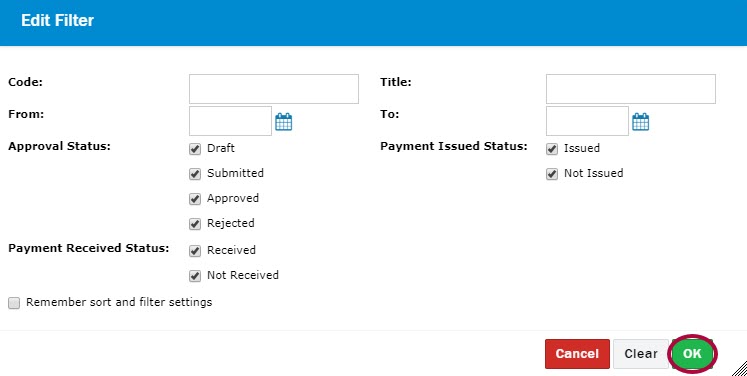
Step 5: Click OK to save.
-
Nexonia expense reports can be viewed in CSV format (spreadsheet). To download an expense report as a CSV file, log in to Nexonia on the web and navigate to Expenses.
Then click Actions > View CSV next to the selected report.

 The format of the downloaded CSV file cannot be modified. Rather, to create a customized CSV file, use the Reporting module in Nexonia. Click here to learn more about Nexonia's Reporting module.
 -
Nexonia allows an approver to assign a temporary approval proxy on your behalf, based on a specific date range. As proxy, you'll have permission to approve expenses on behalf of the original approver both on the web and on mobile.
Note: any items submitted will be available in the original approver’s queue.
Link: How to Set Up Your Temporary Approval Proxy
Acting as an Approval Proxy on the Web
When logged in to Nexonia, click on the Approvals tab. From the drop down list where your name is, if there are any items waiting approval for your colleague, their name will be listed. You will be able to select their name and be able to review and take action on these items. In the example below, we are Tom and have been granted temporary approval proxy access on behalf of Edward.
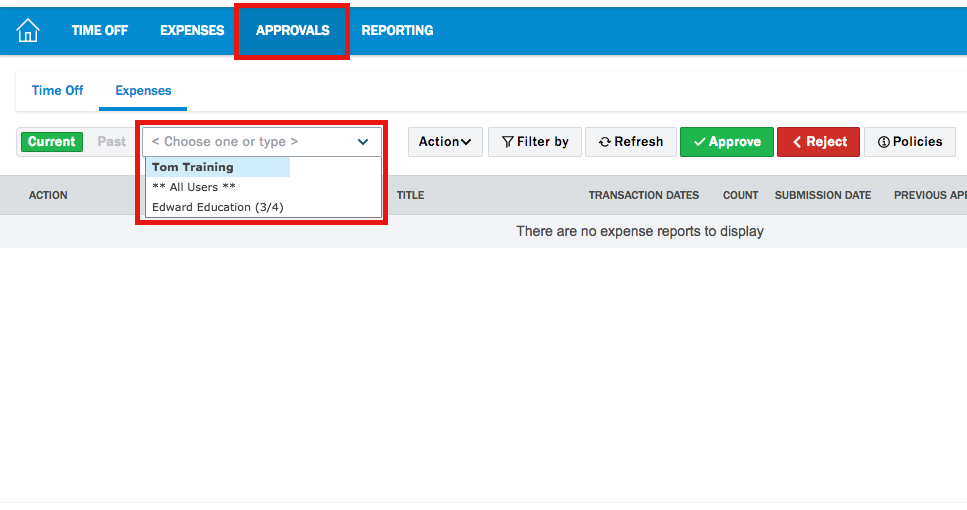
Once you have selected your colleague's name, you will see all submissions still awaiting their approval. You will have the same permissions to act upon the content as your colleague would.
See Article on: Expense Approvals on Nexonia's Web Application to learn more about how to approve expenses.
Acting as an Approval Proxy on the Mobile App
To gain access on behalf of your colleague on the mobile app, please refer to the instructions How to Proxy on the Mobile Application to get setup first. After you are setup, you'll be able to navigate from the homescreen on the mobile app, tap on your name to switch from your account to your colleague. This will sync first your data with Nexonia's servers and will then sync your colleague's account to your app.
Note: While you will see the standard set of icons (Reports, Add Report, Add Item), you will only be able to action within Approvals.
Tap on Approvals to review any submitted content. For more information on how to approve, see article on: Expense Approvals on Nexonia's Mobile Application
-
Users can move draft or rejected expense items with their linked receipts to other expense reports. This is a function supported only on Nexonia's web-based interface.
Notes:
- You can only move the expense item(s) to an existing expense report.
- If a receipt is linked to the item, it'll move the receipt to the other expense report as well.
- If your Nexonia environment is configured to close or lock expense reports after submitting expenses or based on other criteria, you'll only be able to move expense to open expense reports.
To Move a Single Expense Item to Another Expense Report:
Open the expense report, locate the expense item > click Action (on the expense item line) > Move to > select the expense report you want to move the item to > click Move To.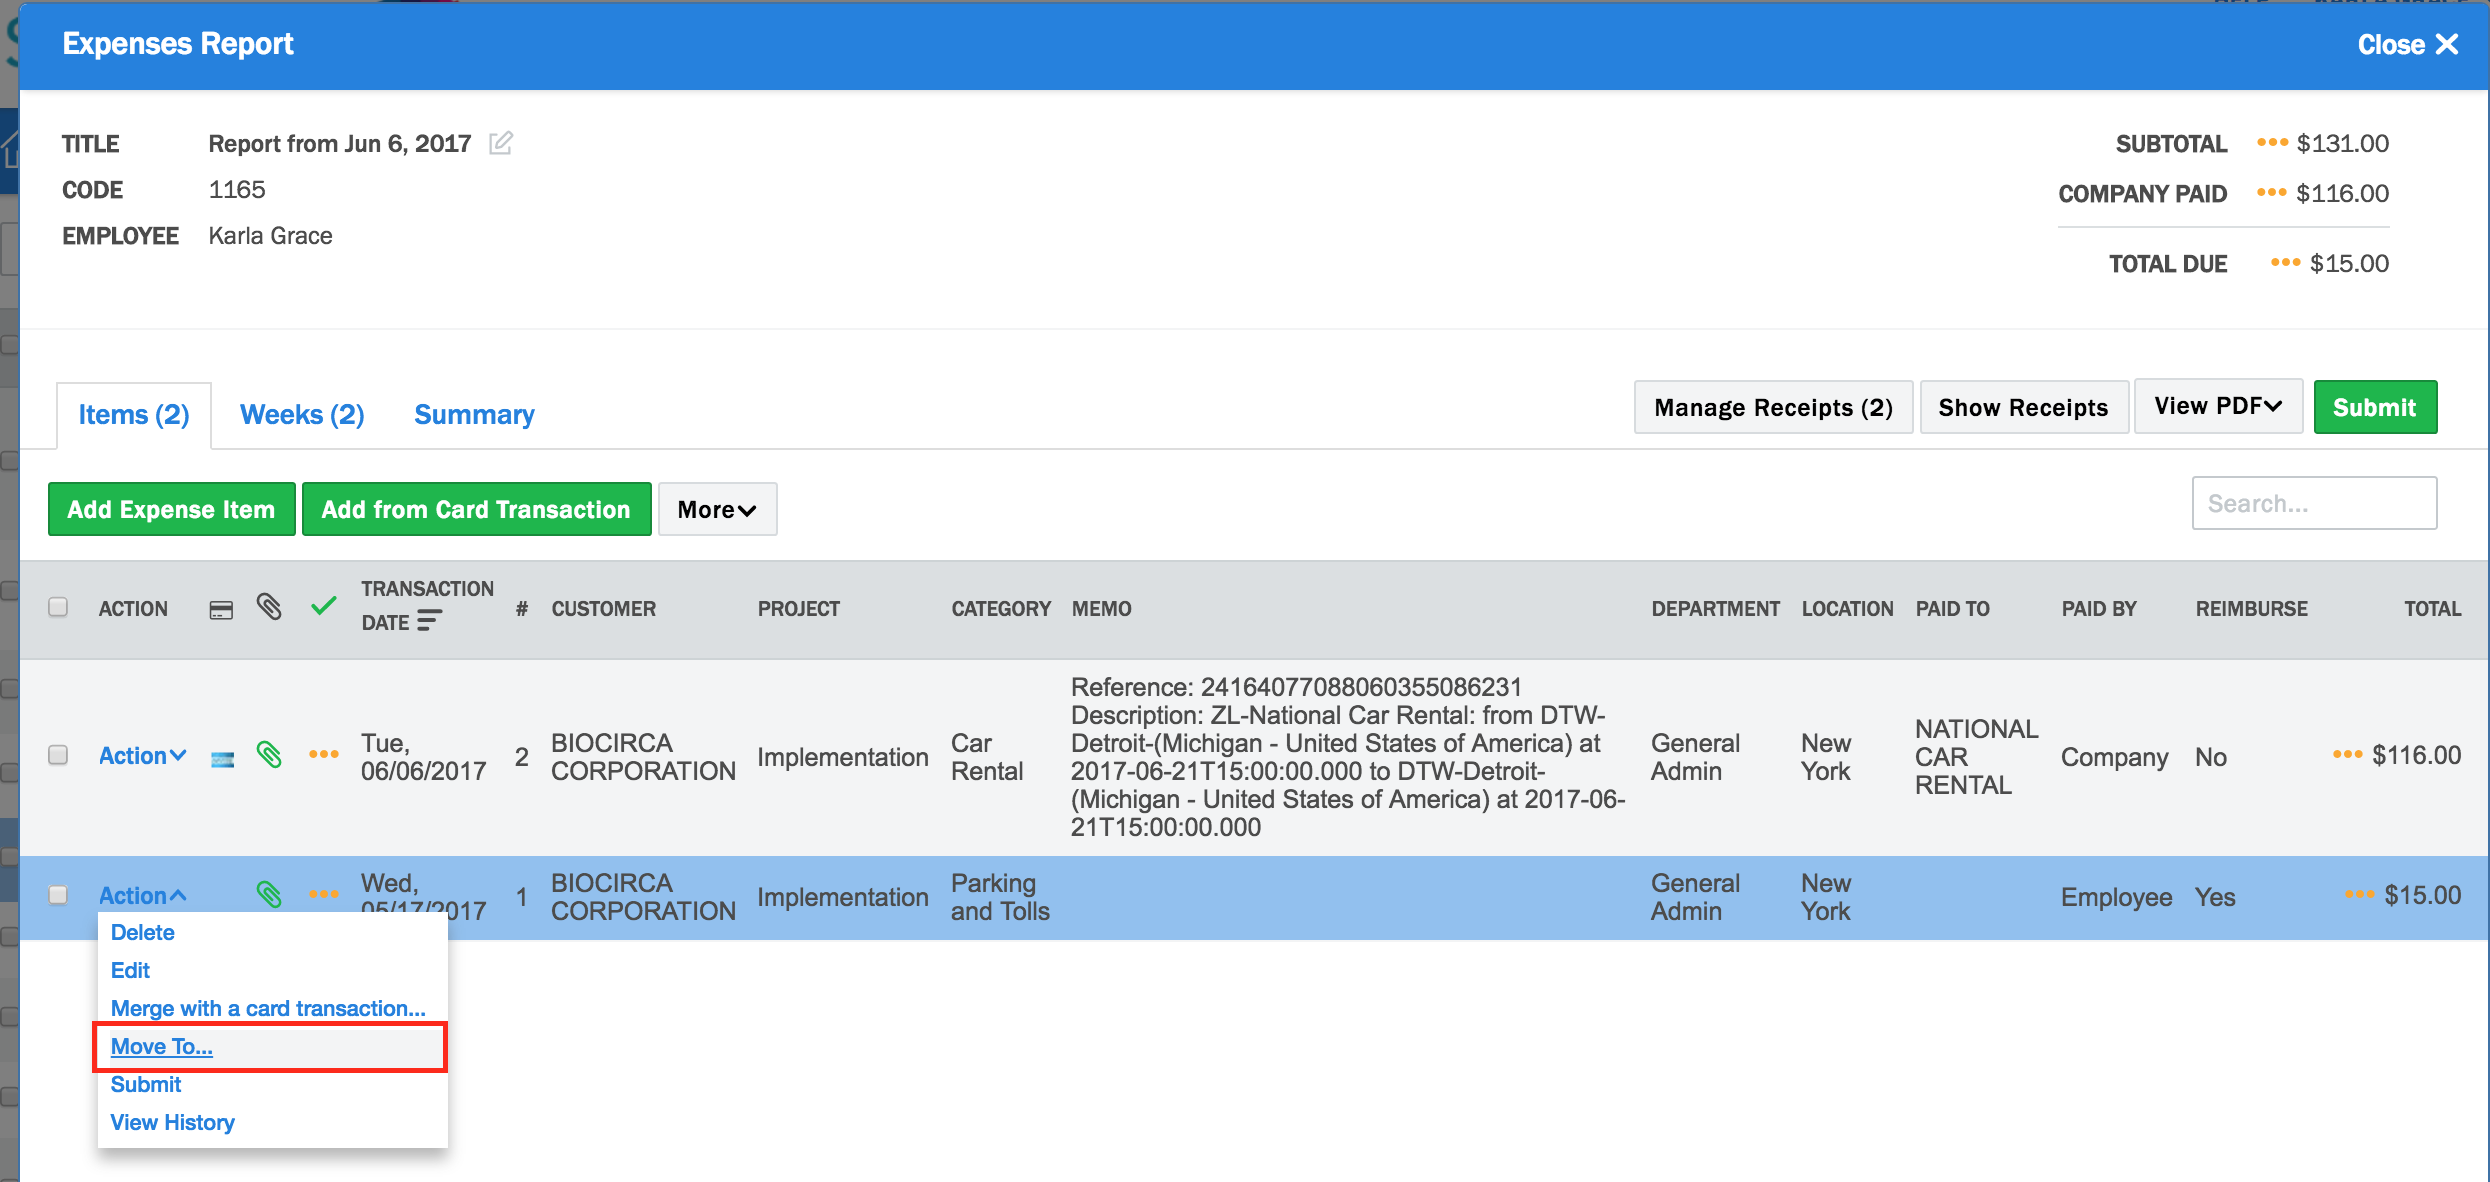
To Move Multiple Expense Items to Another Expense Report:
Open an expense report > use the checkboxes on the left to select multiple expense items > click More (button) > Move To > select the expense report you want to move the item to > click Move To.
-
If you are trying to submit your expense for approval and the following Policy Blocker pop-up window appears, here is what that means.

Within each expense item there is a Receipt field with Yes and No options available in a dropdown.
When Receipt = Yes and no receipt image is actually linked, this pop-up will appear when trying to submit or if you were to click on the policy blocker icon. The field itself acts as an acknowledgement that you have or do not have a receipt for your expense.
If you link a receipt to the expense or change it to Receipt = No, then the blocker will go away.
Click here to learn more about How to Add Receipts on the Web
Marking Expenses as Exported Recalling Submitted Expense Items Approving Expenses Reassigning Expense Approvals Rejecting Expenses
-
Administrators can find themselves with expense reports that no longer need to export to their ERP. To help with this process, you can use the Mark as Exported workflow.
This article shows you, a Nexonia Administrator, how to use the Marked As Exported workflow.
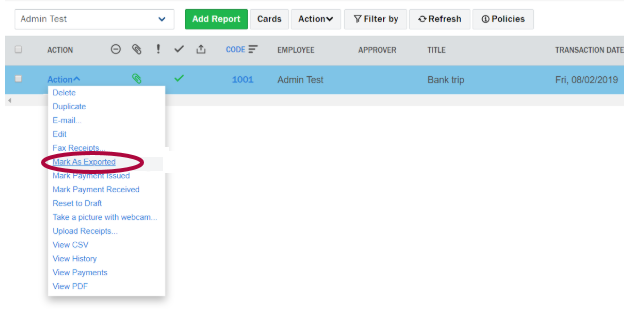
Step 1: If, as an Admin, you have a report that is fully approved but not yet exported, you will see an option for Mark As Exported when you click Actions next to an expense report. Click Mark As Exported to begin.
Step 2: After clicking Mark As Exported, you will be prompted to select the Integration (if you have more than one) and the expense item(s) you want marked as exported.
Please Note: The Memo field is required for all Marked As Exported actions.

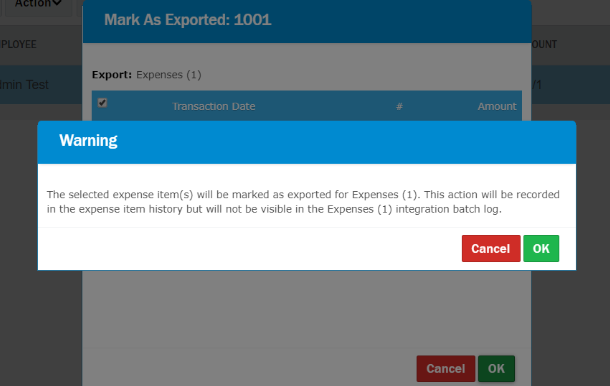
A warning will show that, while the action will be recorded in the item history, the expense item(s) that are being marked as exported will not show in your integration batch log.
Finally, you will be able to see the action recorded in the item history including time stamp, use who performed the action, and the required memo.
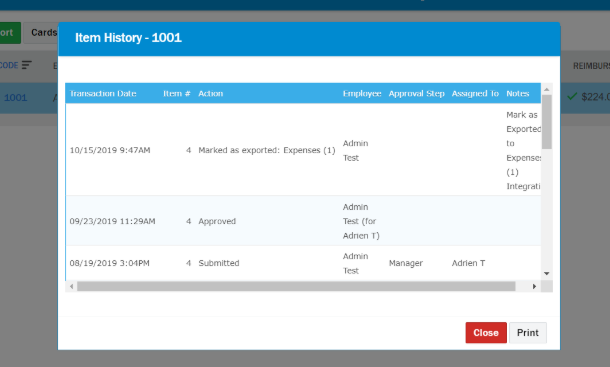
You can undo Mark as Exported by using the Reset Export workflow, also contained in the Action menu next to expense reports.
-
Occasionally, a user may need to make edits to an expense report after it has been submitted for approval. The Recall function allows non-Administrator users to change the state of their own expenses from "Submitted" back to "Draft". The Recall function is applied at the expense report level and will affect all Submitted expense items within the report.
If you are an Administrator, you can alternatively reset any user's expense item(s) to Draft, including fully-Approved expenses which have not been exported.
If you're not an Administrator, you can recall the submitted expense if:
- Recall is enabled in your company's Nexonia configuration. See the article "Allowing Users to Recall Submitted Expenses" for details.
- The expense item(s) were created by you, in your own user account, or by another user acting for you as a proxy.
- The expenses are currently in the "Submitted" state (blue arrow icon) and are not fully "Approved" (green check mark icon).
This article will show you how to recall submitted expense items.
Step 1: On your Nexonia homepage, click the Expenses tab.
Step 2: Find the expense report you'd like to recall and click Action. If you'd like to recall multiple expense reports at once, use the checkboxes to the left of the expense reports.

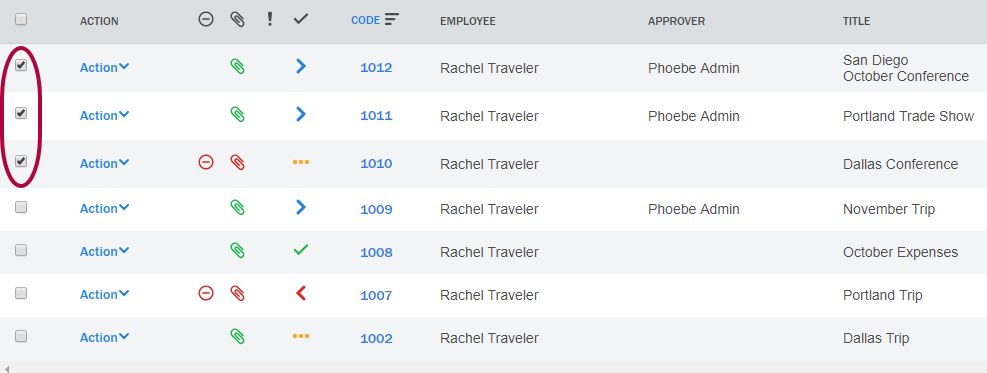
Step 3: Click Recall.

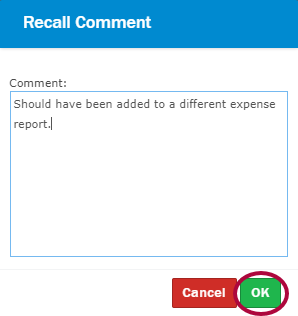
Step 4: Enter a reason for the recall, then click OK.
-
When an expense report is submitted for approval, the approver can advance it to the next step in the approval workflow. Once the status of the report is Approved, it is ready for export to your ERP (if applicable).
Non-Administrators in Nexonia can only approve submitted expenses that are assigned to them for approval, while users with Administrator access have the ability to approve submitted expenses assigned to any user.
This article will show you how to approve expenses.
Step 1: On your Nexonia homepage, select the Approvals tab.
Step 2: Find the expense report you'd like to approve and click the Action button. You can also approve multiple expense reports at once by using the checkboxes to the left of the expense reports.


Step 3: To approve all submitted items in the expense report, click Approve.

Step 4: Click OK to complete.

Step 5: You can also approve individual expense items within an expense report. First click the code number of the expense report you'd like to edit.

Step 6: Find the item you'd like to approve and click Action. You can also approve multiple expense items at once by using the checkboxes to the left of the expenses.

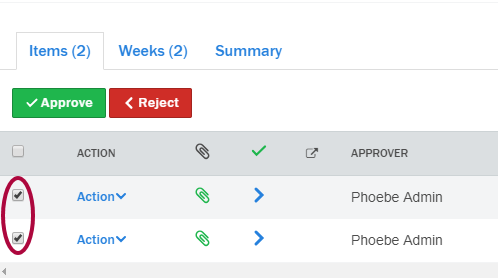
Step 7: Click Approve followed by OK to complete.
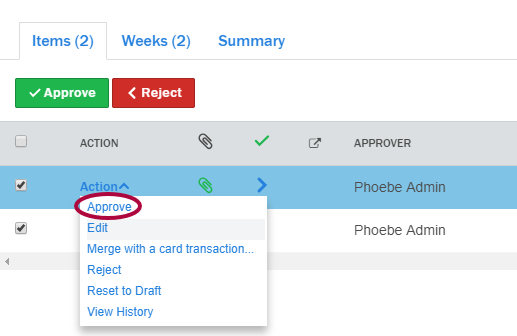

-
When an expense item has been submitted, it is pending approval from a specific user (the "assignee"), as determined by the logic implemented in your Nexonia configuration.
If you are an Administrator, you always have the ability to reassign submitted expenses away from any current assignee to any other user.
If you are not an Administrator, you can reassign submitted expenses if:
- approval reassignment for your user role and approval step is enabled in your configuration
- and the current assignee is you or another user that your role access levels or proxying configuration gives you access to perform approvals on behalf of
Non-administrators can reassign submitted expenses to other users provided that their role access levels gives them at least "read" access to the approvals module.
Note: Expenses can only be reassigned from the Approvals module.- To reassign all submitted items in an expense report that are available for reassignment:
Locate the expense report > click Action (on the expense report line) > Reassign > choose the new assignee > OK.
- To reassign all submitted items that are available for reassignment from multiple expense reports:
Use the checkboxes on the left to select multiple expense reports > click Action (button along the top of the page) > Reassign > choose the new assignee > OK.
- To reassign an individual expense item that is available for reassignment:
Locate the expense report > click Action (on the expense report line) > Reassign > use the checkboxes on the left to check off the item you wish to reassign > choose the new assignee > OK.
- To reassign multiple expense items that are available for reassignment within a single expense report:
Note that expenses that are reassigned remain at the same step in the approval workflow and will continue to advance through the workflow following approval by the new assignee. To return expenses to the submitting user, Reject them instead. To advance expenses to the next approver, Approve them instead. -
Rejecting an expense item changes the status from Submitted to Rejected. A rejected expense item is functionally the same as a Draft item and can be edited, re-submitted or deleted by the user that created it.
Non-Administrator users in Nexonia can only reject expense items that are currently in the Submitted status and assigned to them for approval, or assigned to a user for whom they have proxy access to perform approvals.Users with Administrator role access have the ability to reject Submitted expenses that are assigned to any user.Expenses can only be rejected from the Approvals page.- To reject all submitted items in an expense report:
Locate the expense report > click Action (on the expense report line) > Reject > OK.- To reject all submitted items in multiple expense reports:
Use the checkboxes on the left to select multiple expense reports > click Action (button along the top of the page) > Reject > OK.- To reject an individual expense item:
Open an expense report > locate the item you wish to reject > click Action (on the expense item line) > Reject > OK.- To reject multiple expense items within an expense report:
Open an expense report > use the checkboxes on the left to select multiple expense items > click More (button) > Reject > OK.
Managing Expense Policy Rules How to Enable Email Notifications for Expense Approval Opting Out of Emails Allowing Project Managers to View User Data Related to their Projects Creating Structured Multi-Tiered Categories Enabling Duplicate Detection for Credit Cards
-
Expense Policy rules can be set within each expense category. Nexonia supports setting a policy warning (Policy Warning) or a submit blocker (Prevent Submit). An item that triggers a policy warning can still be submitted to the approver, but will flag it to the submitter and the approver. An item that triggers a submit blocker will not be permitted to be submitted until it complies with the policy rule. Only administrators are permitted to submit items with a submit blocker.
If submitters trigger a policy warning or submit blocker, they'll be able to click on the warning on the web to see why their expenses has been flagged so they can resolve it.
 The Policy Warning flag can be tracked and included in Nexonia reporting, so you can run reports to audit expenses and report on which items were flagged.
Best Practice for Using Expense Policy Rules for the First Time
If you’re not already doing so, you’ll want to set some policy rules around expenses. Setting up at least loose rules with policy warning flags will allow you to use reporting to identify policy changes needed after a few months. Policy warning flags can be tracked and included in Nexonia reporting. Reporting can also Manahelp you identify average spend by category and frequency of violations, giving you data to help further refine your expense policy rules.
Configuring an Expense Policy Rule
The expense policy rules are at the bottom of each expense category's settings.
To edit an expense category, navigate to: Settings > Company > Expenses > Categories.

Click the
 next to an expense category to configure an existing category.
Scroll to the bottom of the expense category's settings, and you'll find the expense policy rules.
Based on your specific expense policy requirements, you can configure based on some common criteria:
- If value above...: Specify the maximum amount allowed per expense item.
- Tip Above (%): Specify the maximum percentage allowed for tip (requires Tip field to be set to Yes)
- If no receipt and value above...: Specify the maximum amount allowed per expense item when missing a receipt.
 Note: The Receipt field on an expense needs to be set to No for this policy to take effect.
- Policy Text: Enter any guidelines you'd like the users to to see when they use this category.
Once you'd applied your rules, click the "Apply" button to save the configuration.
Sample Policy
In the example below for "Parking", we've included the following policy rules:
- Guidelines in the Policy Text on what we expect in the memo field.
- Any expenses over $50.00 will be blocked from submission.
- Any expenses missing a receipt and having a value of $0.00 - $19.99 will be allowed to be submitted but flagged to the approver.
- Any expenses missing a receipt and having a value above $20.00 will be blocked from submission.
- Any expenses submitted over 30 days old will be flagged to the approver.
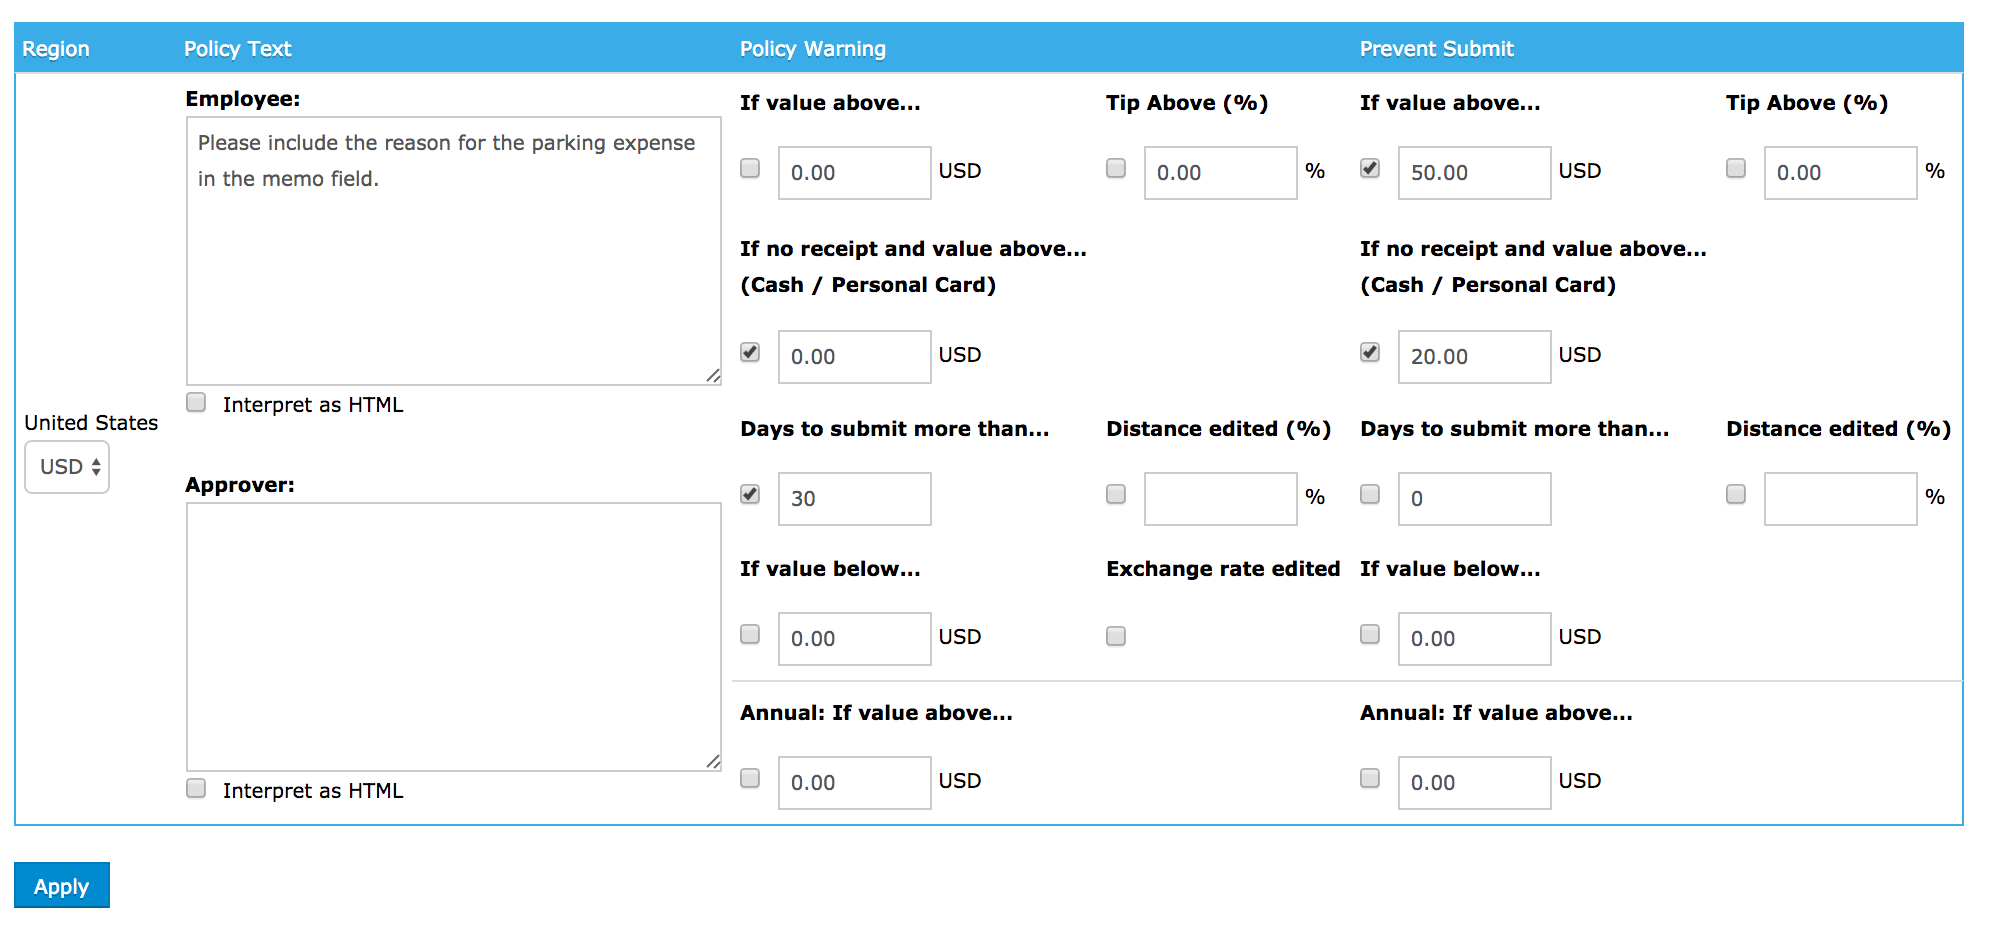
-
Nexonia can send email notifications to your users. Notifications are typically sent to alert approvers when expenses are submitted to them, and notifying submitters when expenses are approved or rejected.

You can enable notifications in Nexonia by navigating to Setup > Company > Notifications > Edit.
Scroll to the row Expense Approval Workflow. These are the settings to send reminders and notifications related to the submission and approval of expense reports.
Check the Active box to enable this notification workflow.
Below would be a standard notification configuration. Check off the appropriate boxes, scroll to the bottom and click the Apply button to save your settings. This will now enable the email notifications.

Common Notifications
Assignee, Unapproved = reminder emails if an approver hasn’t review the submitted report after a day. Frequency can be adjusted here.
Author, Rejected = notifies the submitter if an expense was rejected. You can choose to copy any Prior Approvers as well.
Assignee, Recalled = notifies the approver if a pending report was recalled back by a submitter.
Assignee, Assigned = notifies approver when a report is submitted to them.
Author, Approved = notifies submitter when expenses are approved.
Additional Notifications
Other, Approved = used to email a copy of the notification of approval to another email address.
Un-submitted Expenses Reminder: informs submitters that charges needed to be submitted or rejected charges must be fixed.
Notification Terms and Values
- Recipients
- Author/User: user who submitted expenses for approval
- Assignee/Manager: supervisor responsible for approving expenses
- Manager’s Manager
- Cc Prior Approver: the approver(s) before the current approver
- Regional Administrator: administrator set in the system for submitters region
- Other: email can be specified to include others in distribution list
- When
- Unapproved: reports have not been approved
- Rejected: a line charge/time has been rejected and needs their attention
- Recalled: submitter has recalled a specific expense report
- Approved: a line items/report has been approved
- Assigned: submitted to approver for approval
- On Load: transactions are loaded into system
- End of Period: period of entry has ended
- Frequency
- Specified number of days
- Immediate/Once
- Recipients
-
Users and Admins can opt out of emails with general announcements in Nexonia. To do so, click your name in the top right corner of your Nexonia account and click Account Settings.

In the User Settings tab, you will see two settings called Receive general announcements for users/Receive general announcements for administrators.
If you are non-administrator user, set Receive general announcements for users to No. If you are an administrator set Receive general announcements for administrators to No.

Click Apply to save the changes.
-
If your company is utilizing the Project Manager function where users are assigned as managers to different projects, you can grant the managers permission to view the expenses/timesheets/bills of users submitting towards the managers' projects. To grant this access, the relevant permissions need to be enabled on the Role level.
This article will show you how to allow project managers to view the user data related to their projects.
Step 1: On your Nexonia homepage, click the Gear icon to access your Company Settings.

Step 2: Navigate to Users>>Roles>> Choose the role you'd like to edit by clicking the pencil icon.

Step 3: Click the Access Levels tab.
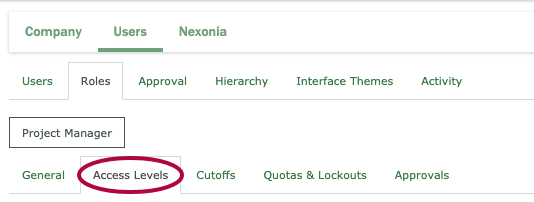
Step 4: Click Edit.

Step 5: Apply Read or Edit permissions in the Project Team column for any applicable modules (Expenses/Timesheets/Purchasing/Payables). If you want to create a new role for this purpose, follow the steps in this article and apply the Project Team settings in the above paragraph.
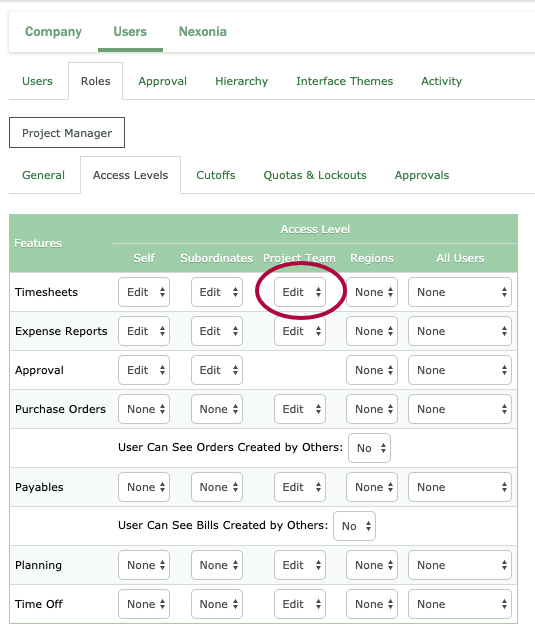
Step 6: After creating the role, you can assign the new role to any applicable users. Start in the Users tab by clicking Users.
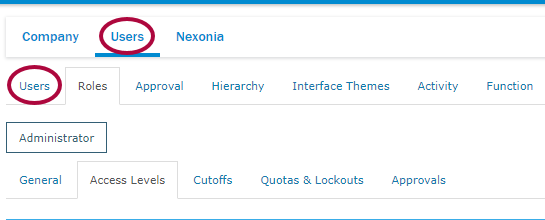
Step 7: Click the pencil icon next to the user you'd like to edit.
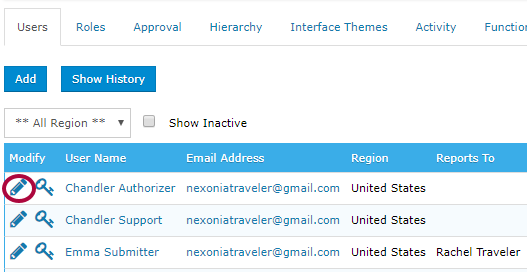
Step 8: Scroll down to Role and choose the new role you just created.
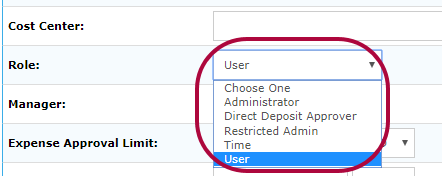
Step 9: Click Apply to save your changes.
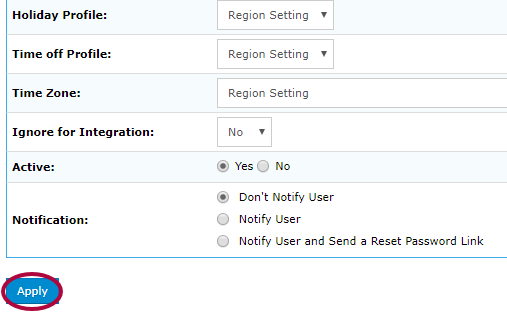
Please Note: This only affects users who are assigned as a Project Manager, for the projects they manage. Users who have this role but are not assigned as a Project Manager will see no change.
Step 10: There are two additional settings that control the scope of data that can be viewed by the Project Manager. Start by clicking the Company tab while in Settings.

Step 11: Click Features.
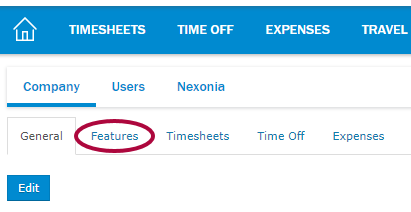
Step 12: Click Edit.

Step 13: Scroll down to Project Manager Visibility. There are two options:
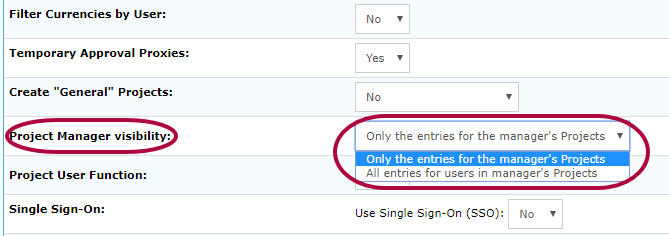
- All entries for users in manager's projects: If a user is an Internal Contact (Resource) on a project, the Project Manager can see all of that user's expenses/timesheets/bills, including those which are for different projects.
- Only the entries for the manager's projects: The Project Manager can only see a user's expenses/timesheets/bills related to the Project Manager's projects, unless visibility is also granted some other way (ie. the user is also a subordinate of the Project Manager).
-
In Nexonia, you have the ability to create multi-tiered categories. This creates multiple category drop-down for any applicable categories. This could be useful when you want to achieve a greater level of detail in how expenses are entered.
For example, if you want to label certain expenses by specific departments (such as Marketing or Sales) and then have different types of expenses available for coding. You could use this feature to create one category tier named Marketing and a second tier named after the type of expense that's being submitted (Supplies, Advertising, etc.).
This article will show you how to create multi-tiered categories.
Step 1: From your Nexonia homepage, navigate to Settings>>Company>>Features>> then click Edit.

Step 2: In the Expense Categories box, set the Structured Expense Categories drop-down to:
- 2 levels: Allows two levels of categories
- N levels: Allows you to pick more than two levels of categories
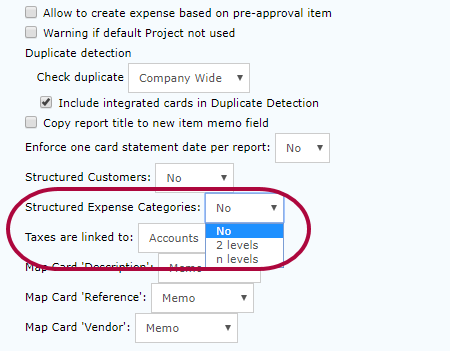
Step 3: Click Apply to save.
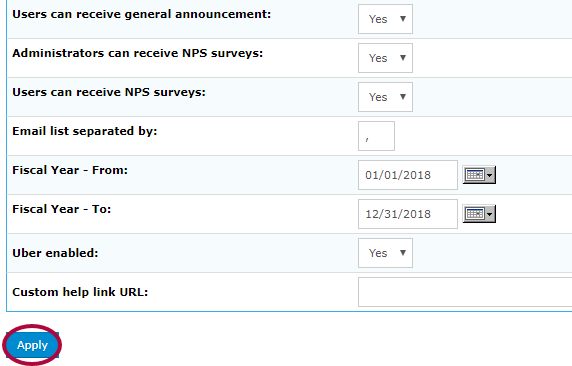
Step 4: In Company Settings, navigate to Expenses>>Categories>> and click the pencil icon next to a category you'd like to make multi-tiered.

Step 5: Create multiple tiers by putting a colon (:) between the name of each tier in the Name field. For example, if you want to have three tiers named Marketing, Inventory, and Toronto Office, you would enter: Marketing:Inventory:Toronto Office (no need to use spaces).
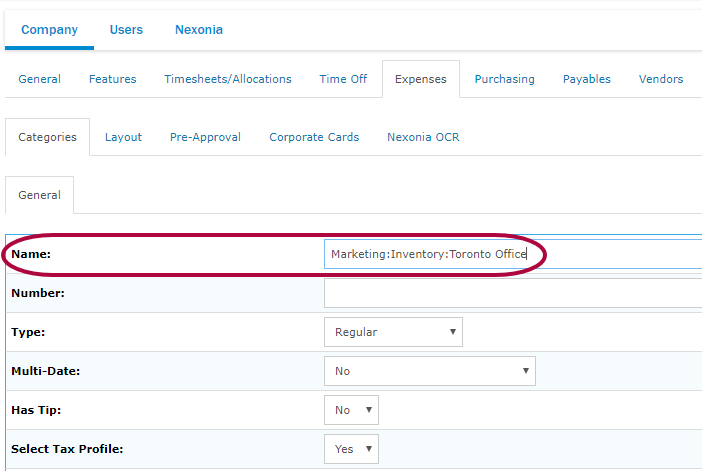
Step 6: Click Apply to save your changes.
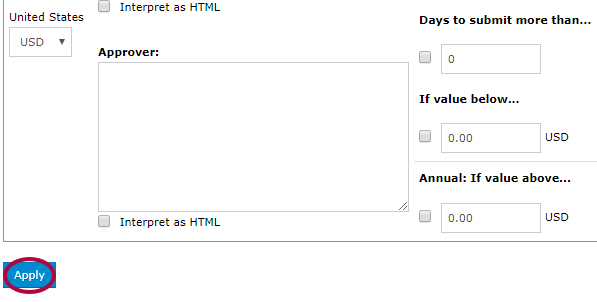
Your account will now have multi-tiered categories.
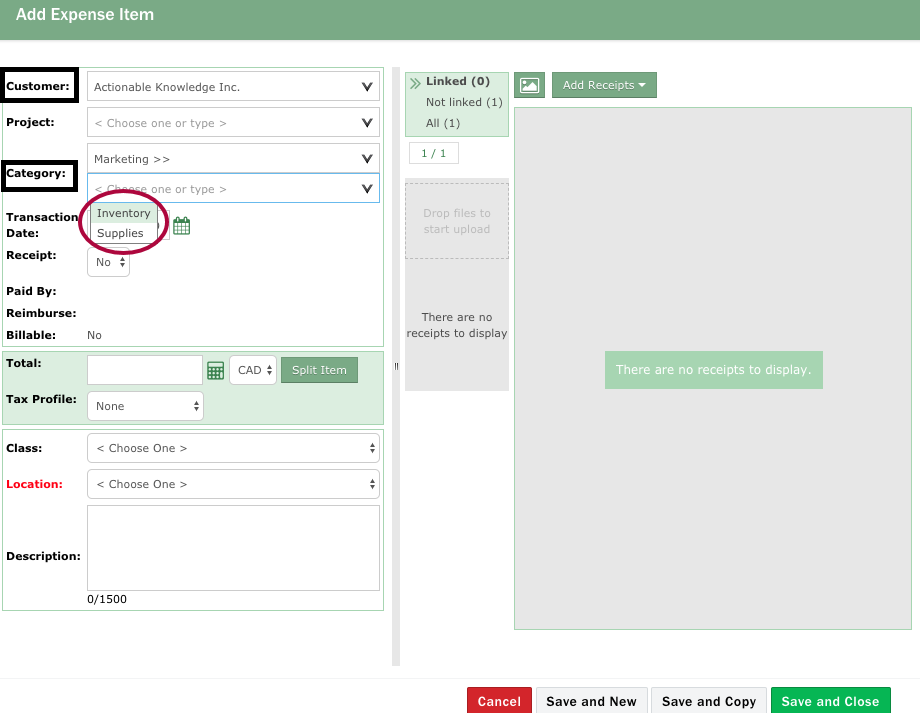
If you want to create new categories that will be multi-tiered and you are integrated with Intacct or NetSuite, see the following articles for instructions on how to import the categories first, then perform the steps above.
Intacct:
- Common Intacct Setup Items: Create Expense Types
- Synchronize Expense Categories from Intacct Expense Types
NetSuite:
- How to Create NetSuite Expense Categories
- Synchronizing Expense Categories from NetSuite Expense Categories
If you're integrated with QuickBooks or Bill.com, see the following articles for instructions on how to create the categories manually and map for integration, then perform the steps above.
QuickBooks:
- How to Create Expense Categories in Nexonia (QuickBooks Desktop)
- How to Create Expense Categories in Nexonia (QuickBooks Online)
Bill.com:
If you do not integrate with any of the above ERPs, you can refer to this article for expense category creation, then perform the steps above.
-
As an Administrator, you have the ability to enable automatic detection of duplicate transactions on your company paid credit card feeds.
This article will show you how to enable duplicate detection.
Step 1: On your Nexonia homepage, click the Integration tab.
Step 2: Click the Integration Setup tab.

Step 3: In the Corporate Cards box, click Edit next to any applicable credit card feeds.

Step 4: Click the Source Type Configuration tab.
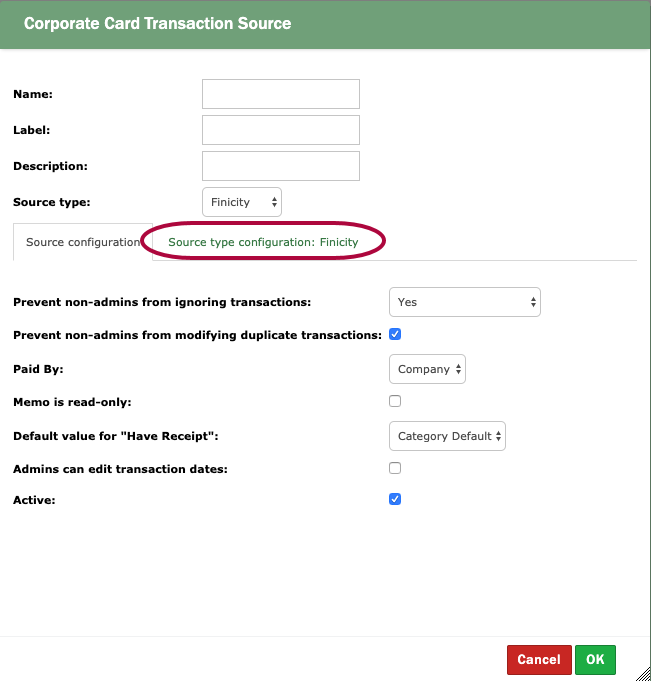
Step 5: Check mark Marked as duplicate transactions (amount and date). This option will ensure that any transactions that share the same amount and date are marked as duplicates.
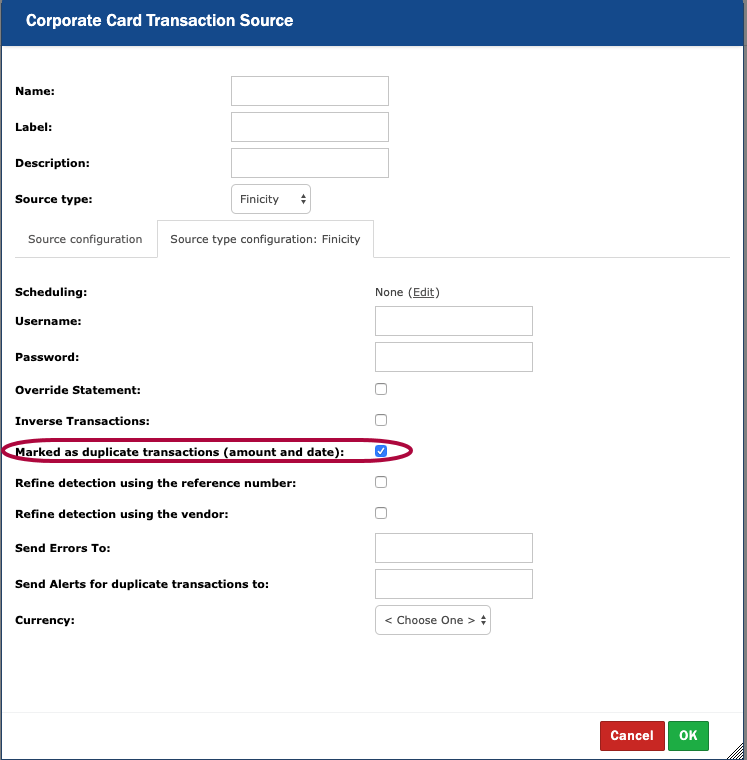
Step 6: By enabling the above option, you'll see two more options populate: Refine detection using that reference number and Refine detection using the vendor. Check marking these means that the system will look for dates, amounts, reference numbers, and vendors that match.
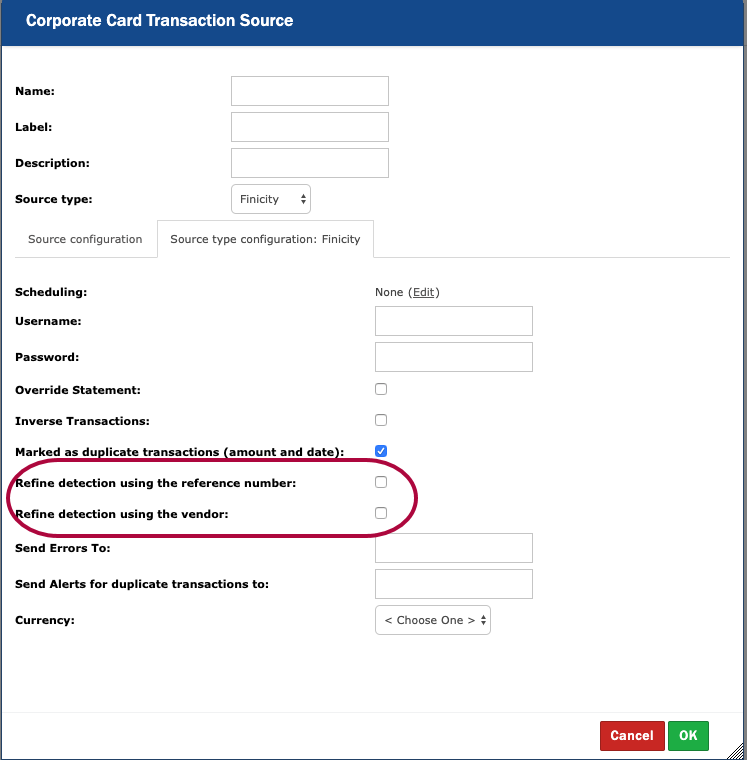
Please Note: Your credit cards might not be bringing in reference numbers and/or vendors. You can also enter a user's email into the Send Alerts for duplicate transactions to field if you want to send alerts for duplicates to one of the users.
Step 7: Click OK to save these settings.
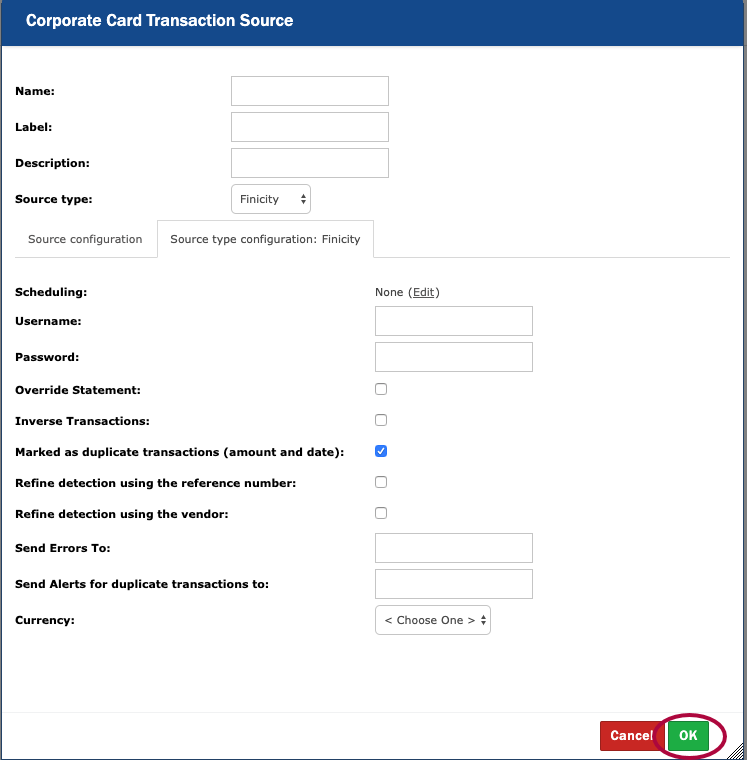
In case you want to un-mark any of the transactions that were labeled as duplicates, you can follow the steps in this article for instructions.
Nexonia Weekly Update Notification Marking Time Data as Exported to Prevent from Exporting to ERP Testing Your Export: Creating and Exporting an Expense Report
-
This notification is designed to provide an end of week update on any pending expense reports that generated errors throughout the week. It is sent to any email addresses that are added in the "Send Errors To" field of a data integration.
Scheduled to send Friday mornings to each “Send Errors To” contact, recipients will receive a reminder email with the subject line “Nexonia weekly update” and a count of any items pending review to close the week.You can view these items by clicking "Review Failures" on the data integration that is specified in the email. For more information, review the "Viewing Export Errors" article.A banner will also appear in Nexonia throughout the week if you have items that need to be reviewed.Please note that this notification is currently only available for Expense data integrations.
-
If you have an active integration with your ERP in Nexonia and are exporting Timesheet data, you may at times want to prevent certain data from exporting to your ERP.
You can mark that data as exported to prevent it from exporting to your ERP by setting up an integration that keeps the data strictly within Nexonia.
This article will show you, a Nexonia admin, how to set up an integration to prevent exporting time data to your ERP. Note that we have a separate feature to mark expenses as exported that doesn't require creating a separate integration.
Step 1: Open the Integration tab, then click Integration Setup.

Step 2: Click Add Data Integration.
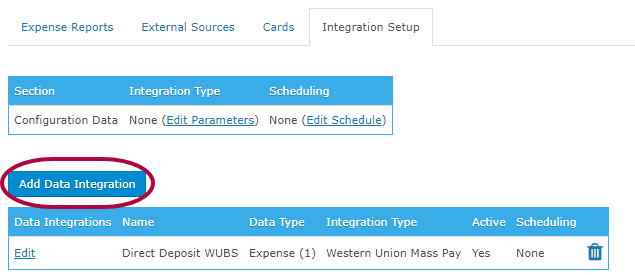
Step 3: Choose Time for the Data Type.
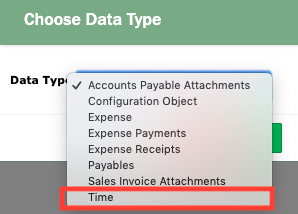
Step 4: Click OK.
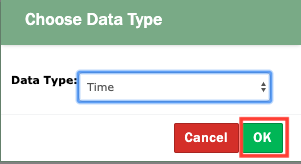
Step 5: Enter the information for the integration. Make sure you enter the following:
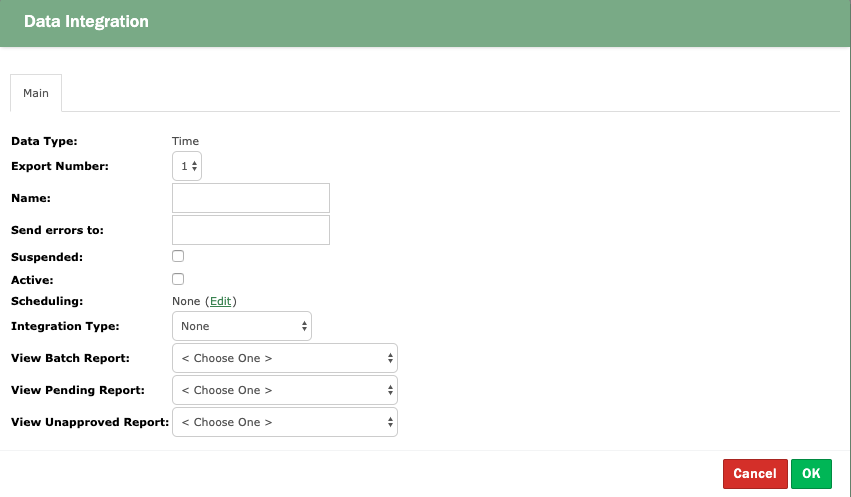
- Export Number: Set this to correspond with the export number of the integration from which you want to mark items as exported.
- Name: This is typically named something along the lines of "Mark as Exported". The main thing you'll want to indicate here is what the integration is used for.
- Active: Check this box to ensure this integration is active
- Integration Type: Choose Report
Please Note: If your ERP time integration has Number 1, and you want to prevent items from exporting in that integration, set Export Number to 1 for the "Marked as Export" integration.
Step 6: After choosing the Integration Type, a Filtering tab will appear. The selections within this tab let you enable filters to narrow down which data you're marking as exported in the integration. Commonly used options are From Date, To Date, and Users. These three options let you choose the date range and users for which you wish to mark data as exported.
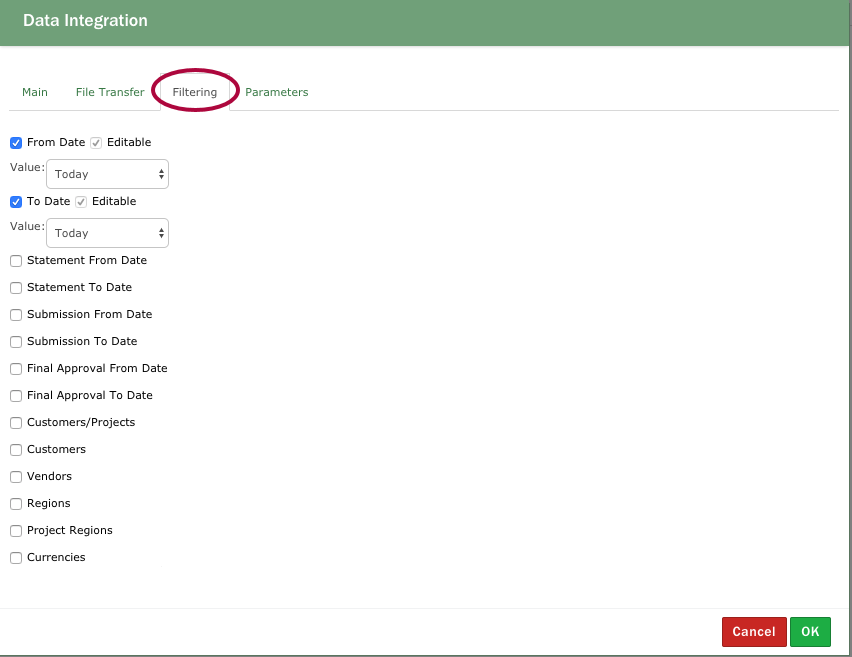
Step 7: Click OK to save your selections.

Step 8: Now that you've created the data integration, you can export the applicable time entries by clicking the Integration tab.

Step 9: Click Expense Reports.

Step 10: Click Transfer Now and apply the filters that you enabled in the integration if using any.
-
As a best practice during your implementation or as part of making configuration changes, you should create an expense report with a couple of expense items, submit and approve it, and then export it to ensure everything is working as expected.
As an administrator, you’ll be able to do this test, act on behalf of any Nexonia users as a proxy, and can choose to delete the test items from Nexonia afterwards.
Note: we recommend reviewing your notification settings so you can suppress or enabled the emails during the test as needed.
Creating The Test Expense Report
We’re going to move to the Expenses Module and create a quick expense report. On the web, navigate to the Expenses Module by clicking Expenses in the top menu bar.
If your user profile has a corresponding vendor or employee value in your accounting platform, you can create the Expense Report for yourself.
If not, you need to choose a supported user from the dropdown menu (1) on the left.

Click Add Report (2) and name your report (i.e. “Export Test”).
Click the Save button. A new pop-up window will appear and you now inside of the new expense report.
Click the Add Expense Item button to create an expense item.
Enter the details for your test expense. Anything above the total is required, anything below the total is optional unless the field is labelled in red. You can choose to add a receipt image for testing purposes or not.

Click Save and New and create a second item with some different values.
Once you’ve created your last item, click [Save and Close].
Submitting the Test Expense Report
Here we have our expense report with our test items:

Under the checkmark to the left of each expense line item, we see the status of the expense item.
These items are currently in Draft ••• status. To export, they must be submitted and fully approved.

Click the Submit (1) button in the top right corner of the expense report.
You’ll see the status change to Submitted > and the name of the approver. If there is no supervisor for this user, the item status would be Approved since there is no approver for this user.
Click [Close] to leave this screen and return to the Expenses homepage.
Approving The Test Expense Report
Click on the Approvals tab on the menu bar. You’ll see anything available for approval under this tab. As an administrator, you’ll be able to act on behalf of any users. If you don’t see any expenses for approvals, click on the dropdown menu to the left and choose “All Users”.

As this is just a test report, we can do a quick approval on it.
To the left of Action, click on the check box to select the expense report.

Once selected, click the [Approve] button. The report should disappear as it is now fully approved and no longer in the approval queue. You can see it if you move to the Expenses module. This report is fully approved and available for export.
Exporting The Test Expense Report
See Exporting Expense Reports to test your new test report.
Additional articles of interest:
Configuring a .CSV Formatted Export File How To Create Reports Reporting Column Definitions - Expenses SOC/SOX Report Reporting Types Reporting Template: Mileage Report
-
Nexonia can generate a comma-separated value (.csv) formatted export file. This allows an administrator to export approved expenses for upload into your accounting software. In order to configure this type of export, the administrator will need to:
- Create a Nexonia reporting export template that matches the import template from your accounting system; and
- Configure the Nexonia data integration to run using that reporting export template.
This will allow you to run exports from the Integration module. Exported items will be logged and appended with an Export status, thereby preventing items from being exported twice in and creating duplicates. You can set up multiple filtered exports if needed, if you had one export for employee expenses and one for credit card expenses.
Creating Your Reporting Template (.CSV)
Here, we’ll walk through building the export template.
- Go to the Nexonia Reporting module.
- Click the Create Report
- As you click Apply in each tab, it’ll save changes you made as you go.

You’ll see the basic General information for this report:
Name: name for the report – best practice is to make it clear what it is, i.e. “Accounting Export Template”.
Description: description of the report, you can copy the name here if you want.
Type = Expense
Summary = No
Language = English

Click the Add button.
This will start the report creation process, and now you’ll see the expanded configuration options.
You’ll now use the 5 tabs to configure this export report:- General
- Selection Criteria: defaults for the report
- Columns: this is where you’ll define the columns of data for this report
- Categories: used to create groupings of results, not typically relevant to export reports
- Order: order of the results, not typically relevant to export reports
Reporting: General Tab
You’ll see an expanded general tab. The only setting to know here is Shared, which can allow you to share this template with all users with access to reporting, or shared with specific roles.
Reporting: Selection Criteria
In normal reporting, this would be used to set filters and defaults for the information being pulled when you run the report as a regular “on demand” report. For our purposes, we don’t need to do anything here – any filtering of values will be done later in the Data Integration configuration for the export.
Reporting: Columns
This is the main tab you’ll need to work on, where you need to indicate which columns of data should be included and in what order to match the import template.
To add a column, click the “Add” (1) link.
Column Type: to add a column of data from Nexonia, leave as Simple Column. You’ll then use the Column (2) dropdown to select which Nexonia reporting value to use in the report:
Simple Column = (most common) allows you to insert a column from a Nexonia value.
Text = allows you to insert a column of pre-defined information into the report, such as a set A/R code. Enter the Text you need on each line item, and the Label for that column.
Label (3): can be used to label the column header with specific text you enter here. By default, it will populate the Nexonia name for the value, but you can modify that.
Click the Add (4): button to add the column to the report. You can also Modify or Delete a column.
Once you add a column, you’ll see it here in the template.
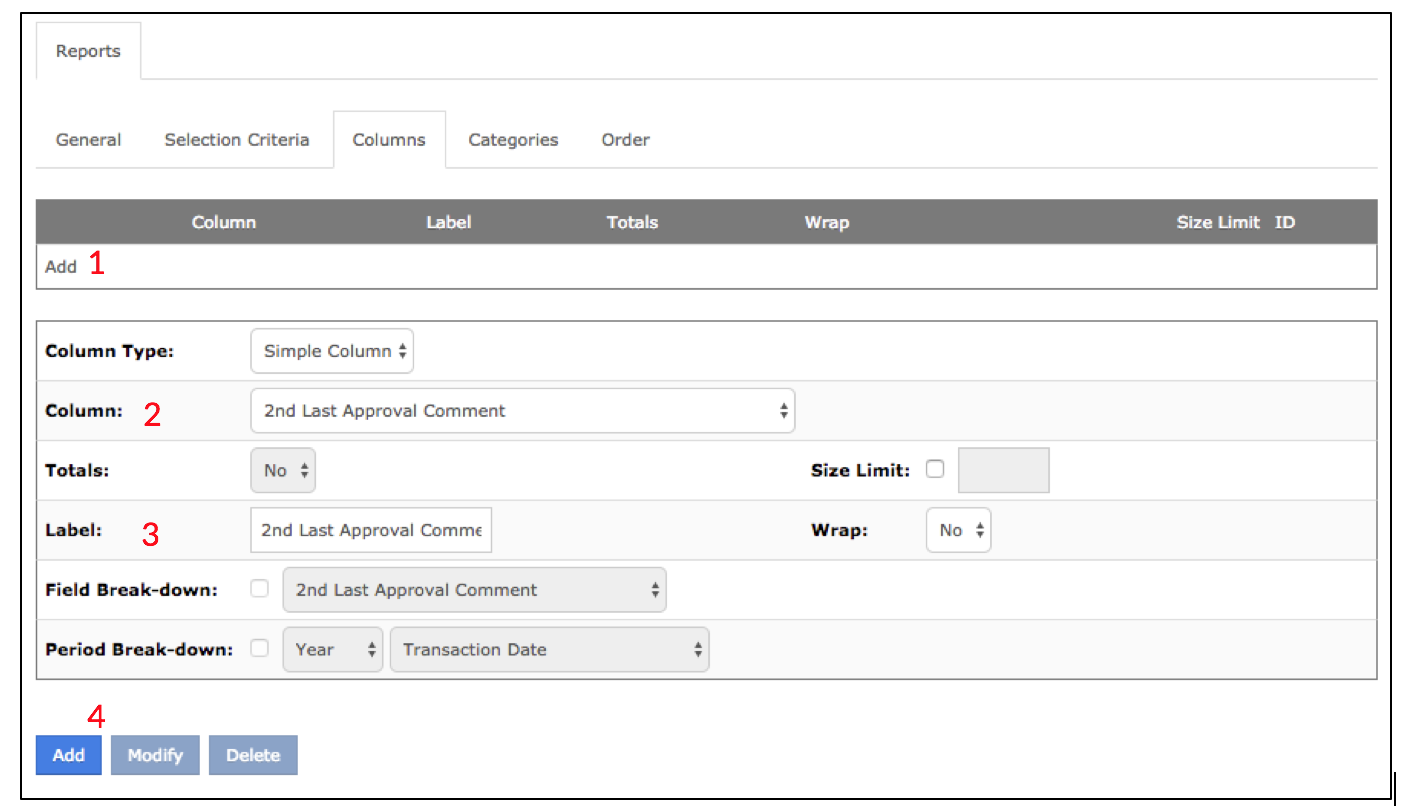
Reporting: OrderHere’s an example of a report that was created. Each column is shown with an Insert link if you wish to insert a new column of data. You can also use the arrows to shift the column order:

And here’s an example of the corresponding export file:

Reporting: Categories
In normal reporting, this would be used to group the results for sub-totals of the information being pulled when you run the report as a regular “on demand” report. For our purposes, we don’t need to do anything here.
In normal reporting, this would be used to order the results of the information being pulled when you run the report as a regular “on demand” report. For our purposes, we don’t need to do anything here. By default, the information runs in date order.
Your report template has now been created. The last step is to set up the export integration.
Data Integration: Exports
You can now configure the export using this template.
- Go to the Integration module.
- Click on the Integration Setup tab.
- Click Add Data Integration. The “Choose Data Type” window will appear.
- Choose Data Type = Expenses, click OK.
You’ll now see the Data Integration setup window:
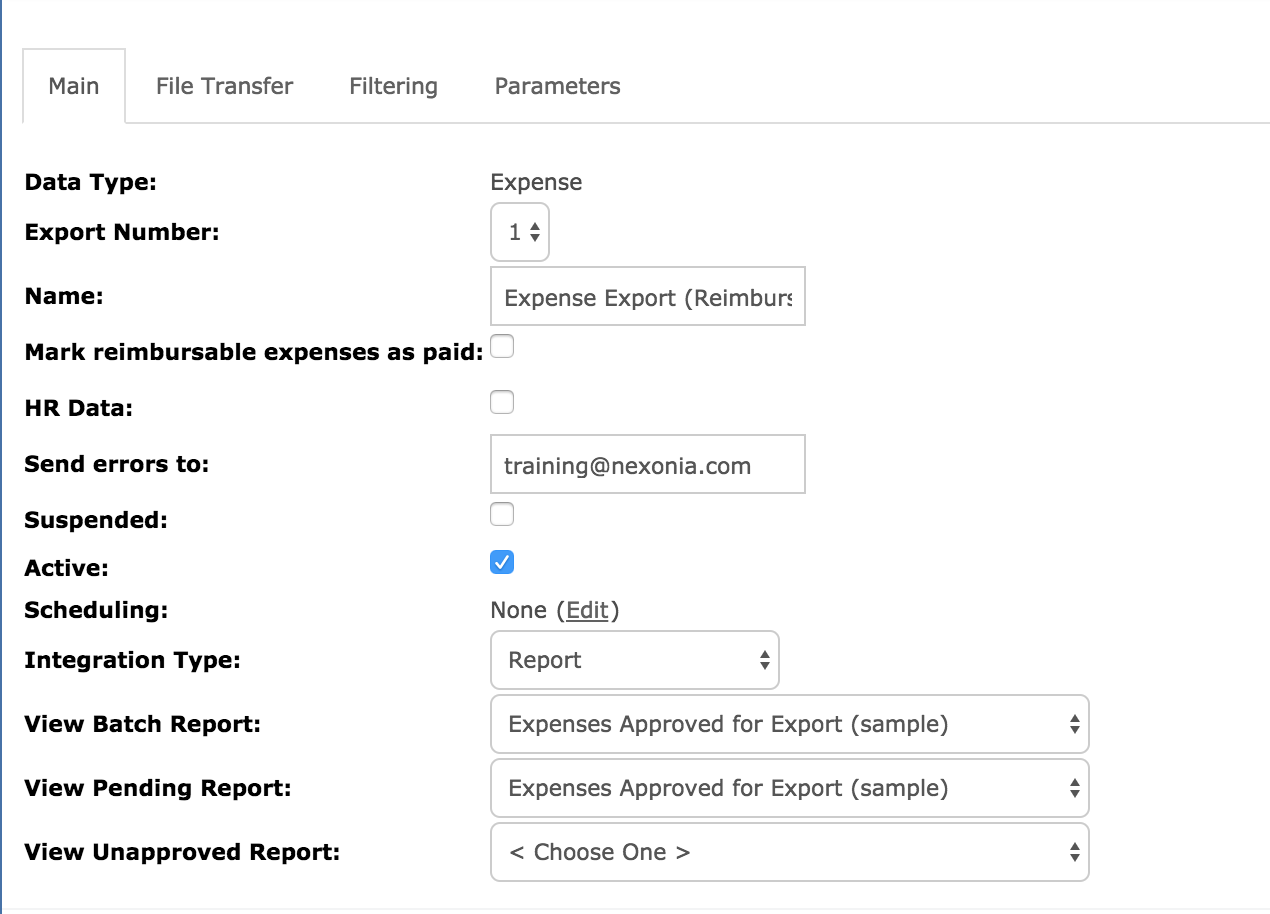
Export Number: you can number the exports to identify which export it is. You’d want to number them if you had more than one export.Name: name of your export
Mark as Paid: this is optional. If checked, when up run your export, any exported items will be marked as “Paid” in Nexonia with the export date as the Paid Date.
Send errors to: enter the email address that should be notified if there are export errors.
Active: check the box off to make this export active.
Integration Type: choose Report. A window will appear and ask you to click OK. This will create additional tabs to appear along the top of the integration window.
View Batch Report / View Pending Report : these are options to use reporting template to view batch or reports pending export. You can choose a reporting template in the dropdown menu.
The additional tabs are:
File Transfer:
Transfer Method:
- Manual Download = will allow you to download the export file when you generate it.
- Upload = allows you to map the export to an SFTP transfer
Generate Empty Files: only check this box if you want to generate empty files when you run the transfer
Filtering: this allows you to filter which expenses should be included in this export.
For example, if this export was specifically for company paid credit card expenses, you might want to filter by the Transaction Source for specific credit card feeds, or Item Types for only Company Paid expense items.
If this report was only for the Employee Reimbursable expenses, you’d filter Item Types for only Personal type of items.
If this report was for a specific region of the company, you’d want to filter by Region.
If this report was to export the Billable Customer expenses, then you’d filter only Billable
Parameters: this is where you indicate the template and format for this export.
Report: select the reporting template you want to use for this export.
Format: .CSV, HTML, PDF, XML (most likely you’ll use .csv)
Click the OK button to save the export settings.
Running the Export file
- Go to the Integration module.
- You should see a tab labelled “Expense Reports”.
- To the left, you’ll see Integration. If you have more than one export, you’ll need to choose which export to run in the dropdown.
- To run the report, click the Transfer Now
- You’ll see a window asking “Transfer the data now?”. Click OK.
- Once it runs, you’ll see a window allowing you to download the file.

Once you’ve run the export, it’ll be logged on Nexonia. You’ll see an Actions link for the export, with the options to:
Download – allows you to re-download the export file.
Undo – allows you to roll back the export file. This will undo the export status all the expense items in the export file. If you need to roll back the export on a specific report, this can be done from the Expenses module. Find the report, click the Actions link and “Reset Export” will be an option if you have Administrator rights.
View/View With – allows you to view the items that were included in the export.
-
 Note: In order to create reports, your role permissions must allow you Design or Share access to Reports. If you need to learn more about your role, please speak with your administrator.
To access Nexonia's reporting tool, select Reporting along the navigation bar. Click on Create Report.

Enter in the following fields to create the report in Nexonia, then click Add.
- Name: Title of the report
- Description: A Description of the report can go here, its not mandatory
- Type: Select the type of report you would like to create. These values pull information from different areas of Nexonia (ie. Time[sheets] or Expenses)
- Summary: Yes will create a summarized report. No will allow you to create a detailed report.
 Note: The Type & Summary options cannot be changed later.
 Note: An Expenses type of report can only generate results based off an existing expense item (company and/or employee paid). Card Transactions can report on any credit card transaction that exists in Nexonia (either linked to an expense or not).
Upon creation, there are 5 tabs that are used to define the report and its behavior.
General
This is where the title and description can be edited along with adding keywords to the report. Here will also be the option to choose if you'd like to share the report so that users with other roles can run the same report.
- Shared: No (default) means that only the author and administrators can run the report. Yes allows you to share the report so other users will be able to run the same report.
- Shared by Role: No (default) means that all users will be able to run the report because there is no filter set on who to share with. Yes allows you to pick which Nexonia roles to share the report with (who will have access to run the report).
- Roles: Check which roles the report should be shared with.
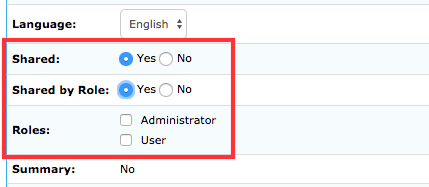
- Header: Values entered here will appear at the top of the report.
- Footer: Values entered here will appear at the bottom of the report.
- Lines in Header (CSV): The value entered here determines the row number that data will start appearing in a CSV exported report.
- Include Receipts (only available in PDF): No (default) means that no receipts will be included in the report, All means that every receipt added will be included and Linked means that only the receipts that are linked to the reported expenses will be included.
- When Editable is checked, the user will be able to change this preference at the time of running the report.

Selection Criteria
In this section, you have the ability to define the parameters under which a report can be run. Most parameters have 3 options:
- Disabled: When selected, the user will not be prompted to make any selection or add any filter. For the output of the report, all data related to this parameter will be included.
- Selected when the report is run: When selected, a report default can be set, but the user will have the opportunity to update this parameter at the time of running the report.
- Predefined: The values to be included in the report must be defined here and will not be editable by the user when running the report.
 Note: The Customers and Projects values are sometimes re-labeled in the interface settings to suit your expense management requirements. The below screenshot shows what the Nexonia Customer and Project root values are.
Columns
In this area, you will be able to define which values of information will be reported on. To create a new column, click Add.

To create more simple, straight forward reports, not all of the below options will be necessary to set. When creating new reports or modifying existing ones, typically only the Column and Label fields would be utilized.
- Column: The value selected here pulls from an existing Nexonia object (ie. Amount will report on the Total field from an expense item).
- Label: This is the output column header for the final report. Change this to reflect whatever is preferred to reference the column value (ie. User - Full Name is a Nexonia column, "Employee" is an example of a more common reference and label for this column)
Once the column has been defined click Add at the bottom. Repeat the process until all preferred columns are added.
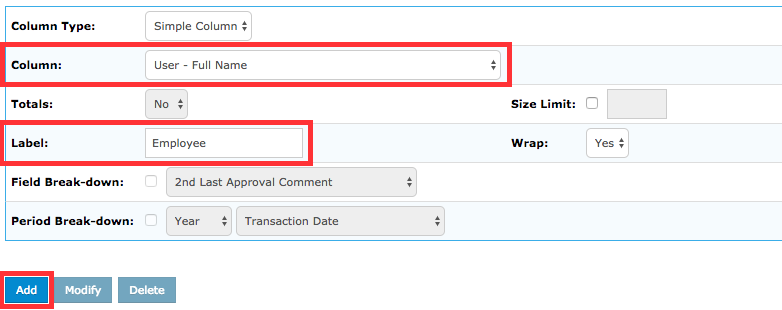
If any column need to be modified, click on the Column, change any values necessary, then click Modify at the bottom. To delete, click on the Column, then click Delete at the bottom.
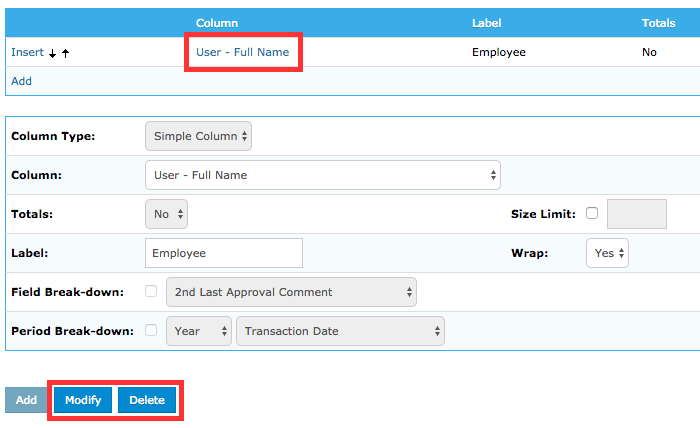
Categories
Setting categories allows the report to group results by whatever category values are selected. In the example below, the report will group results by Expense Category.
To create a new category, click Add near the top, define the category by selecting a value from the Category dropdown, then click Add at the bottom.
 Note: For HTML & PDF generated reports, subtotals will be calculated by category and included in the report results. Categories can also be relabeled by updating the name in the Label field.
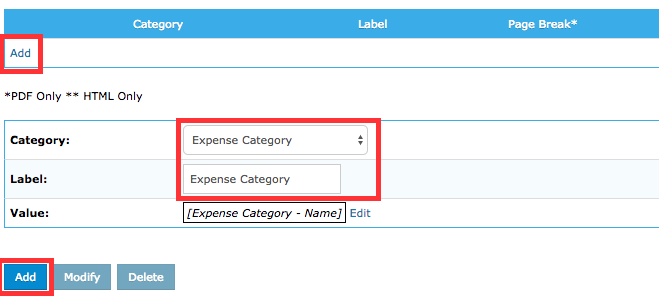
Order
Defining an order value allows you to organize results based on specific criteria (ie. you can sort results by Status or Amount). If no order is set, the results will be sorted by date (oldest first).
 Note: If categories are set, they will be sorted alphabetically. The order value selected only applies to the results.
To create a new order value, click Add near the top, define the order using the Column dropdown. The results can be set to ascend or descend, then click Add at the bottom.
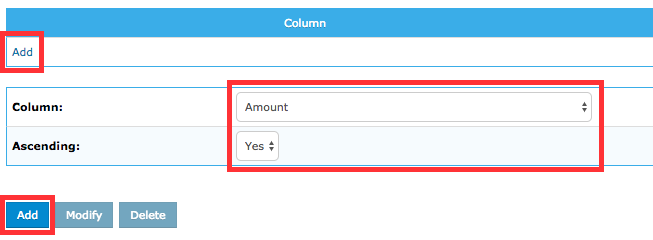
-
Please refer to the attached PDF to see a list and definition guide of all the column values available when creating an Expenses type of report.
Please note, custom fields created in your Nexonia profile are not reflected in this list, but will appear in the dropdown list.
-
As a Nexonia customer, you can request a copy of your SOC or SOX Report by visiting the Emburse Trust Center. Nexonia customers can access the Emburse Trust Center at trust.emburse.com.
The Emburse Trust Center is a secure platform that makes it easy for Nexonia to share sensitive security and compliance documentation with customers, including W-9 forms, compliance certifications, and frequently asked questions.
1. In order to download the security documents from the Trust Center, you will first need to request access to the Trust Center using the Get Access button, located at the top of the page. You will then be prompted to enter your email address.
2. If the domain of your email address matches an existing customer domain name, you will be granted access to view and download specific product information from the Trust Center.
If the domain does not match an existing customer domain, you will be prompted to complete the Request Access form with your email address and company information.
3. When your access is approved, you will receive a link via email for authentication. You must click this link to access the Trust Center.
Note: This link remains active for 24 hours. If the link expires, you will need to select 'Get Access' again, and you will automatically receive a new link in your email without additional verification required.
-
When creating a report in Nexonia, its important to make the right Type selection. The option selected will affect all of the possibilities when building the report.
Each report Type will be able to pull information from specific areas of Nexonia. This article will cover what each Type can do.
Its important to note that the types that appear are conditional based on if you are using the associated service with Nexonia.
Expenses - Reports on expense items that exist within an expense report. Receipt images can be included in this type.
Expense Attendees - Will also report in the same fashion as an Expenses type, but with the ability to report on more granular Attendee information.
Card Transactions - Reports on credit card transaction data regardless if added as an expense item or not (reports can include users' personal credit card transactions if no transaction source filter is applied).
Time - Reports on time entries that exist on a timesheet (will include Time Off entries).
Time Off - Reports on time off requests.
Purchase Orders - Reports on purchase orders.
Purchase Orders - NPI Contacts - Will also report in the same fashion as a Purchase Orders type, but with the ability to report on NPI Contact information (setting must be turned on to be relevant).
Accounts Payable - Reports on accounts payable bills.
Accounts Payable - NPI Contacts - Will also report in the same fashion as an Accounts Payable type, but with the ability to report on NPI Contact information (setting must be turned on to be relevant).
Users - Reports only on user level information.
-
These instructions will assist with building a mileage report which can be used by admins or shared with users so they can run a quick report on their mileage for a specific period.
The ability to build and run reports is linked to your Role permission. Administrators typically have this permission built in to their role, and can grant it to other roles if needed.
Link: Configuration Guide to Roles and User Permissions
Designing Your Report: Creating the Report Template
Login to Nexonia on the web and click on the Reporting module.
Click the Create Report button to start the report configuration.
You'll see the General tab appear. Enter the following:
- Name (e.g. "Mileage Report")
- Description
- Type - select Card Transactions
- Summary - select No
Click the Add button.
You should now see the five tabs for configuring the report:
- General - general information and sharing permissions
- Selection Criteria - report template filters and defaults
- Columns - data columns for the report
- Categories - data categorization for the report
- Order - order of the report results
Important: as you update the settings in each tab, it's important to hit Apply at the bottom of each tab to save your changes before moving to the next tab.
General
Most of the information will have been provided on your initial General screen. Here you can also configure:
- Shared - allows the report template to be private, shared with all other users or specific roles
- Header & Footer - you can enter information you'd like to see in the report header and footer
- Include Receipts (PDF) - gives you the option to include the linked map images for the mileage entries. Keep in mind this will increase the size of the report file.
Selection Criteria
This tab allows you filtering of the report data to be included. A number of fields can be set as hidden or visible to users running the report, set with defaults, or locked in with a predefined selection.
For this report, the key values are:
Date Range - establishes the date range range of entries being pulled when this report is run.
- Interval - you can default the period of time most commonly used when running the report: Last Month, Current Quarter, etc.
People - you can set whether the person running the report can select the people to be included in the report results, or lock down the values by using the "predefined" option.
Subset - default to which people will be included in the report. The most commonly used options:
- Default to user - select this if the report is intended so users can report on their own mileage.
- Default to user and subordinates - select this if the report is intended so managers can report on mileage for themselves and their subordinates.
- Default to all visible users - select to include all available users in the results. This would be useful if running department or company wide reporting.
Customers and Projects - disable this criteria if you want to always include all customer and project values.
Expense Category - here you would want to set the report to only include expenses from the mileage expense category(s).
- Select "Predefined".
- Choices = Manual, then click the "Change" link to select the Mileage expense category(s) to be included in this report.
Approval - default to "Approved"
Format - if there's a preference, you can set the default output format for this report.
Columns (Data)
The Column tab is where you define what information you want to include in the report. We’ve included some columns of data that can be useful, but you can choose to add others, remove columns or sort them in a different order. Click Add and select the column value below.
Column Name Value
Purpose
User - Full Name Person Name of the employee Expense Report - Code Report Code Expense report number Expense Report - Title Report Title Expense report title Transaction Date
Date
Transaction date
Expense Category - Name
Expense Category
Name of the expense category
Status Status Approval status Quantity Distance Total mileage distance.
Note: displayed based on the distance unit of the category (miles or km)
Rate Mileage Rate Mileage rate for this expense. Amount Amount Total amount for this expense. The following fields are optional depending on the amount of detail you need.
Distance - Locations
Distance - Locations
Includes a list of all the addresses/waypoints entered for this trip.
Distance - Origin
Distance - Destination
Start
End
Include these if you want to see the start and end points of the trip.
Memo
Memo
Expense item memo
Billable
Billable
Include if tracking mileage as being billable or not.
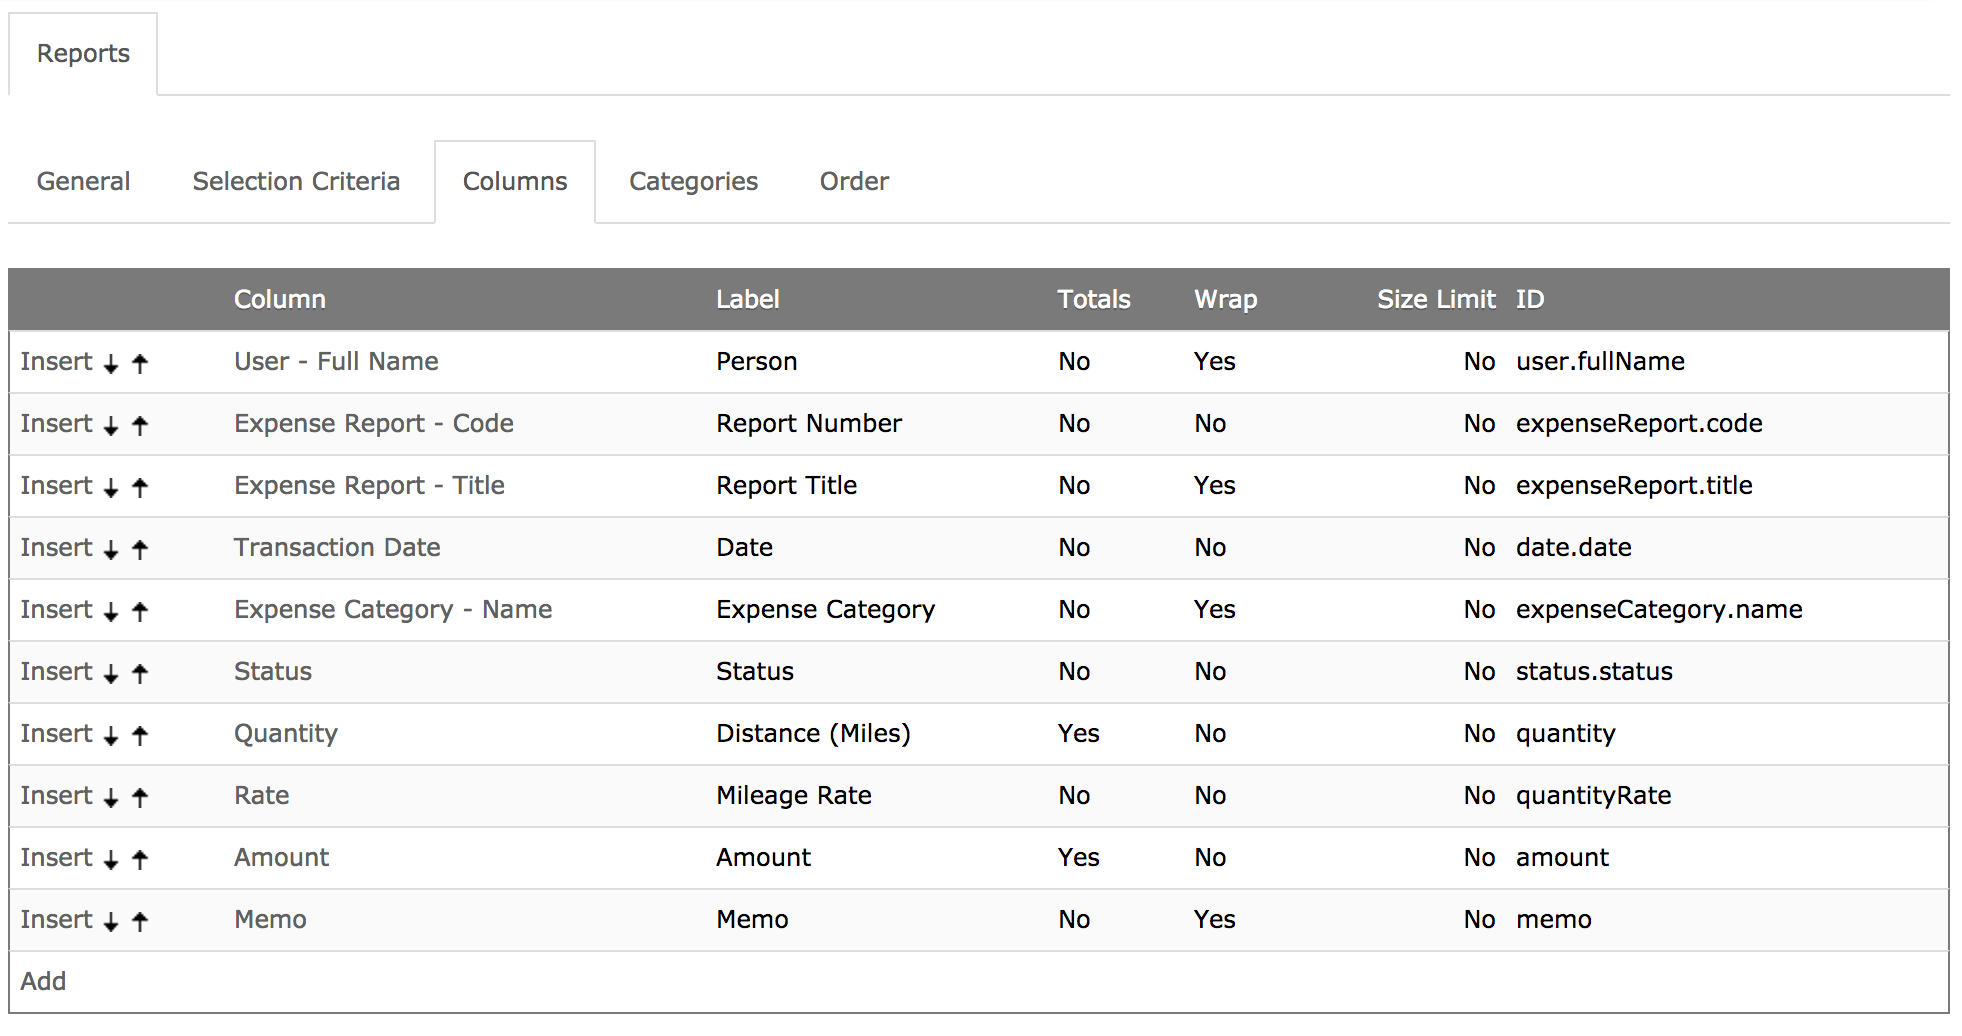
Categories and Order
Categories: Categories can be used to group the results and create subtotals for the distance and amount:
- User - group the results by user
- Expense Category - group the results by expense category
- Department - group the results by department if using this dimension on your expense items.
Order: Order is what order are the report results being sorted. For example, you could sort the results by user, then by date.
You have now completed building your reporting template.
Running Your Report
Under the Reporting module, you should see the reporting template you have just built. If you’re not seeing it, double check you don’t have a filter enabled.
Click the Action link to the left of the reporting template and you should see a dropdown menu with your Run option.
You’ll now see your Selection Criteria for the report. Make any adjustments if needed, and then click Run.
Reading Your Report
Here’s an example of our Mileage Report, run as a .CSV and opened in Excel. You can now identify exactly where in the process your credit card transactions are, and if there’s anything outstanding before your billing date.

Here’s an example of our Mileage Report, run as a HTML or PDF.

How to Obtain a Sample CSV File for Exports Viewing Export Error Messages Un-suspending an Integration Exporting Payables Bill Due Date to Intacct Due Date Card Transactions Not Exporting and Failing to Generate an Error Message (NetSuite/QuickBooks) Enabling the Emburse Integration Role in NetSuite for Nexonia and NetSuite Integrations
-
Please reach out to your ERP consultant or representative and request a sample CSV (comma-separated values) import file. CSV stands for Comma Separated Values, and it's a file format (.csv) for spreadsheets. This CSV file will need to capture employee [expense, time, etc.] information from Nexonia and import this data into your ERP. Please request that sample data and a description on what each field represents is included to ensure accurate formatting. Once received, the file format will be recreated in Nexonia and when [expense, time, etc.] data is ready to export, the administrator can download the file from Nexonia and upload it into the ERP.
 Please note: Each file will be different depending on the ERP. Please ensure you obtain the file directly from your ERP representative to ensure a successful import.
-
If your export fails for whatever reason, you can view the error message for that specific integration and export batch.
This article will show you how to view Export Error Messages.
Step 1: On your Nexonia homepage, click the Integration tab.
Step 2: Open the integration tab in which the export is failing (Timesheets, Expense Reports, Expense Receipts, Accounts Payable, or Accounts Payable Attachments). A list of all successful and failed export batches for that integration appears. If the message column on the far right side of the screen states Failure or Partial Success for an export batch, that means that some or all of the expenses failed to export.
Step 3: You can click the Failure/Partial Success message for a more detailed message about why the export failed. Some key features are:
- Reports -- Indicates which specific reports are failing
- User -- Shows which user's reports they are
- Error Description -- Shows the cause of the export failure. If the error begins with "Intacct/NetSuite/QuickBooks Message" it means that part or all of the configuration in those ERPs are preventing the export from coming over.
- Export again: adds the expense report back to the queue. If this is not selected, the report will not attempt to export again
- Mark as Exported: Marks the report as "Exported" in Nexonia and prevents it from attempting to export again.
- Mark All as Exported: If there are multiple failures in the same batch, this will mark all reports as "Exported" in Nexonia.
Alternatively, admins can view all pending expense report error messages by clicking the Review Failures button.
The Failure/Success message provides the same key columns, but for all expenses across multiple export batches.
If unfamiliar with the error message or are unsure what it means, consult the following articles for reasons/resolutions for common error messages with Intacct/NetSuite Integrated accounts:
Intacct:
- Understanding Intacct Expenses Data Integration Error Messages
- Understanding Intacct Cash Management Data Integration Error Messages
- Understanding Intacct Timesheet Integration Error Messages
NetSuite
Please Note: Sometimes card transactions fail to export without generating an error message. That is likely because the cards tied to those transactions haven't been mapped for export, which if you're integrated with NetSuite/Quickbooks generates an empty batch rather than a failed one. You can view articles for instructions on how to map the cards for export here:
-
Data integrations can be suspended for a number of reasons, most commonly due to repeated export errors. When a data integration is suspended, administrators have the ability to reactivate it to resume their exports.
This article shows you, a Nexonia Administrator, how to reactivate an integration.
Step 1: Open the Integration tab and click Integration Setup.

Step 2: The suspended integration will be listed in red and includes suspended in the name. Click Edit next to that integration.
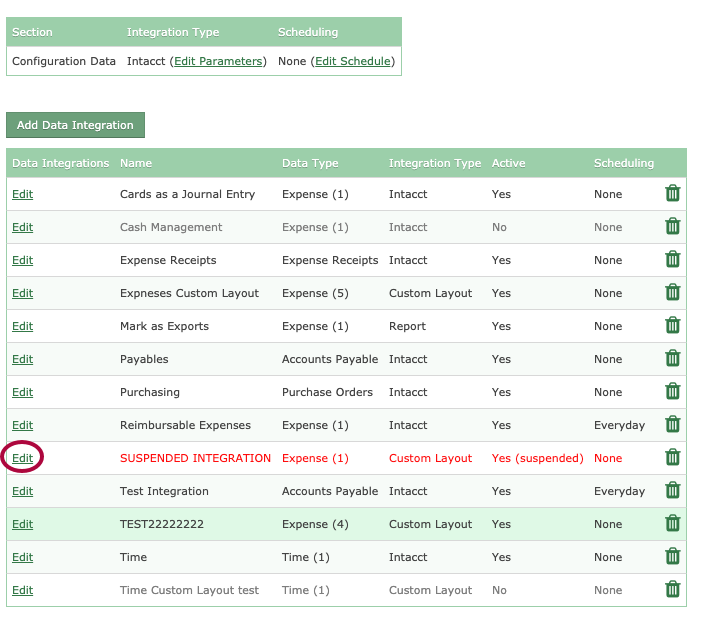
Step 3: Uncheck the Suspended box. Then, click OK to save. Your integration will now be reactivated and you can resume your exports again.
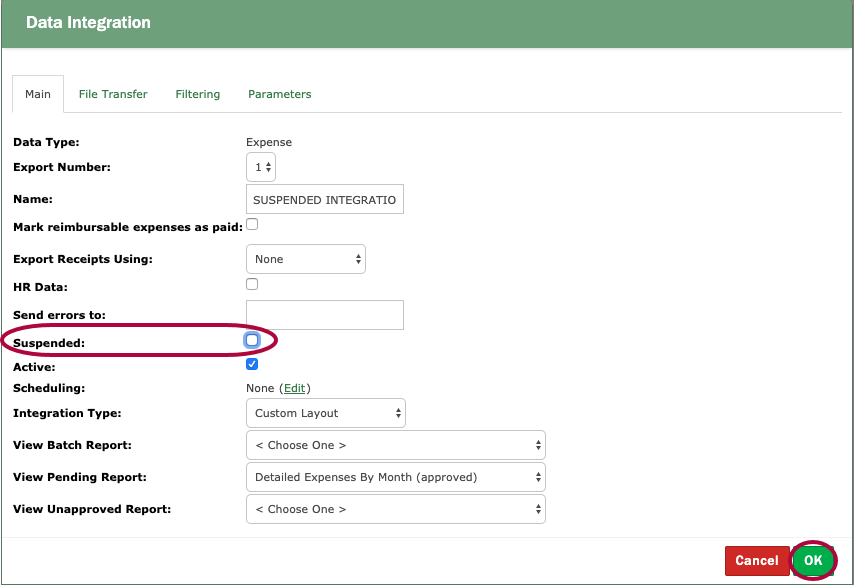
Please Note: If there is an Unexpected Error in your data export right before the integration is suspended, it's recommended that you leave the integration suspended and contact the Support team for help.
-
This article will show you how to map the Nexonia Payables Bill Due Date to export to the Intacct AP Bill Due Date.
Step 1: From the Company Settings page, click Payables>> Layout>> Edit.

Step 2: Click the checkbox next to Due Date and click Apply.
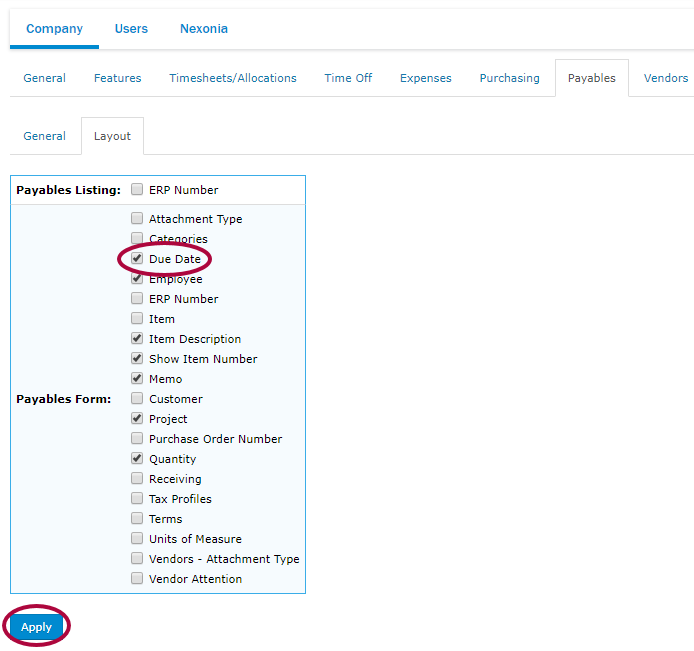
Step 3: Click the General tab.
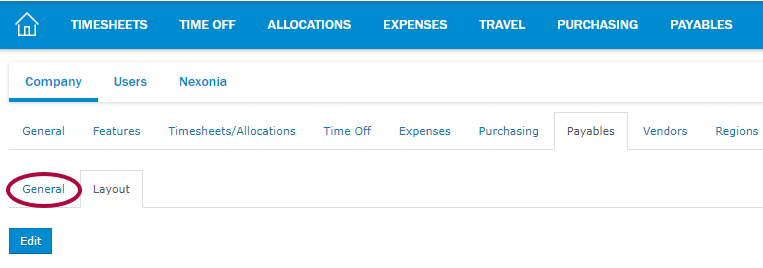
Step 4: Click Edit.
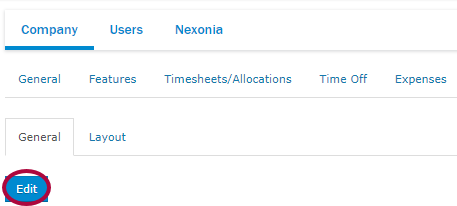
Step 5: Click the Creation Date checkbox next to Default Due Date.
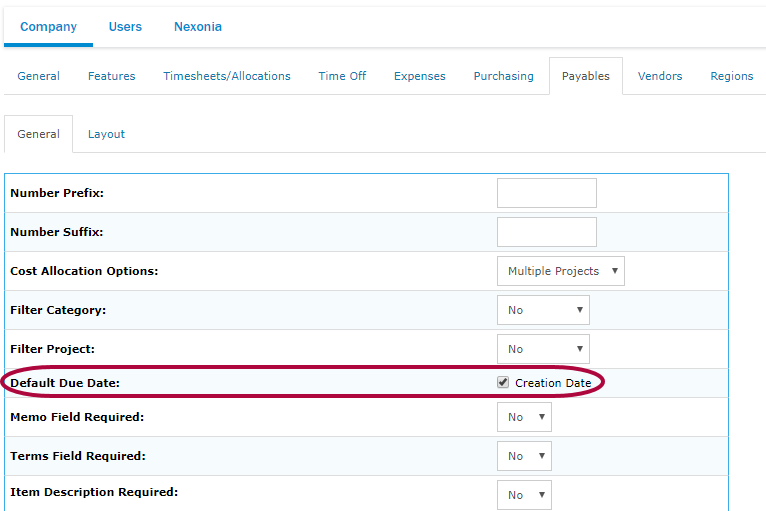
Step 6: Set Due Date Required to Yes.
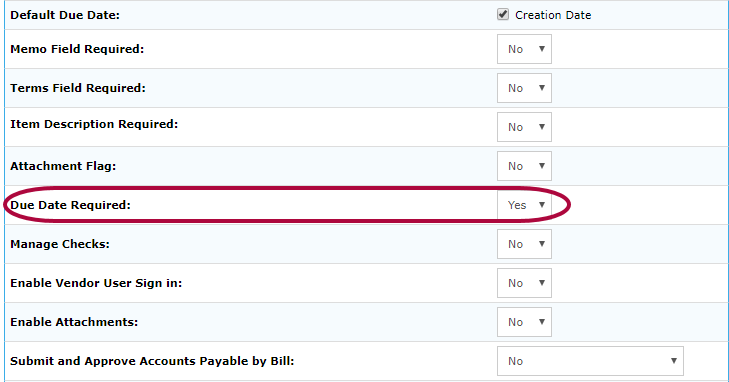
Step 7: Click Apply to save.
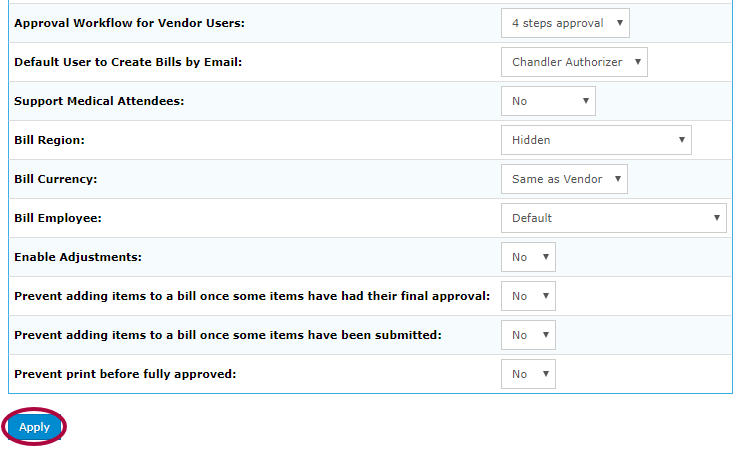
Step 8: Open the Integration tab and click Integration Setup.

Step 9: Click Edit Parameters.

Step 10: Click the Accounts Payable tab.
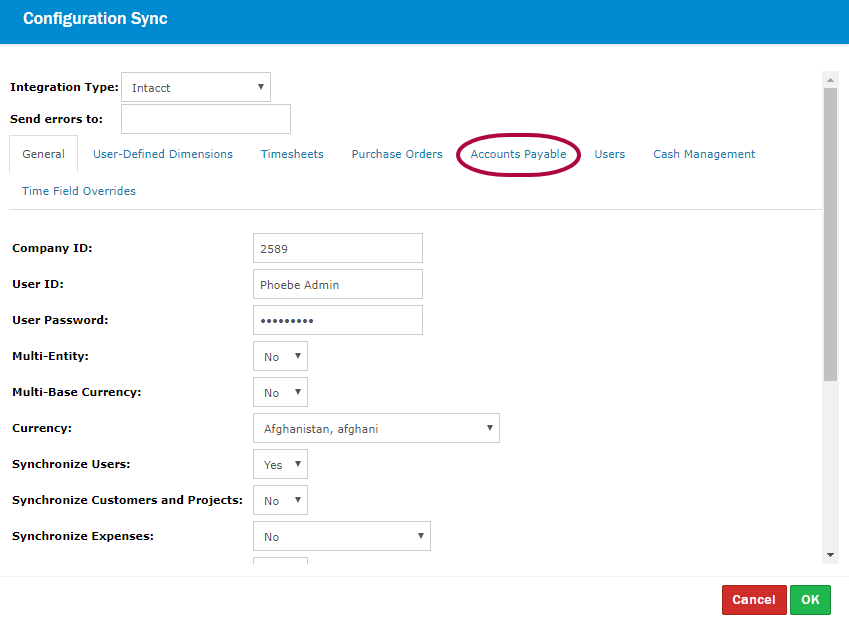
Step 11: Click the Bill Due Date drop-down and select Bill Required Date.
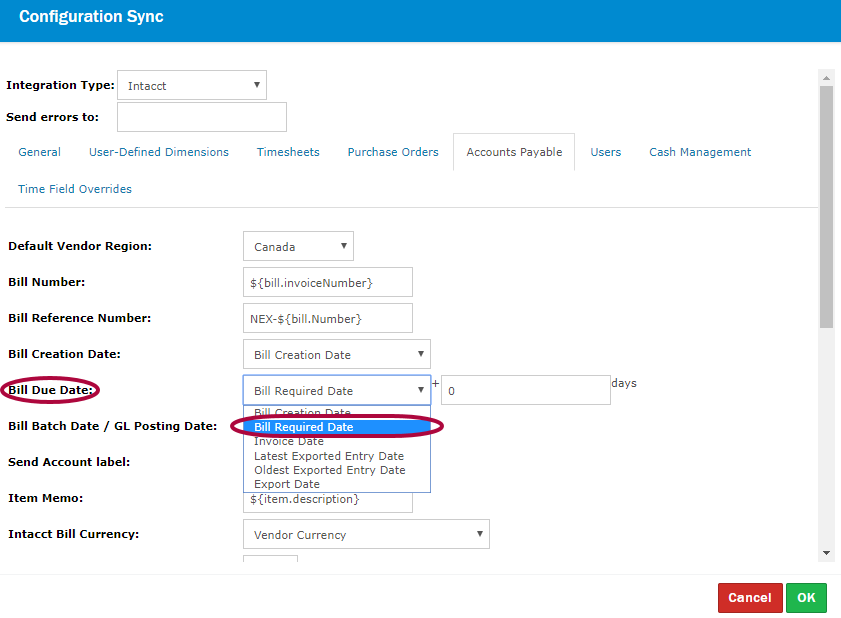
Step 12: Click OK to save.
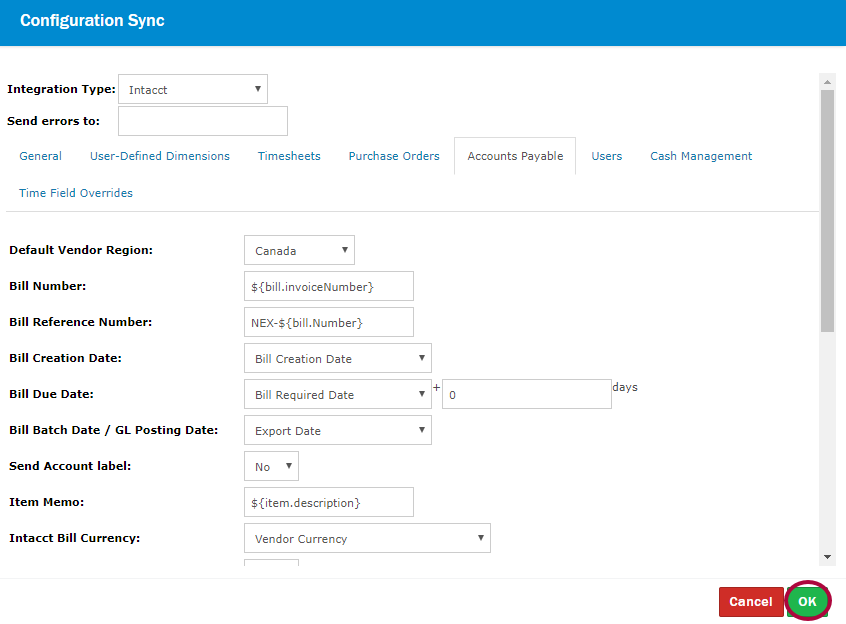
The Paybles Bill Due Date is now mapped to the Intacct AP Bill Due Date.
-
If you're using company paid credit cards and are integrated with NetSuite or QuickBooks, you might run into card transactions not exporting and also not generating an error message. That is likely caused by the card(s) associated with the transactions that aren't exporting not being mapped for export to NetSuite or QuickBooks.
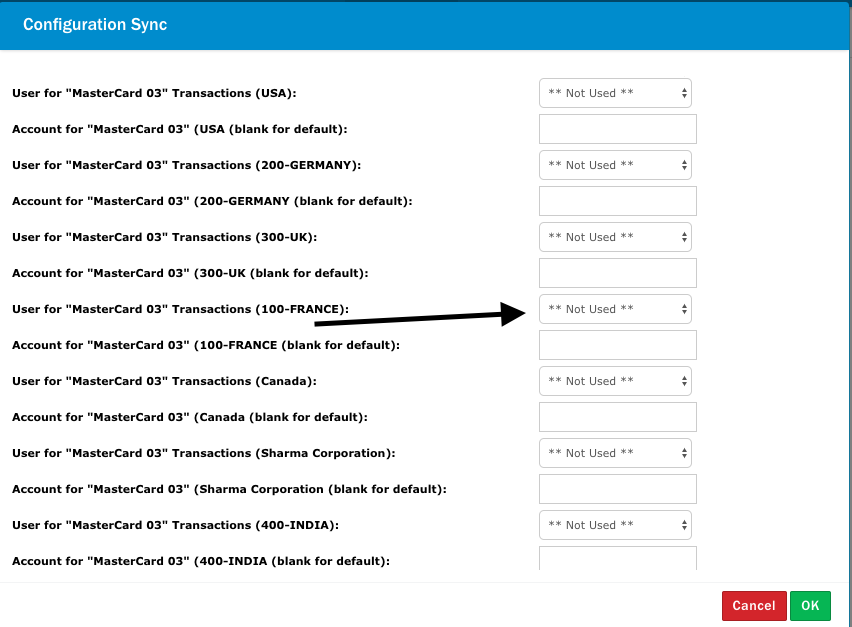
For NetSuite, you can check if the card is mapped for export by following the steps in this article.
Please Note: If the value next to the "User for..." credit card field is Not Used it will not be able to export.
For QuickBooks, you can check if the card is mapped for export by following the steps in this article. For further information, see Mapping Company Paid Credit Cards to QuickBooks Online.
Please Note: If the value next to the name of the credit card is None it will not be able to export.
-
NetSuite deprecated its "Full Access" role which was necessary before to enable integration between NetSuite and Nexonia. Now, users will have access to the Emburse Integration Role which gives them the necessary permissions for integrations.
This article will show you how to create the Emburse Integration Role within NetSuite, as well as how to link it to your Nexonia account.
Step 1: In your NetSuite account, click Customization. Then click SuiteBundler, followed by Search & Install Bundle.
Step 2: Search for the Emburse Integration Role.
Step 3: Once found, click Install. By clicking Install, you will be forwarded to the Installed Bundles Page, were you can locate the role. Make sure that the role version is V1.5 (seen under VERSION in the Installed Bundles page) - this is required for the integration. You can update the version by clicking on the name of the bundle after it's been installed and clicking Update.
Please Note: It will take a few minutes to install the role, wait for the green check mark to appear.
Step 4: Once you've located the role, click Setup. Then click Users/Roles, followed by Manage Users.
Step 5: From here, choose a user you want to give this role to, or create a new user. Once you choose a user, click Edit in the user's profile.
Step 6: Scroll down and click the Access tab then click Roles. Add the Nexonia Admin Role and click Save.
Step 7: Next, click Setup followed by Integrations and Manage Integrations. Once on the Integrations page, add the new integration and click Save. The Consumer Key and Consumer Secret will appear. Save them so that you can enter them in Nexonia.
Step 8: Before adding the credentials into Nexonia, you'll need to create an Access Token. To start, click Setup, then click Users/Roles, followed by Access Tokens.
*Note: If the 'Access Tokens' section is missing, go to Setup > Company > Enable Features > SuiteCloud 'tab'> enable "Token-Based Authentication"
Step 9: Click New. Under the Applications Name, choose the integration you just created. Then, choose the User you assigned the role to. Assign the role and name the token. Then, click Save. The Token ID and the Token Secret will appear. Save these so that you can enter them in Nexonia.
Step 10: Now that you have set up the integration and access token in NetSuite and have your authentication details, you can update the integration settings in Nexonia to complete the setup. Go to the Integration tab in Nexonia > Integration Setup > Edit Parameters. Under the General tab, enter the following:
- Account - this should be your NetSuite Account ID. Can be found on Setup > Company > Company Information > Account ID
- Token ID - paste the Token ID you generated above.
- Token Secret - paste the Token Secret you generated above.
- Consumer Key - paste the Consumer Key you generated above.
- Consumer Secret - paste the Consumer Secret you generated above.
Click OK to save your updated authentication. You can run a Configuration Sync now to establish the integration between NetSuite and Nexonia. If you use Custom Segments in NetSuite, make sure to update those with the new role to allow them to be imported into Nexonia.
Reimbursing through Nexonia Direct Deposit Entering Account Information for Nexonia Direct Deposit
-
Nexonia Direct Deposit enables your organization to reimburse employees using direct deposit. To initiate reimbursements, your Nexonia Administrator must first designate you as a Direct Deposit Approver within Nexonia. This feature is available to reimburse in USD and CAD.
This article shows you, a Nexonia Direct Deposit Approver, how to reimburse your employees using Nexonia Direct Deposit.
Step 1: From your Nexonia homepage, navigate to Approvals>>Direct Deposit.

Step 2: Here you'll see all the reports up for Direct Deposit Approval. First, click the Actions menu for a list of things to do with the report:


- Reimburse with Direct Deposit: Click the reimburse the report using Direct Deposit.
- Exclude from Direct Deposit: Click to exclude the report from Direct Deposit.
- Reject: Click to reject the expense report and send it back to the submitter.
- Reset to Draft: Click to reset the expense report to draft format and send it back to the submitter.
- View History: Click to view the history of the expense report.
- Download CSV: Click to download the expense report as a CSV onto your computer.
- View PDF: Click to view the expense report as a PDF.
Step 3: To Reimburse, click the checkbox next to the report. Then, click Reimburse.

Step 4: A warning will appear confirming you'd like to reimburse all items in the expense report. Click OK.

Step 5: Enter an Approval Comment and click OK.
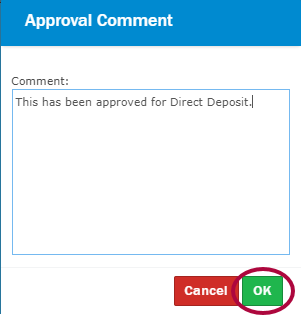
Step 6: Alternatively, to Reject click the checkbox next to the report. Then, click Reject.

Step 7: A warning screen will appear to confirm you'd like to reject all expenses. Click OK.

Step 8: Enter a Rejection Comment and click OK. The report will be sent back to the submitter.
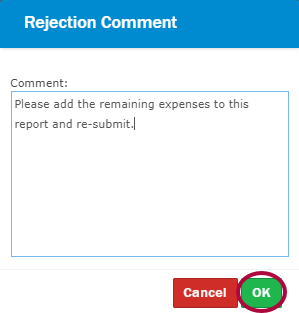
-
If your organization is using Nexonia Direct Deposit, there are a few steps to enter your direct deposit account information to begin receiving reimbursement. Nexonia Direct Deposit is partnered with Western Union and uses ACH technology.
This article will show you, a Nexonia employee, how to enter your direct deposit account information.
Step 1: On your Nexonia homepage, click your name in the upper right-hand corner.

Step 2: Click Account Settings.

Step 3: Click the Banking Information tab.

Please Note: If you do not see the Banking Information tab, your organization is likely not using Nexonia’s Direct Deposit feature and you will be reimbursed directly through your organization’s accounting software.
Step 4: Click Add Banking Information.

Step 5: The Banking Information screen appears. First, enter your personal information.
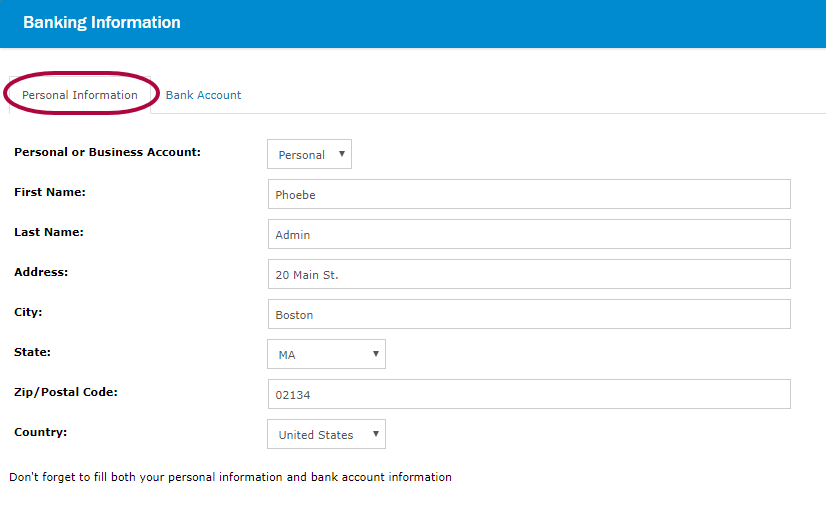
Step 6: When you're finished entering your personal information, click the Bank Account tab.
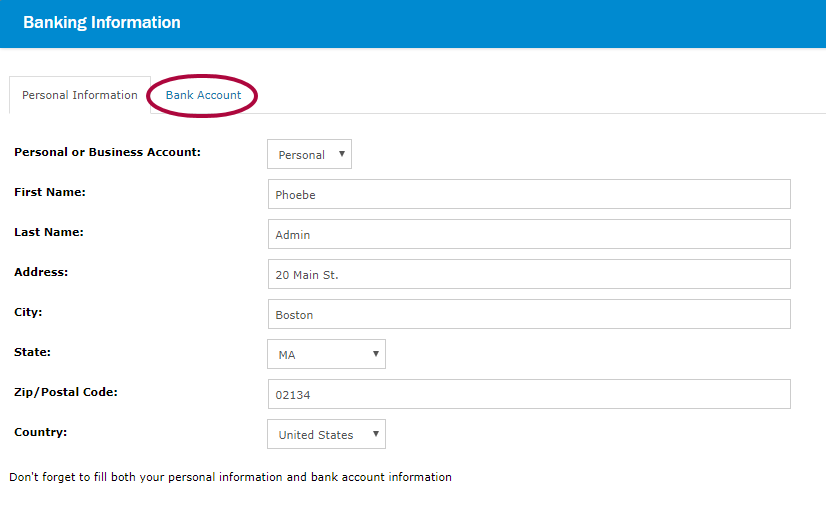
Step 7: Add your Bank Account information into all required fields.
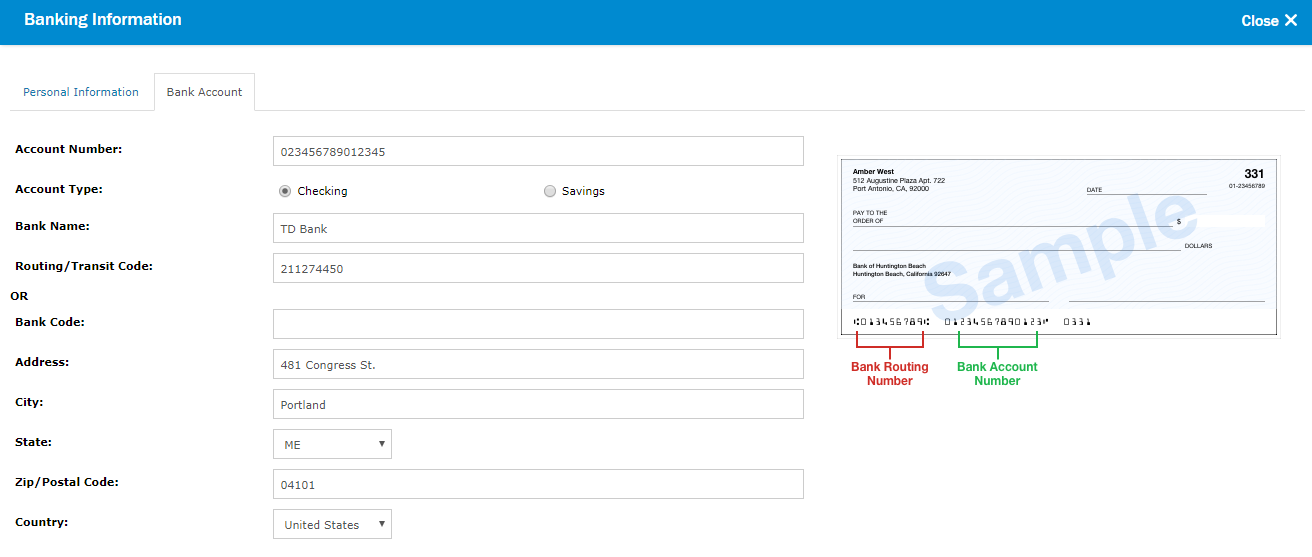
Step 8: When finished entering both your Personal Information and your Bank Account information, click OK.
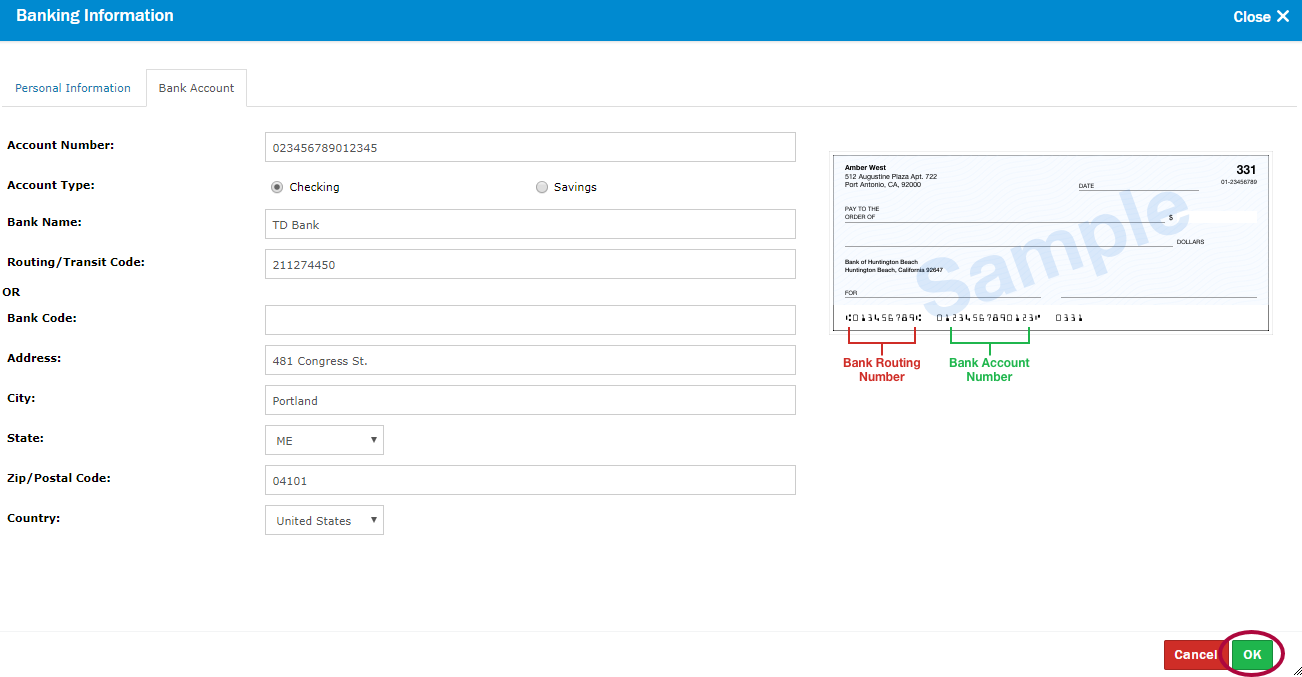
Step 9: You'll receive a confirmation message that your bank information is complete. Click OK.

Step 10: Now your Banking Information screen will show your newly added bank information. To edit the information at any time, click the pencil icon.

Email is a quick and convenient method for adding receipts and expenses into Nexonia. You can email receipts from your computer's email service or a mobile device with email capabilities. When emailing, use the same email address associated with your Nexonia account, or another email address that you have associated to your account as an authorized address.
This article showcases how to email receipts to Nexonia.
Step 1: To begin, email receipts to receipts@nexonia.com. There are multiple ways to send receipts via email:
Please note: If the email is longer than the standard page height, it will be split into multiple images based on the standard page height.
Step 2: Upon processing, receipts are added directly to the Receipt Wallet unless an Expense Report was specifically chosen.
To direct the receipts to a specific expense report that already exists, change the subject line of the email so it only contains that expense report number.
To: receipts@nexonia.com
From: nexonia.user@business.biz
Subject: 1234
To direct your receipts to a brand new expense report, set the subject of the e-mail containing your receipt to be '+' without quotes, followed by the title you want to give to the new report.
To: receipts@nexonia.com
From: nexonia.user@business.biz
Subject: + My New Expense Report
You'll receive a confirmation email that indicates if the emailed receipts were processed successfully or not.
Please note: When emails contain multiple receipts or a multi-page PDF, receipts will be processed as individual, separate images/receipts in the Receipt Wallet.