When an expense report is submitted for approval, the approver can advance it to the next step in the approval workflow. Once the status of the report is Approved, it is ready for export to your ERP (if applicable).
Non-Administrators in Nexonia can only approve submitted expenses that are assigned to them for approval, while users with Administrator access have the ability to approve submitted expenses assigned to any user.
This article will show you how to approve expenses.
Step 1: On your Nexonia homepage, select the Approvals tab.
Step 2: Find the expense report you'd like to approve and click the Action button. You can also approve multiple expense reports at once by using the checkboxes to the left of the expense reports.


Step 3: To approve all submitted items in the expense report, click Approve.

Step 4: Click OK to complete.

Step 5: You can also approve individual expense items within an expense report. First click the code number of the expense report you'd like to edit.

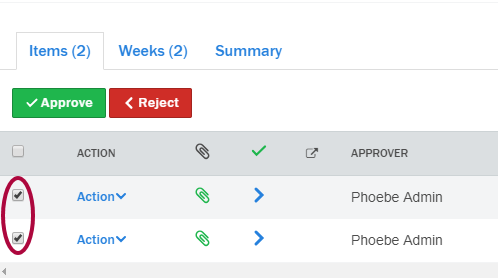
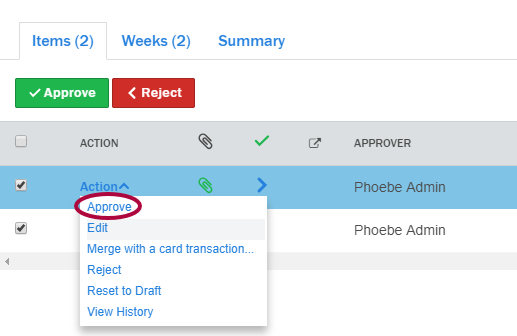
Step 6: Find the item you'd like to approve and click Action. You can also approve multiple expense items at once by using the checkboxes to the left of the expenses.


Step 7: Click Approve followed by OK to complete.


Comments
0 comments
Article is closed for comments.