Administrators can find themselves with expense reports that no longer need to export to their ERP. To help with this process, you can use the Mark as Exported workflow.
This article shows you, a Nexonia Administrator, how to use the Marked As Exported workflow.
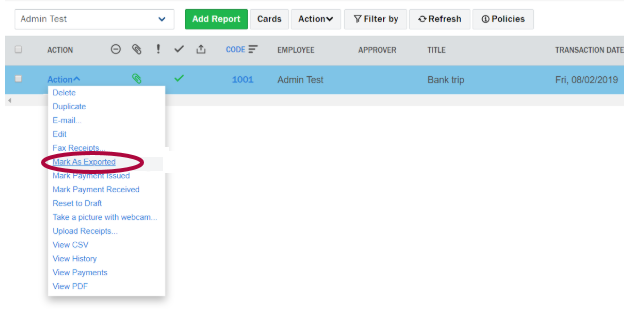
Step 1: If, as an Admin, you have a report that is fully approved but not yet exported, you will see an option for Mark As Exported when you click Actions next to an expense report. Click Mark As Exported to begin.

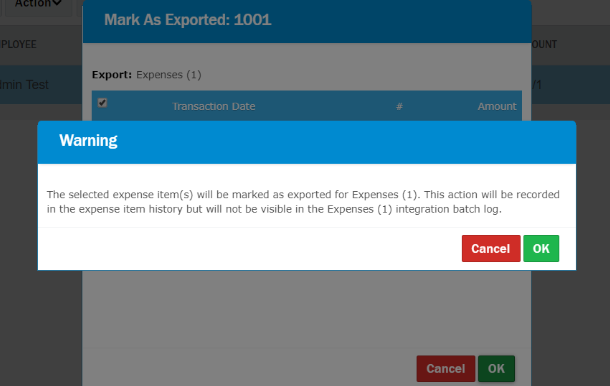
Step 2: After clicking Mark As Exported, you will be prompted to select the Integration (if you have more than one) and the expense item(s) you want marked as exported.
Please Note: The Memo field is required for all Marked As Exported actions.

A warning will show that, while the action will be recorded in the item history, the expense item(s) that are being marked as exported will not show in your integration batch log.

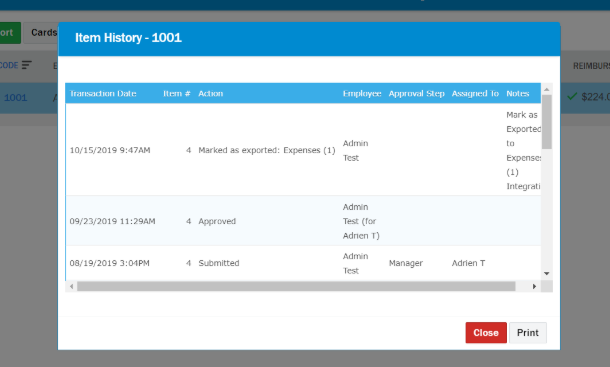
Finally, you will be able to see the action recorded in the item history including time stamp, use who performed the action, and the required memo.

You can undo Mark as Exported by using the Reset Export workflow, also contained in the Action menu next to expense reports.

Comments
0 comments
Article is closed for comments.