Training Calendar
Submitting & Approving Expenses
Alternating schedule
How to login, upload your receipts, create and expense reports for approval, and approve expenses.
Submitting & Approving Time Off and Timesheets
Alternating schedule
A walkthrough of how to create, submit, and approve Timesheets and Time Off requests.
Reporting Module Overview
Alternating schedule
An overview on how to create and generate reports.
Configuring Expense Settings for Admins
Alternating schedule
How to manage your company's data and settings.
Configuring Timesheets & Time Off Settings for Admins
Alternating schedule
How to manage timesheets and time off settings and policies for your company.
Managing Nexonia with Intacct
Alternating schedule
An overview of how Nexonia is integrated with Intacct. Learn how to import and export data between Nexonia and Intacct, manage users, expense categories and Intacct dimensions.
Managing Nexonia with QuickBooks
Alternating schedule
An overview of how Nexonia is integrated with QuickBooks Desktop or QuickBooks Online. Learn how to import and export data between Nexonia and QuickBooks, manage users, expense categories and QuickBooks dimensions.
Managing Nexonia with NetSuite
Alternating schedule
An overview of how Nexonia is integrated with NetSuite. Learn how to import and export data between Nexonia and NetSuite, manage users, expense categories and NetSuite segments.
Travel Booking & Analytics
Alternating schedule
Review how to book travel, run reports, & view unused tickets.
Watch Nexonia's easy-to-follow brief tutorial videos here.
Training Videos
Release Notes: August 31, 2023
-
Intacct Best Practices
Emburse Nexonia integrates with Sage Intacct via a web-services API. This automates many of your setup, maintenance, and transactional postings. With this in mind, we have put together a few best practices to get the most out of your Nexonia and Sage Intacct integration:
1. Keep your Nexonia configuration up to date.
Inbound syncs can be scheduled to run any day of the week to refresh your Nexonia account with any updates made within Intacct or can be run manually at any time.
Click here to learn more about syncing Nexonia with Intacct, and click here to learn how to export expense reports.
2. Set an Export Schedule
Determine your export schedule for posting approved data from Nexonia to Intacct. Exports can be triggered on demand or scheduled. Automated exports may be scheduled weekly, multiple times per week, or even hourly depending on your accounting practices. In the Send Errors To field, enter an email address for notifications if there are any issues in posting that you need to address.
For more information on error messaging, review the articles linked below:
3. Review Failures
Review failures for any items that have not been posted successfully. Each export batch will include a success or failure status. A failed export may be an indicator that your Nexonia and Intacct configuration may need some fine-tuning.
4. Configure Intacct Integration
Nexonia offers multiple configuration settings to support your Intacct accounting needs. Ensure your filters are set to import any required dimensions and keep your account maintenance healthy. Good data in, good data out.
Update: Intacct Review Failures Window
To streamline processing time with your Intacct integration, and reduce export failure rates, Nexonia has made updates to our Review Failures pop-up window. Rather than reviewing a long queue of error messages, admins now only have one consolidated message to review for each failed export.
Note: At the moment, the Review Failures window is only available for Expense Report exports.
1. Navigate to the Intacct integration page, and click the Expense Reports tab.
2. After an automated or manual sync, click the Review Failures button.
3. Review the listed expense reports for errors, then click either the Export Again or Mark as Exported buttons.

Release Notes: April 13, 2022
-
Updated Legacy Cards Integration
With the release of Nexonia’s new Cards Gateway, we have now removed our older Emburse Card integrations to offer customers an improved and streamlined experience.
Intacct Tasks for Expenses
Nexonia has enhanced our native Intacct Task integration with Nexonia Expenses to support exports for company-paid expenses to Intacct Cash Management and Vendor Bills.
Release Notes: March 9, 2022 Nexonia Cards Gateway
-
Automated Distance Rate Mode
Nexonia has updated our Mileage Category feature to include an Automated Distance Rate mode for US -based customers. The automated rate mode removes the room for error for organizations that opt into setting their expense category to utilize the IRS data source, rather than depending on an editable rate and date field. The implementation of the IRS Automated Rate Source provides a separate rate table with preconfigured Distance Unit, Distance Rate Currency, and Effective Date fields.
To update this setting, edit an existing mileage category(s) to update the rate source. Use the Updating Rates for a Mileage Expense Category or Creating a Mileage Expense Category articles in the Help Center if you need a refresher on how to access the mileage category settings.
In the mileage category, the Distance Rates Mode should be set to Automated, with IRS Mileage as its source.
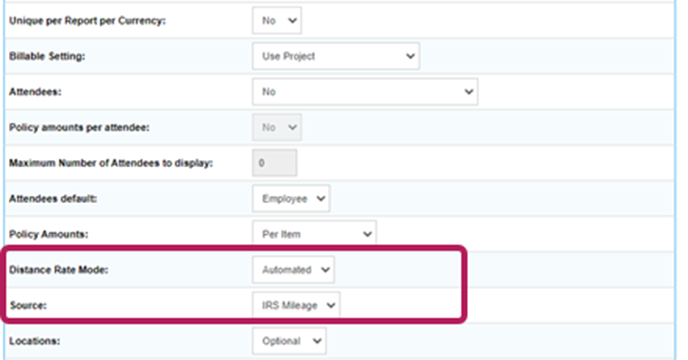
Please Note: Updating the Mileage Expense category will not automatically update the rates for in-progress mileage expenses in the expense reports. If a rate update is needed for an in-progress expense (ie any 2022 mileage expenses), the expense item will need to be opened and saved to reflect the new rate once the category has been updated.
Intacct API Updates
We are currently working on updating our Intacct configuration sync. Overall, we have significantly reduced our sync time, and look forward to additional improvements.
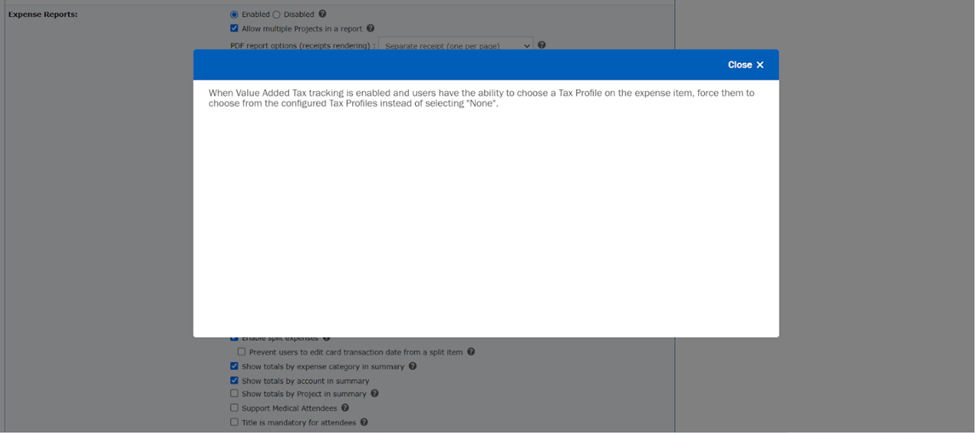
Tooltips
Throughout Nexonia’s Setting pages, a series of Tooltips have been released to assist with onboarding and general account management. Click the question mark icon next to certain features for helpful tips and information.

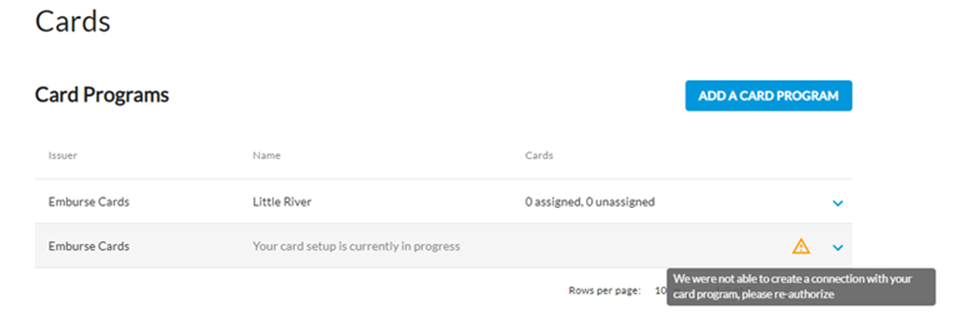
Card Authorization
Nexonia’s new Cards UI now supports re-authorization for disconnected and pending card programs. A warning icon and popup message appear, alerting Admins to reconnect card programs that have been added to the company’s account.
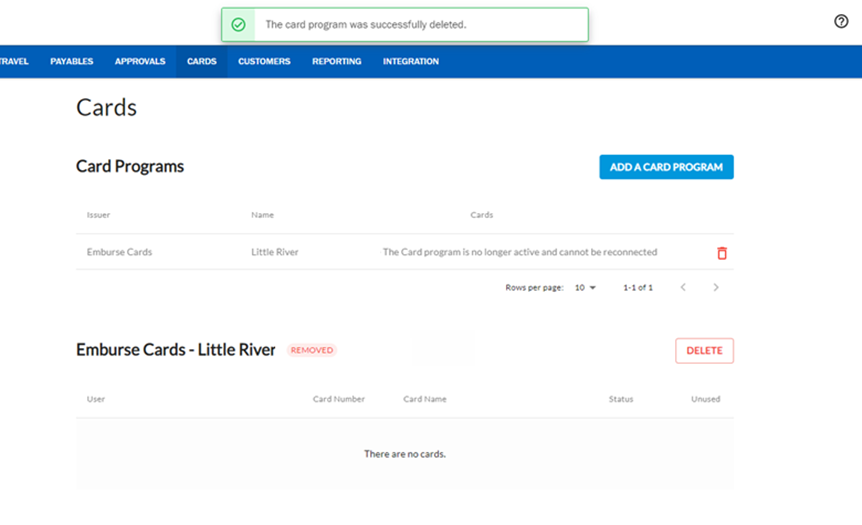
Card Program Removal
For card programs integrated via the Gateway, we have introduced an interim Removed status. The cards associated with the account will become deactivated, allowing for final expense use and submission for any transactions previously synced to Nexonia.
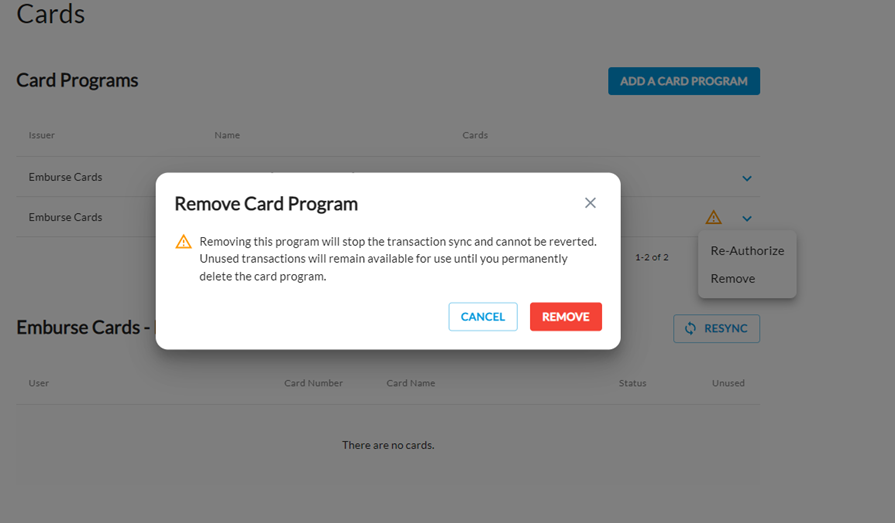
Please Note: A removed card program cannot be reconnected; however a new card program can be established using the same financial institution in the future.
To completely delete a removed card program from the Nexonia Cards UI, use the Delete button. This prevents the export of any unused transactions and clear card account information for this program.
-
Cards Gateway
Nexonia Expenses is integrating with Emburse Cards Gateway to offer a dedicated interface for admins to manage card programs with ease and benefit from more secure, stable transaction feeds and enhanced card data directly from banks. This creates the foundation for improved connections with financial institutions in the future.
Please Note: This feature is currently available only to companies using Emburse Cards. For all other card integrations, continue to use the Integration Setup page.
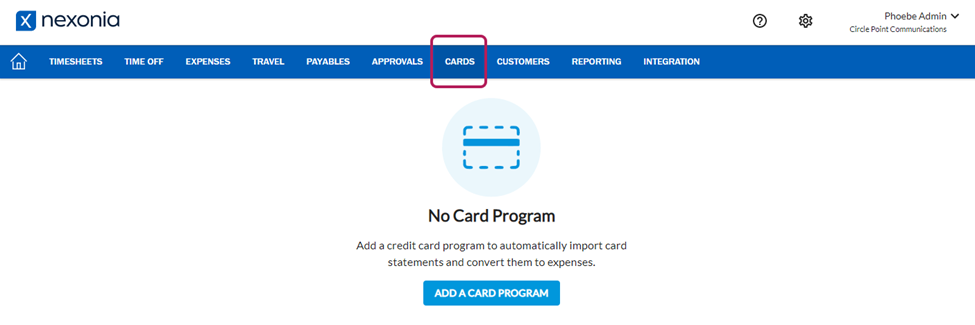
Once the permissions have been enabled by your Nexonia Support team, the Cards tab will appear in the top menu bar.
Once a Card Program is selected, the cards associated with the Emburse Cards account are imported into Nexonia.
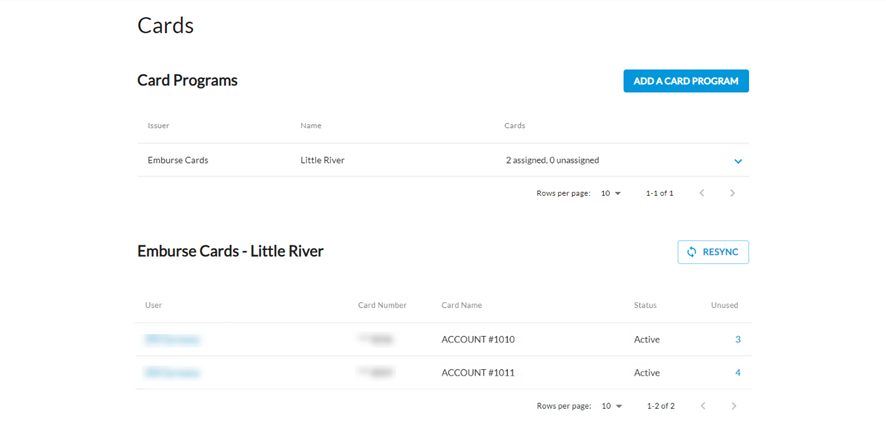
The Nexonia Administrator can then use the Cards Gateway to manage the virtual cards and import transactions for expense reports.
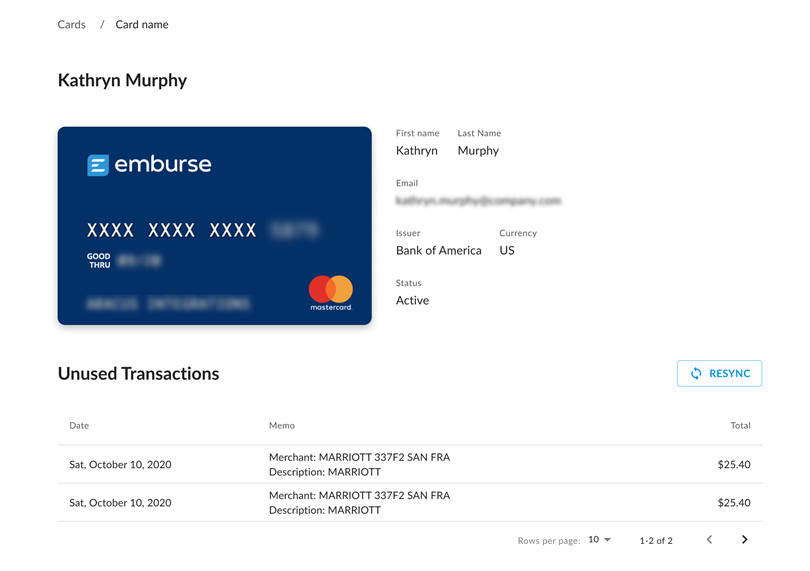
For more information on how to set up the Nexonia Cards Gateway, click here.
Nexonia's New Navigation
-
In the next month, Nexonia will transition to a new Navigation Bar for a more streamlined look and feel. The new navigation bar allows for a consistent user experience across all Emburse products, saving time when learning a new product.
This article shows you the changes made to the Nexonia Navigation Bar.
Step 1: To access the new Navigation Bar, click the Try it Now button at the top of your Nexonia homepage.
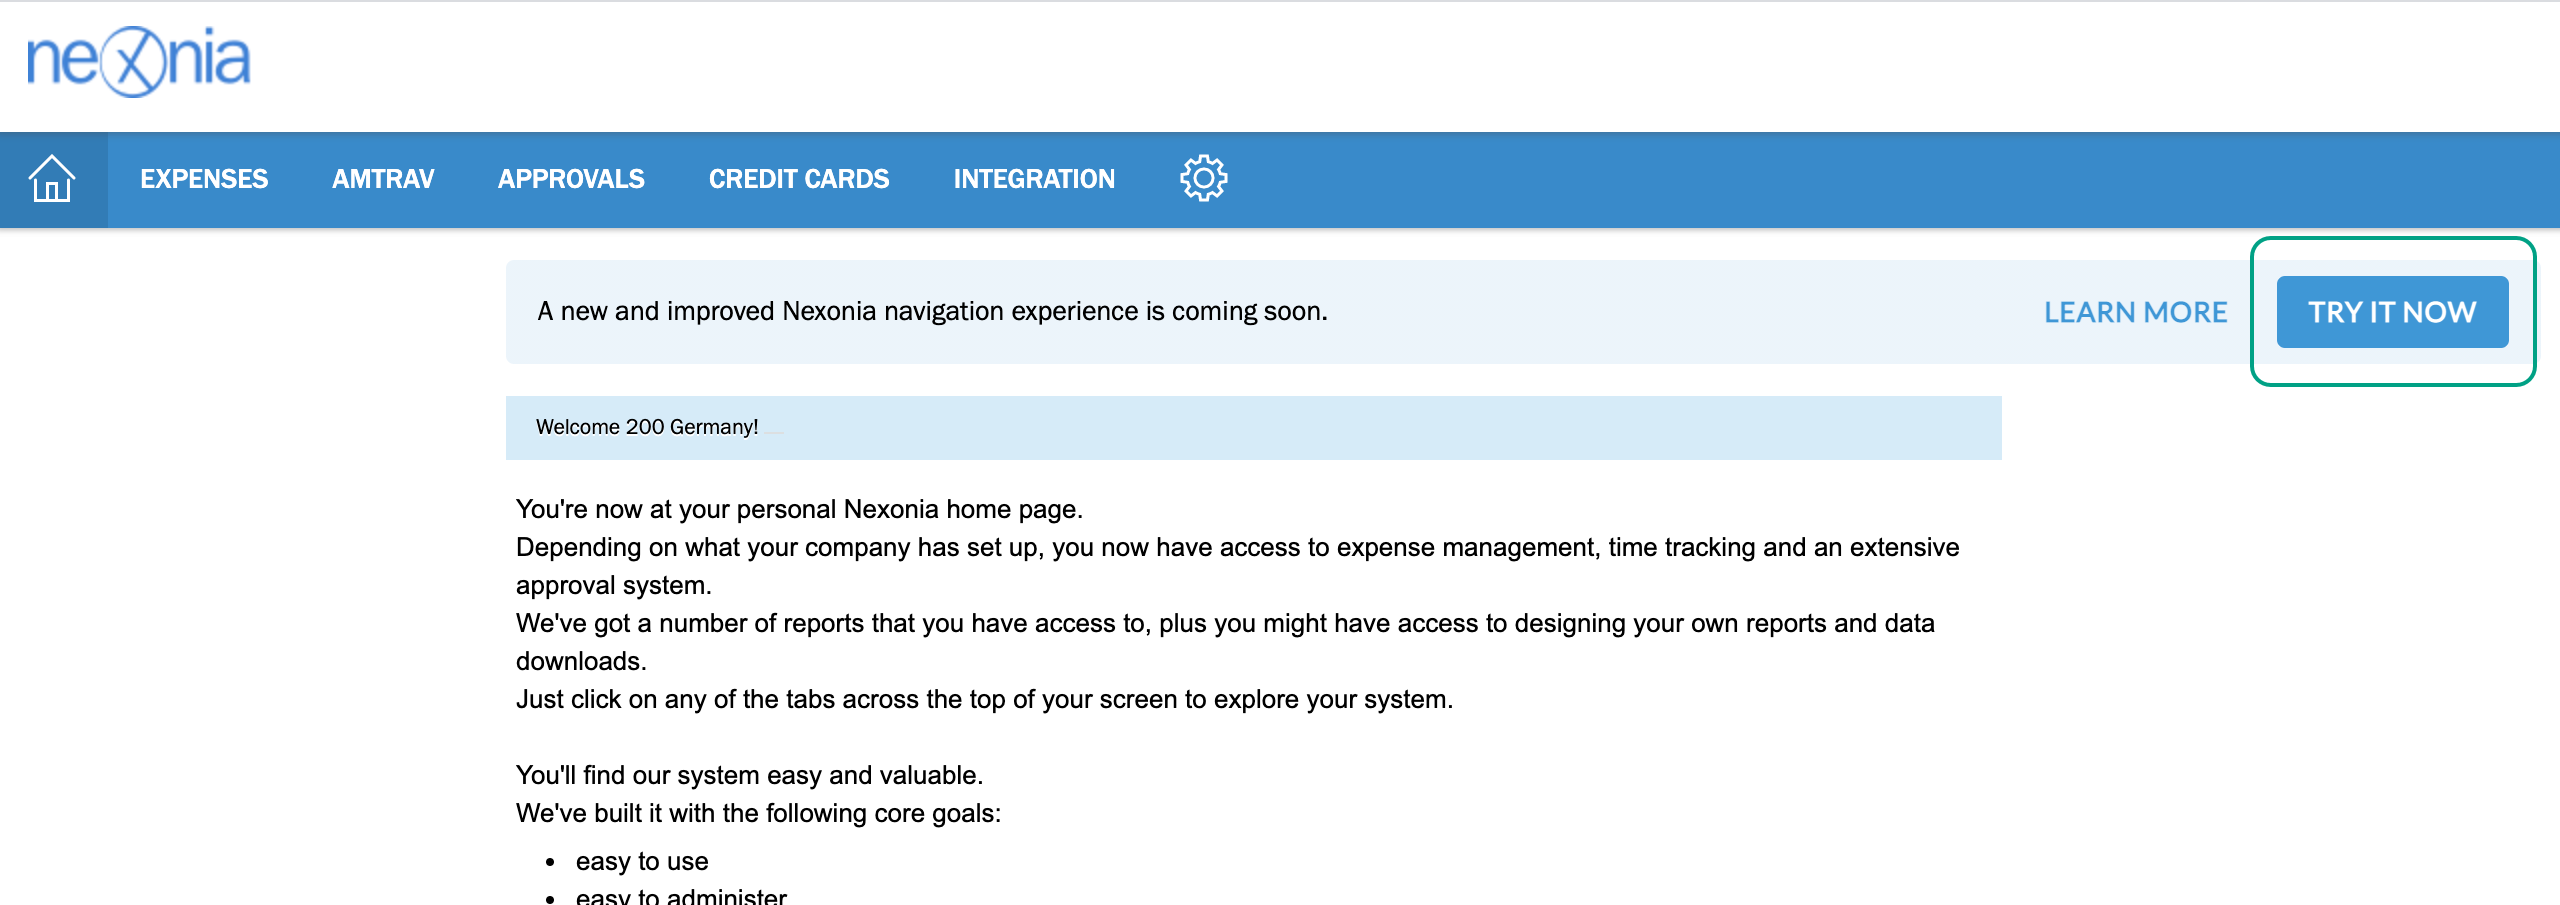
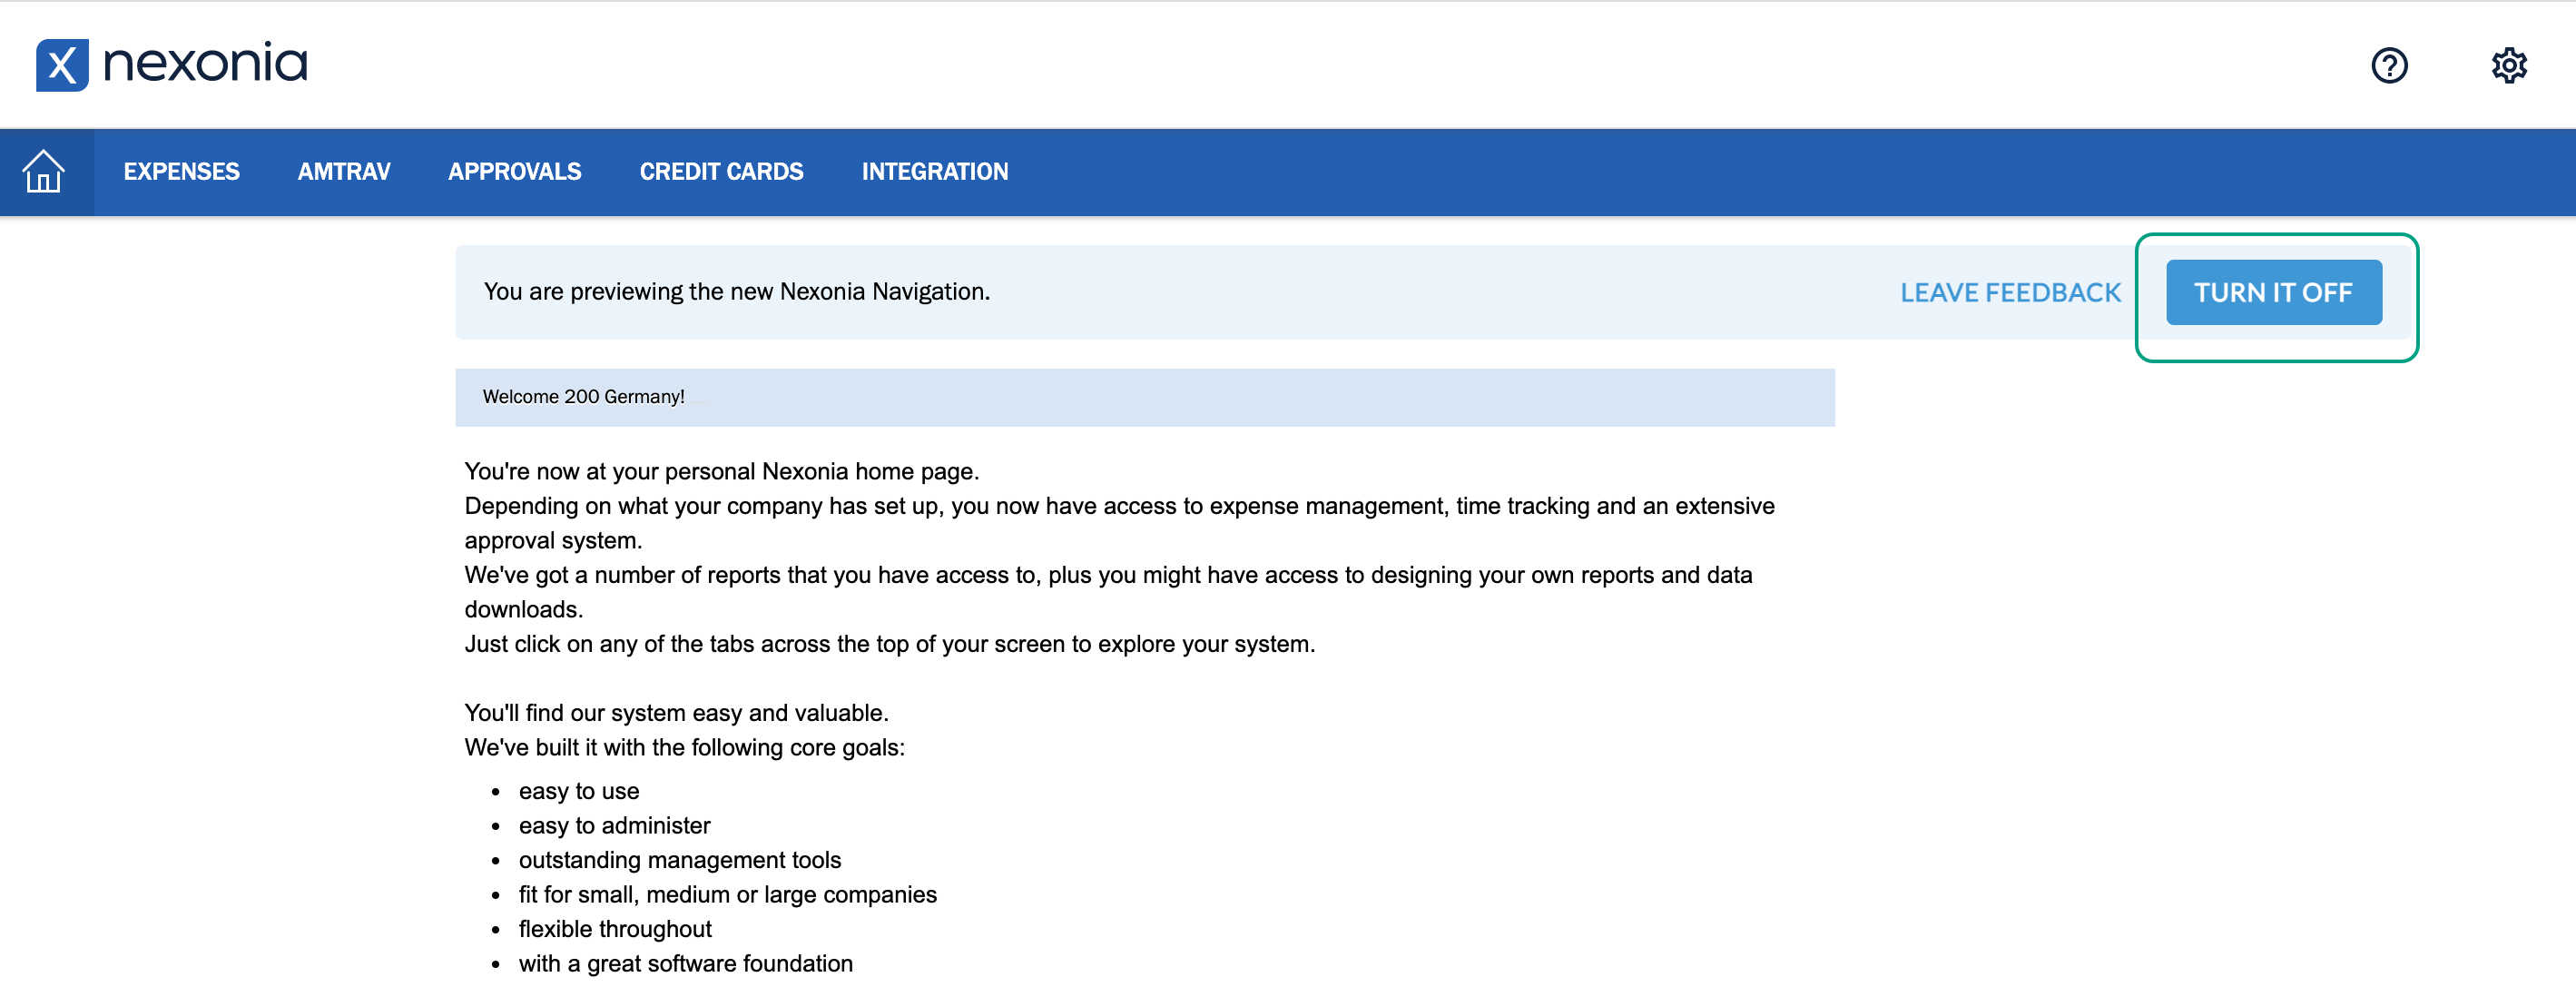
Until early November, Nexonia Users can leave feedback or turn off the new Navigation Bar by clicking the options at the top of the page.
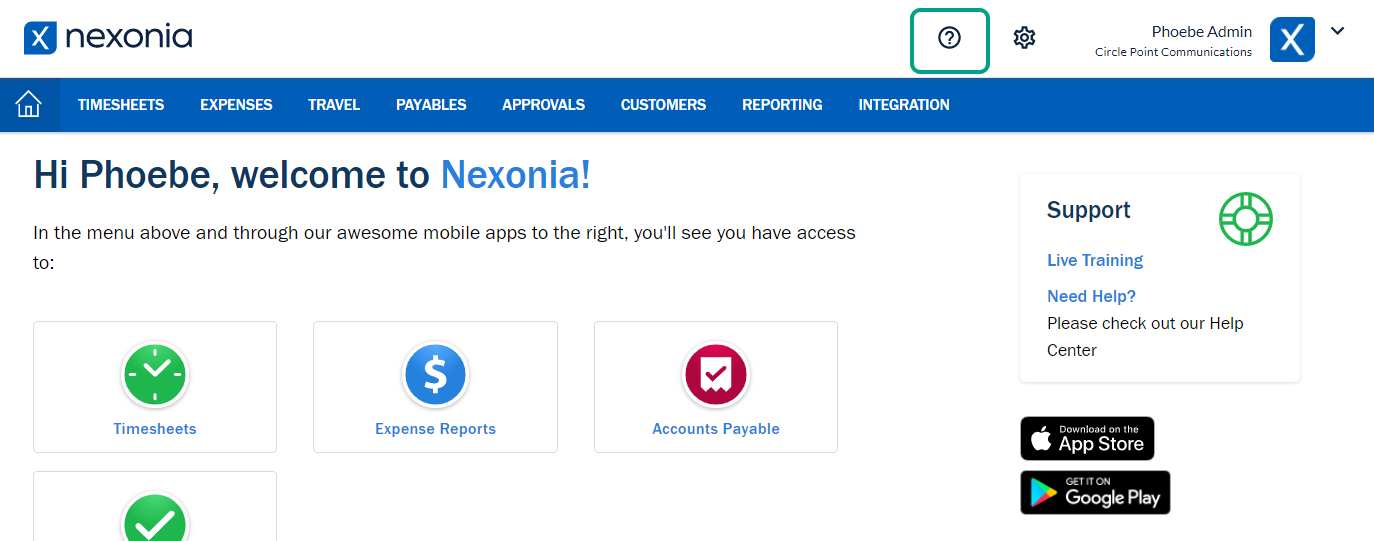
Step 2: Click the Question Mark icon to directly access the Nexonia Support page.
Step 3: To access the Company Settings page, Nexonia Administrators may now click the Gear icon at the top of the page.
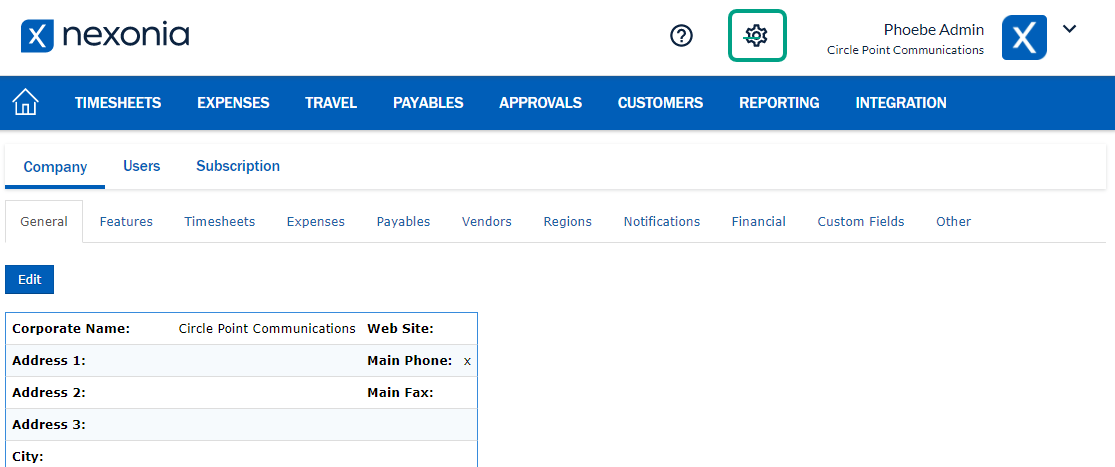
From here, Administrators can manage their company's Nexonia account.
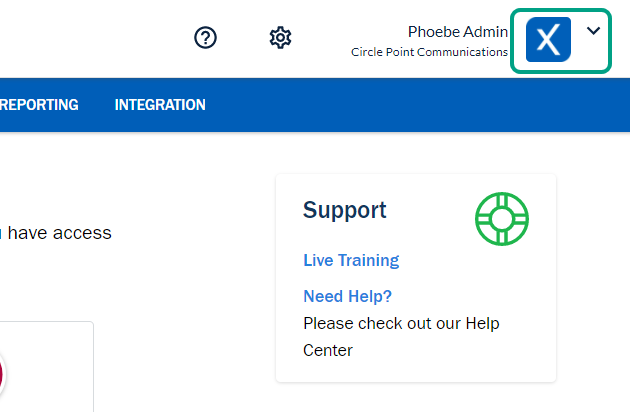
Step 4: Clicking on their Username in the upper right-hand corner of the screen opens a dropdown menu. From here, Users can access their Account Settings or Logout from Nexonia.

Adding an Avatar
After enabling the navigation bar, the Nexonia Administrator must add a company Avatar. Companies that have previously uploaded a Corporate Logo will need to readjust the sizing so it appears properly in the avatar area.
Please Note: Companies without a corporate logo will default to the Nexonia logo once the new navigation bar is enabled.
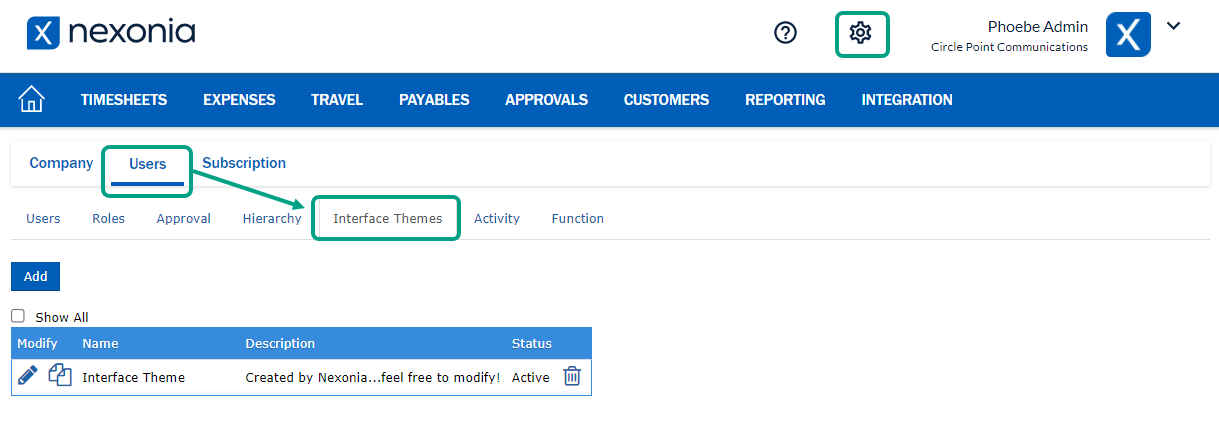
Step 1: Click the Gear icon to open the Company Settings page. Next, open the Users tab and select Interface Themes.
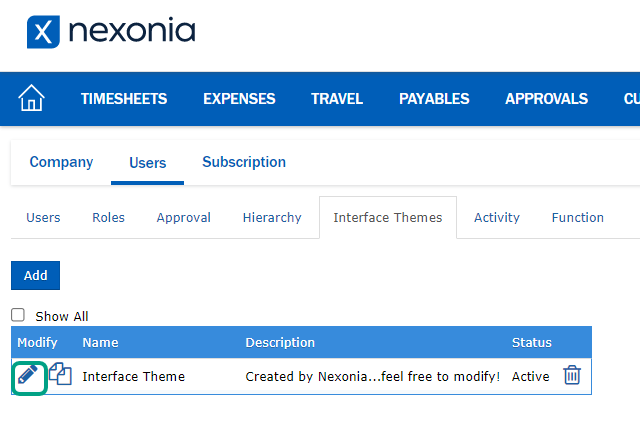
Step 2: Click the Pencil icon to edit the Interface Theme.
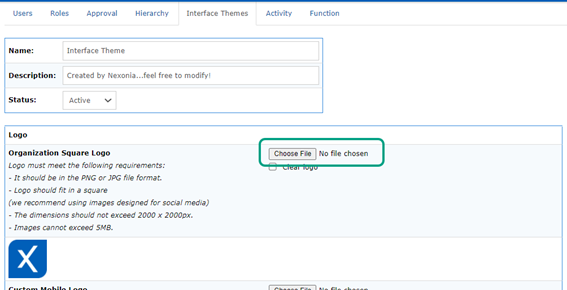
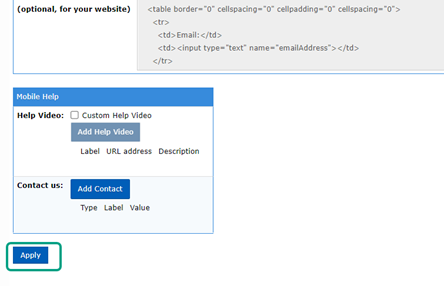
Step 3: Next to Organization Square Logo, click Choose File to upload a logo that meets the image requirements.
Step 4: Click the Apply button at the bottom of the page when finished.
Release Notes: May 4, 2021
-
Direct Deposit User Report
A new highly requested feature has been added to Nexonia that will allow Administrators to export a report that tells them which users have entered their banking information and are enabled for direct deposit to Western Union Business Solutions.
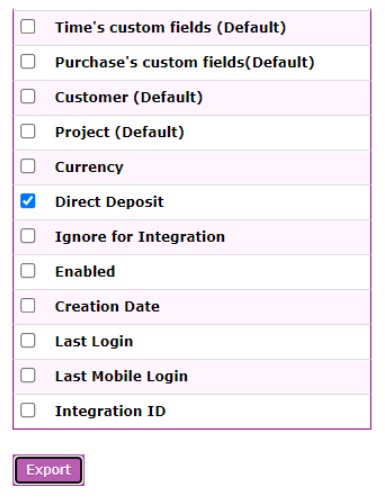
The report export can be found under Settings > Users > Export Users. Selecting the Direct Deposit option will add a new column that will read Yes/No on whether the user has entered their banking information.
Release Notes: March 31, 2021 Release Notes: February 25th 2021
-
Unfiled Expenses - Create New Report
A new feature has been added to Unfiled Expenses for users to create a new report when moving their expenses to the reports module.
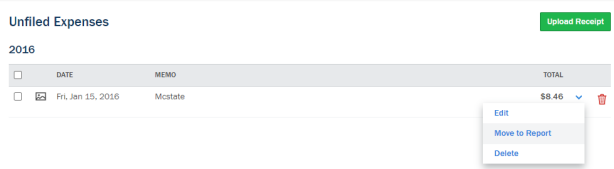
After selecting the option to Move to Report, users will now see the New Report option in the upper right-hand corner.
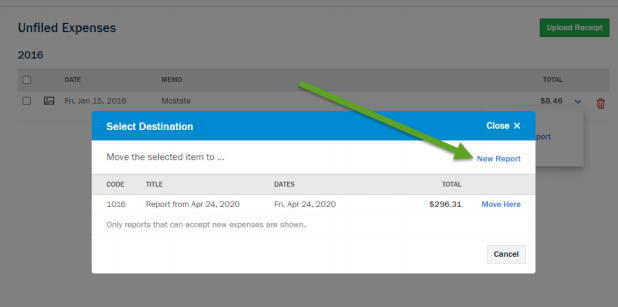
A new report will then be created automatically and the expense will be added to it in the reports module.

-
AmTrav Travel
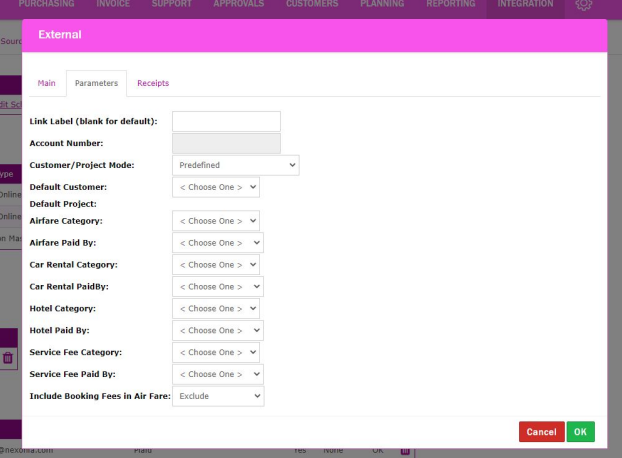
Nexonia has partnered with AmTrav to offer a new Travel booking integration. To add a new AmTrav integration, navigate to Integration > Integration Setup > Add Travel Integration > Select Integration Type: AmTrav.
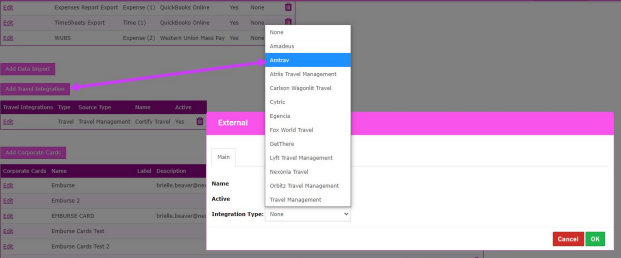
Please Note: You will need a Nexonia agent to assist entering your AmTrav account number.
Users will then have an AmTrav option in their header that will allow them to Single Sign On (SSO) into AmTrav and create travel expenses. If a profile has not been created for a user, AmTrav will create one automatically.
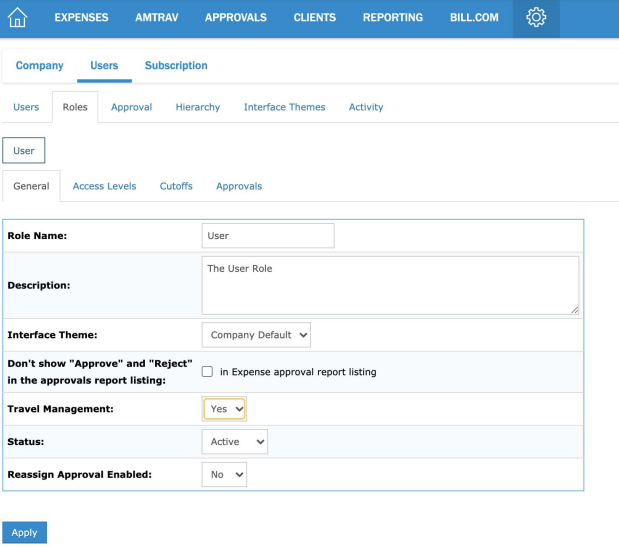
To enable or disable the Travel module for any user role, go to Settings > users > roles > select a role > general > Travel Management = No
All travel expenses that are pre-paid will be automatically brought back into Nexonia, onto an expense report, and linked to all items within the report.
Please Note: Travel expenses that are not pre-paid will not be automatically brought into Nexonia, and the emailed receipts will need to be manually emailed to receipts@nexonia.com. Also, if a user has an email address used twice within a Nexonia account or used twice in different Nexonia accounts this is not supported for an AmTrav integration.
If you're looking for information and additional help on AmTrav, visit their Knowledge Base.
Release Notes: November 16, 2020 Release Notes: November 5, 2020 Release Notes: October 30, 2020
-
Invoice OCR Scanning on Payables
Nexonia has added the second iteration of OCR Scanning on Invoices on our Payables Module.
There are two ways to create a bill on payables and OCR is supported for both. First, an invoice can be mailed using the unique vendor email address. A bill will automatically be created, the invoice sent to OCR for processing, and the returned following fields populated:
- Vendor Name
- Invoice Number
- Invoice Date
Secondly, if a bill is manually created in Nexonia, you can add the invoice as an attachment. When added, the invoice is automatically sent to OCR for processing. We have now added real-time page updates to show the invoice in the OCR process:
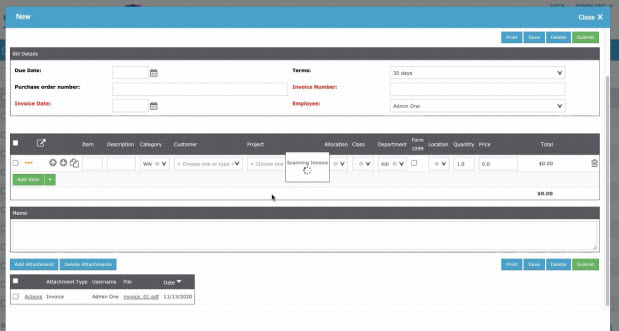
If you close or refresh the page, the real-time notification will be removed but the results will still
populate.As this is only our second iteration, we also look forward to expanding the supported fields to include Terms, Due Date, and PO Number.
-
Upgraded Bill.com Vendor Auto-Match Service
Previously, we upgraded our Bill.com integration by auto-matching BDC Vendors to Nexonia Users.
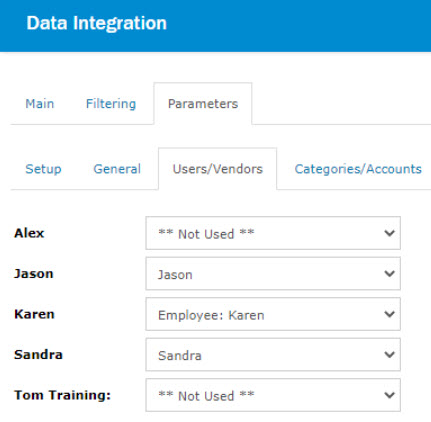
We have now upgraded our integration even further to automatically run syncs as well as save the vendor auto-mapping without Admin intervention.
If you already have an active Bill.com configuration sync inside the data integration (parameters tab) the sync will be tied to the BDC data integration's schedule (e.g. hourly or overnight).
If you do not have an active schedule, your sync will automatically be run overnight.
-
Invoice OCR Scanning on Payables
Nexonia has now added the first iteration of OCR Scanning on Invoices on our Payables module.
There are two ways to create a bill on payables and OCR is supported for both. First, an invoice can be emailed using the unique vendor email address. A bill will automatically be created, the invoice sent to OCR for processing, and the returned following fields populated:
- Vendor Name
- Invoice Number
- Invoice Date
Secondly, if a bill is manually created in Nexonia, you can add the invoice as an attachment. When added, the invoice is automatically sent to OCR for processing.
Please Note: In this first iteration you will need to close and reopen the bill to see the populated results. In our next iteration we will add real time page updates so you will see results without having to reopen the bill.
Additional Update
Nexonia supports sending receipts by email. You can simply attach your receipt images to an email or forward the email containing your receipts at receipts@nexonia.com.
If you wish to send receipts to your Unfiled Expenses, you don't have to do anything special as it is the default behavior.
Release Notes: September 17, 2020 Release Notes: August 25, 2020
-
Auto-Assign Credit Cards to Users
In an effort to reduce setup time for Administrators, a new feature has been launched that will auto-assign your imported credit cards to your Nexonia users based on name matching.
Whether your cards are imported from feeds or uploads, when new card profiles are created in Nexonia, the system will search your user list and assign the card profile based on an exact name match. The auto-assigning is not case sensitive and will only assign cards if they are previously unassigned.
-
Reports Archive
Recently, changes have been made to our reporting module to better scale and handle larger reporting requirements. As part of those upgrades, support for direct browser generation of reports needed to be removed. For those who preferred that functionality, there have been more upgrades to our report module.
First, a Reports Archive has been added, and is located on a new tab in the reporting module.

This new section will list any of your previously generated reports with an option to download them again. Importantly, any report that has been recently run will appear here as soon as it has finished processing, which means for smaller reports, you do not have to wait for the email to be sent containing the report.
Please Note: In this first iteration we will not have real time page feedback so you will need to refresh your we browser to see newly generated reports. We plan on adding the real time feedback in future iterations.
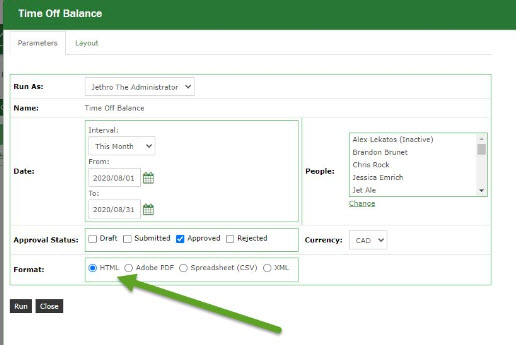
Lastly, the ability to generate reports in the HTML format has been brought back.
Release Notes: June 10, 2020 Upcoming Reporting Module Update: May 2020
-
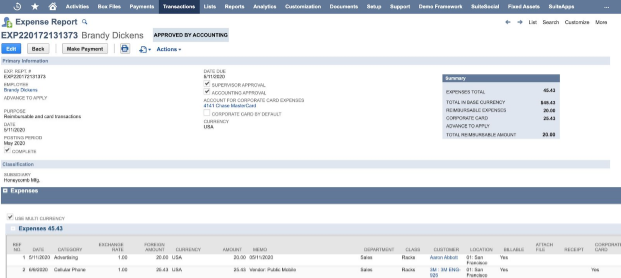
NetSuite - Ability to Send Credit Card Transactions to Expense Reports
Previously, NetSuite supported sending non-reimbursable credit card transactions to their Accounts Payable module as a Vendor Bill. They made changes to their software to allow for credit card transactions to be placed on expense reports alongside reimbursable expenses.
We have further enhanced our integration with NetSuite to allow for this new workflow. To configure this in your account, navigate to your Integration Module > Integration Setup (Tab) > Edit Parameters > Expenses > 1 (Tab) > and set "Export As NetSuite Corporate Cards = Yes"
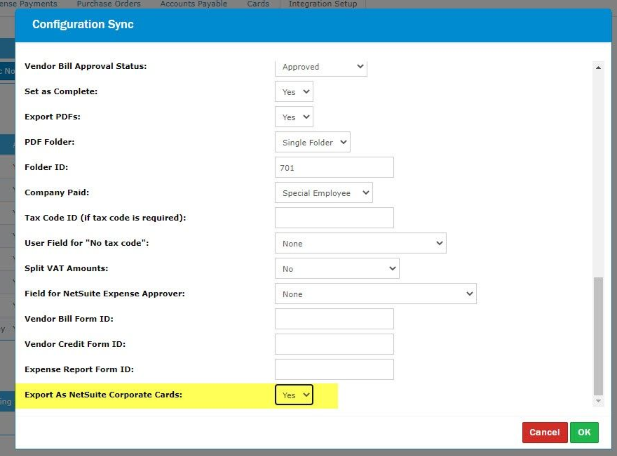 A new tab will appear where you can map your corporate credit cards to their respective accounts.
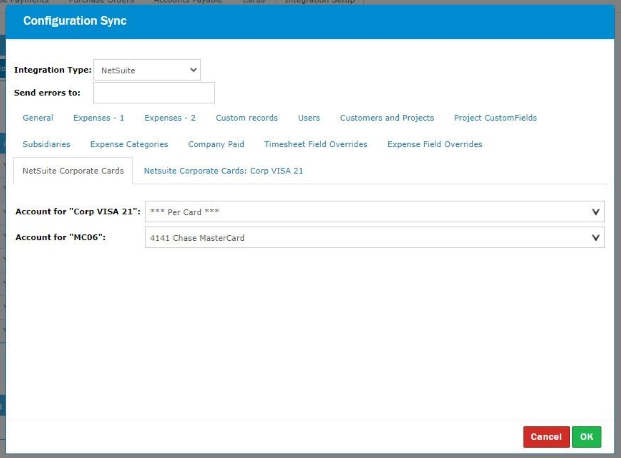 When exported to Netsuite you will be able to see the totals broken out by corporate card, the account the card is mapped to, and Corporate Card Yes / No on the line item detail.
-
There are two changes coming to the Reporting module in early May 2020:
- Format download change
- Report delivery location
Format Download Change
The option to download reports directly in your browser will be removed. You will see PDF, CSV, and XML as your format options.
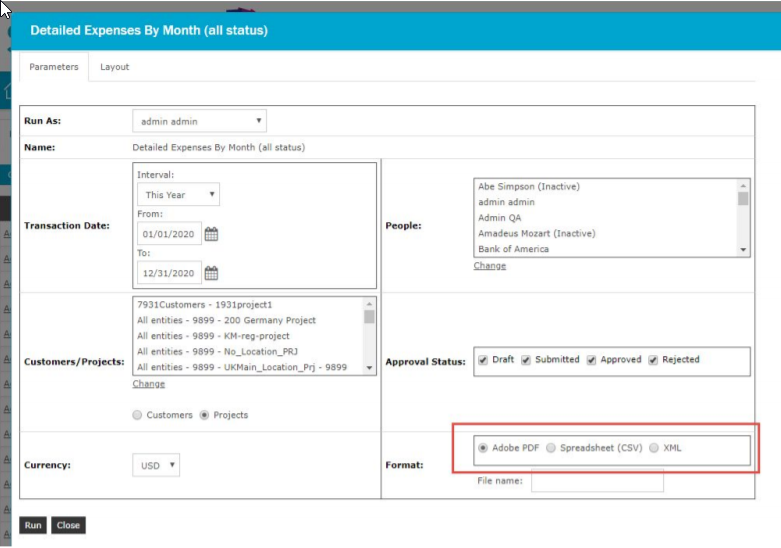
Report Delivery Location Change
In the past, report windows had to be kept open in order for a report run to complete. Now, you will be able to navigate from the report running window because the report will be emailed to you once it's complete.
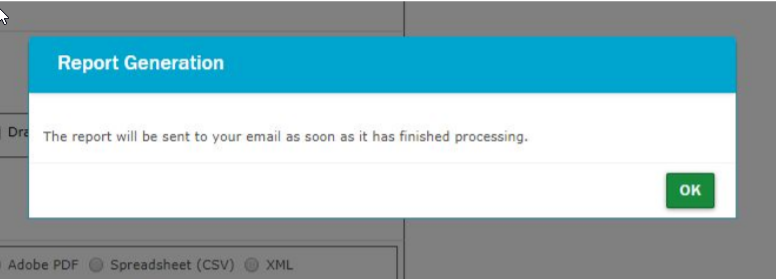
Lastly, you will receive an email with a link to access your report. If you are not already logged into Nexonia, you will be prompted to do so for security reasons.
Release Notes: March 31, 2020 Release Notes: March 13, 2020 Release Notes: February 6, 2020 Release Notes: January 6, 2020
-
Expenses iOS Mobile App
The Nexonia Expenses Mobile App has been updated to provide a quicker way to submit expense reports.
Please Note: You will need to have IOS 11, 12, or 13 and have downloaded the Nexonia Expenses Mobile App Version 11.9.2 from the app store.
In this first iteration of updates, you will see a button on your Expenses App homepage that gives you access to the new workflow.
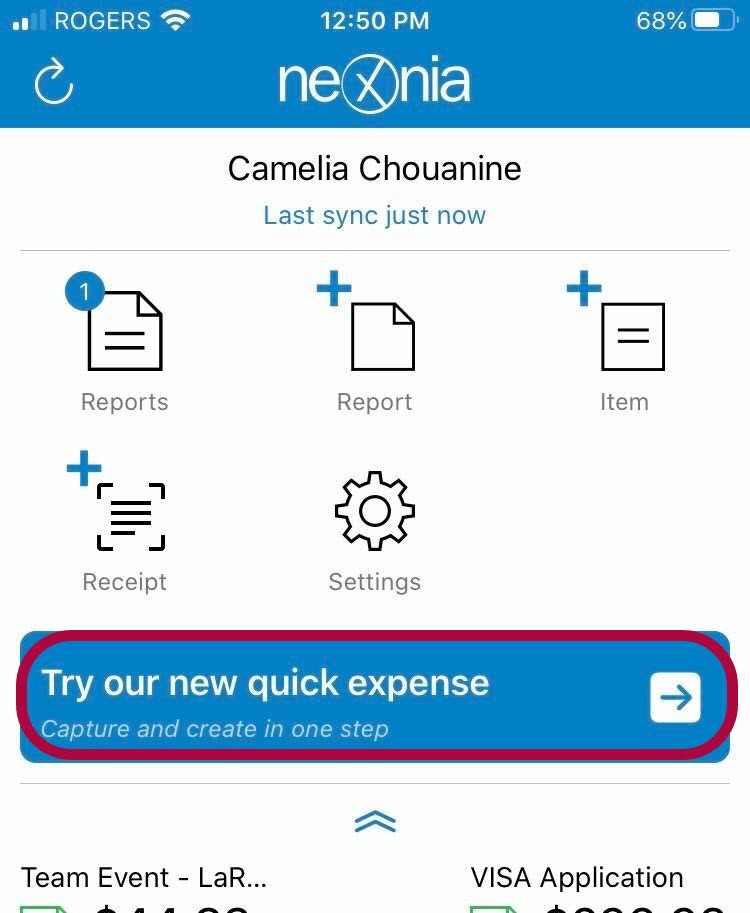
From this new mobile workflow, you can quickly upload receipts as expense lines into a report titled Unfiled Expenses. For information on using this new workflow, view our article on Using Nexonia Mobile's Quick Expense Workflow.
Some key features include:
- Once you capture your receipt image, the app will automatically begin scanning it using OCR technology. You no longer need to wait to see the results. If you leave the screen before the scan has been completed the results will still populate.
- Previously, you were required to enter certain pieces of data before you could save your expense. We have removed those requirements in this workflow to allow you to more rapidly enter your expenses and the freedom to choose when you would like to enter your data.
- On Nexonia Web, the Unfiled Expenses Report will be placed on top of all other expense reports regardless of filtering.
- Regular reports contain the same data requirements as before therefore to further edit or submit your expenses you will need to enter the required data before moving the expense from the Unfiled Report to a regular report.
-
Upgraded OCR Engine to Emburse Receipt Transcriptoin
Our OCR engine has been upgraded to the new Emburse Receipt Transcription service. Users can expect to see 20-40% more accuracy in results, as well as a return rate on average of six seconds which is down from our previous return rate average of 30 seconds.
We will continue to work on our Emburse Receipt Transaction service and expect to expand its capabilities as well as continuously improve accuracy and speeds.
-
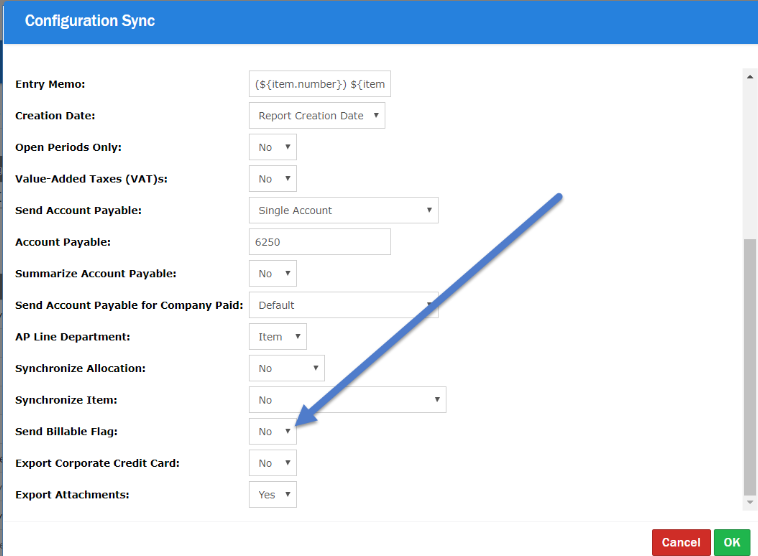
Intacct Enhancement - Billable Journal Entries
Support has been added for the billable status on journal entries for both Expenses and Cards. To enable in your account, go to your Intacct integration settings. In the Expenses as Journal Entries (tab) there is a new setting Send Billable Flag: (Yes/No). When enabled, we now will send the Billable Flag on the GLAccount line for Non-Card Expenses to Journal Entries.
We have also added the same setting to the Cards as Journal Entries (tab). When enabled, we now will send the Billable Flag on the GLAccount line for Credit Card Expenses to Journal Entries.
Bug Fixes
Unexpected Error
We fixed the issue where standard error messages for integration syncs were being replaced with an unexpected error.
-
NetSuite - Batch Expense Exports
To help reduce potential export errors, we have added the ability to limit the size of NetSuite exports by batching expense reports.
Bug Fixes
- Fixed an issue where there was an incorrect amount of decimal places for Time Off Bank Accrual reports
- Fixed an issue where merged card transactions would contain the incorrect exchange rate
- Fixed performance issues when accessing the Account Usage page
- Fixed an issue where a NumberFormatException occurred when VAT is set to $0
- Fixed an issue where there was an error when running Time Off Balance report containing the data column "User Bank - Total Accrued in Reporting Period"
- Fixed an issue where downloading attaching XLSX/DOCX Files from payables was missing the file extension
- Fixed an issue with Account Usage where fetching the current year was hard coded instead of getting the current year
- Fixed an issue where bulk approval was not functioning when there was pagination on the expense approval page