
In the next month, Nexonia will transition to a new Navigation Bar for a more streamlined look and feel. The new navigation bar allows for a consistent user experience across all Emburse products, saving time when learning a new product.
This article shows you the changes made to the Nexonia Navigation Bar.
Step 1: To access the new Navigation Bar, click the Try it Now button at the top of your Nexonia homepage.
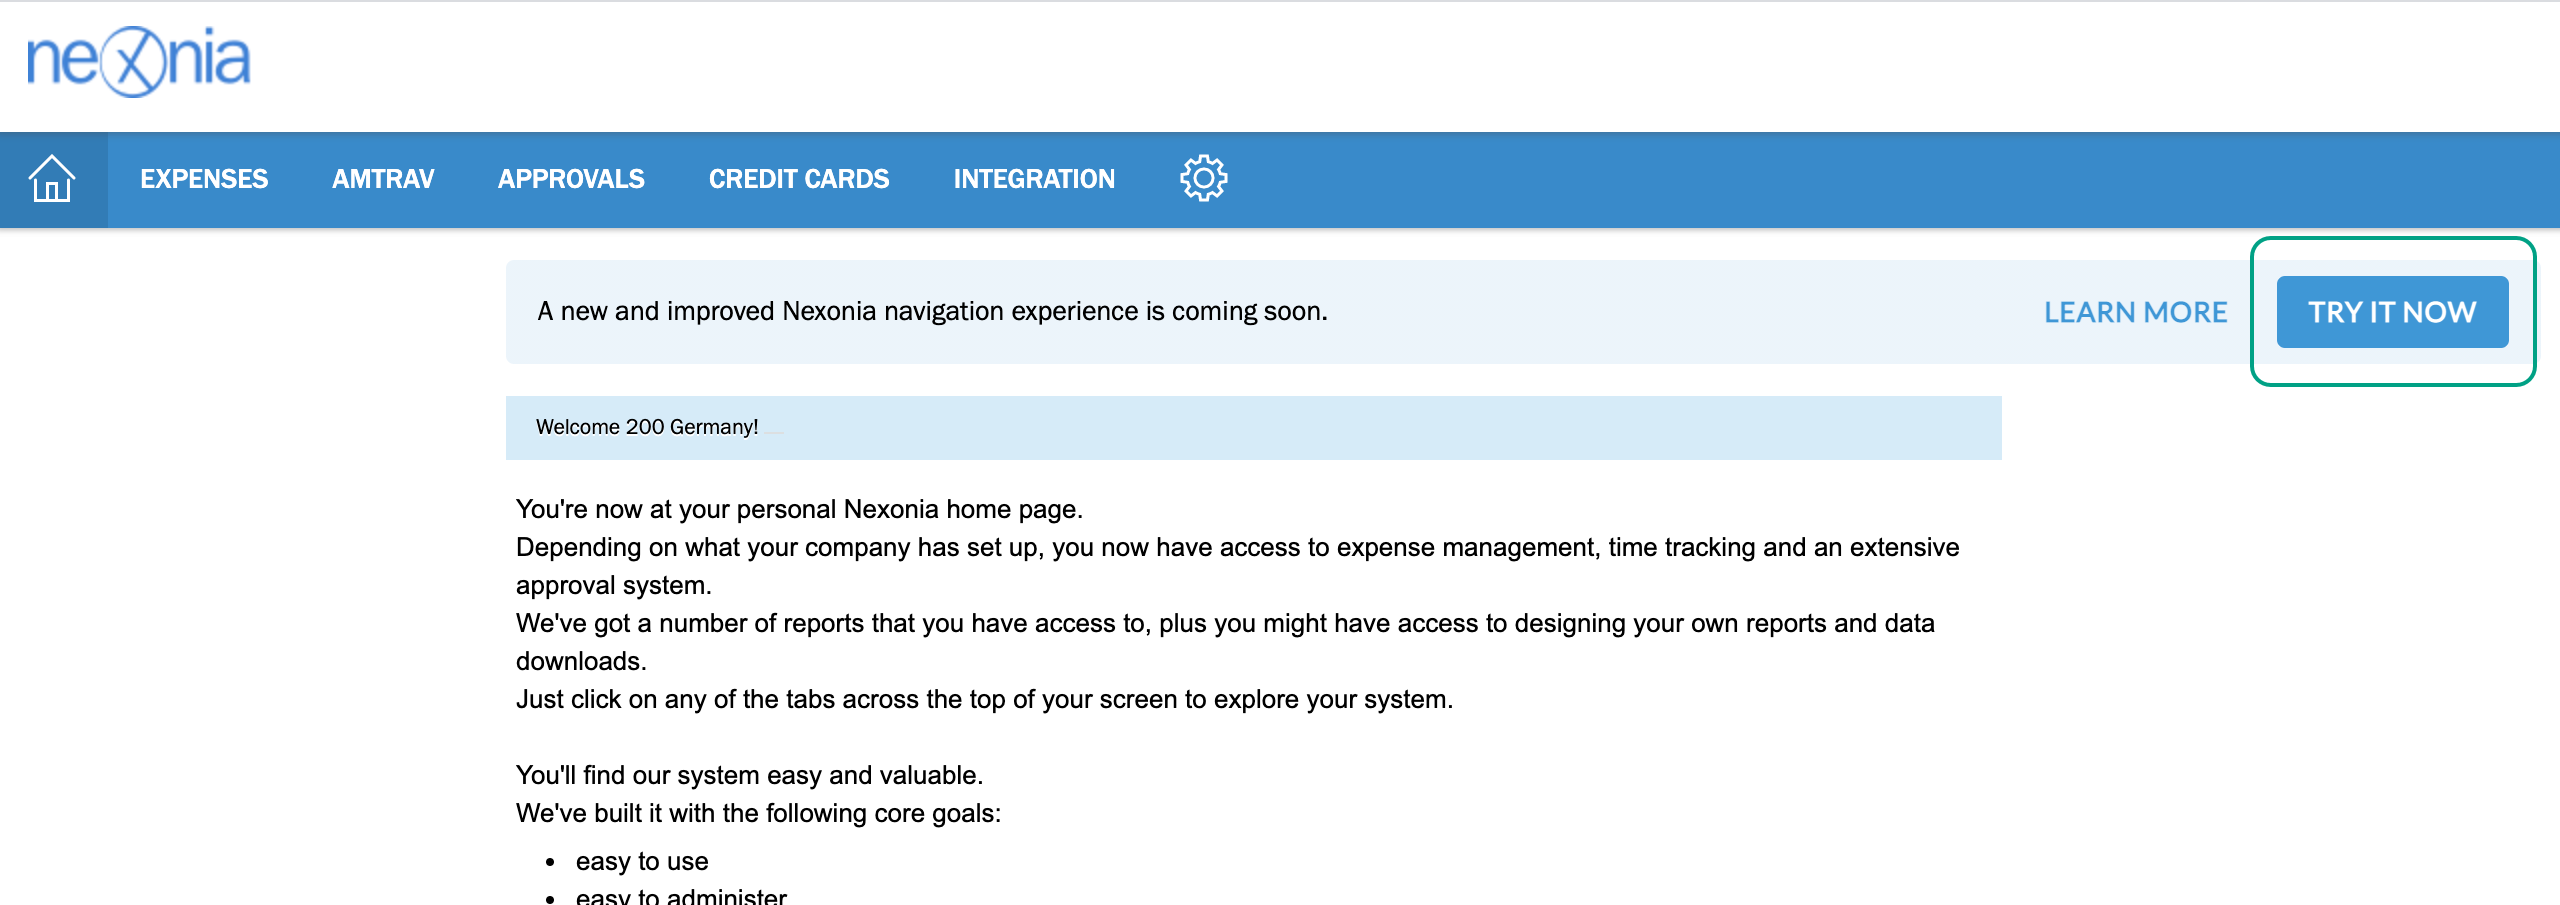
Until early November, Nexonia Users can leave feedback or turn off the new Navigation Bar by clicking the options at the top of the page.
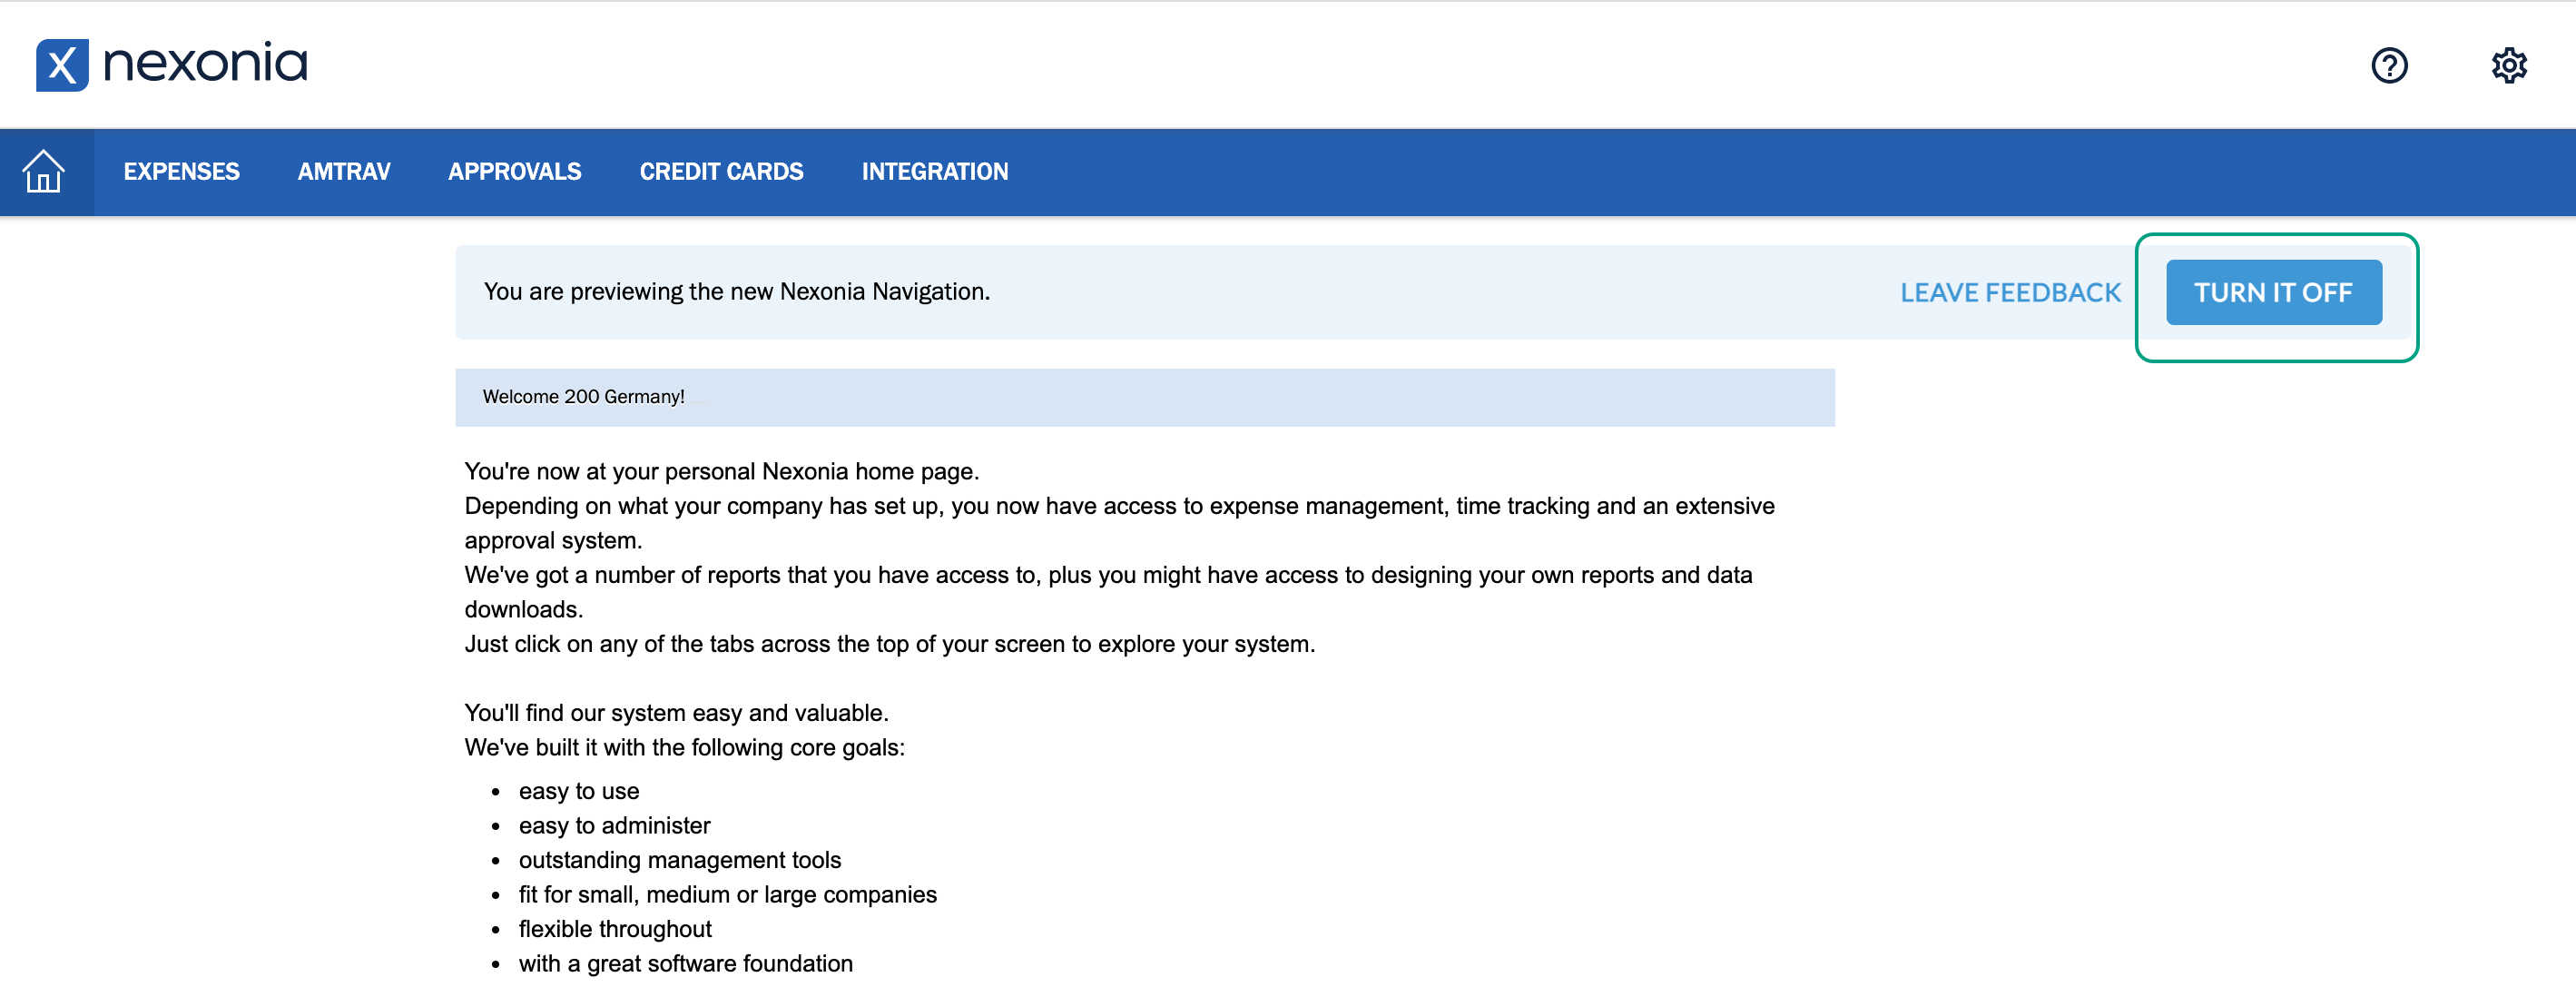
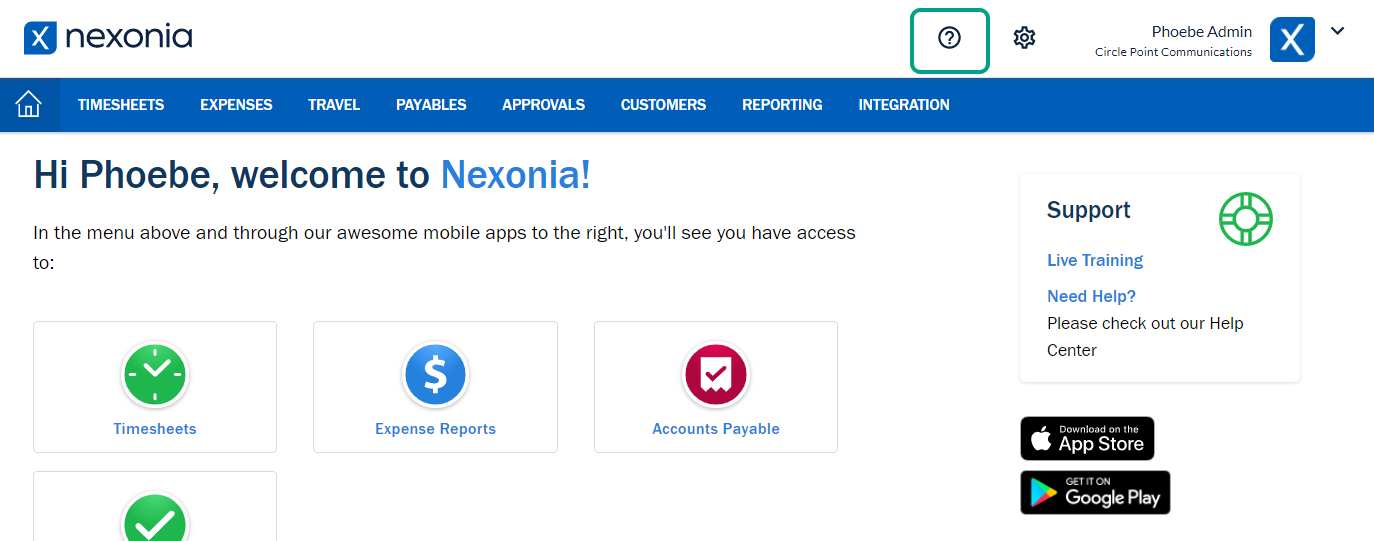
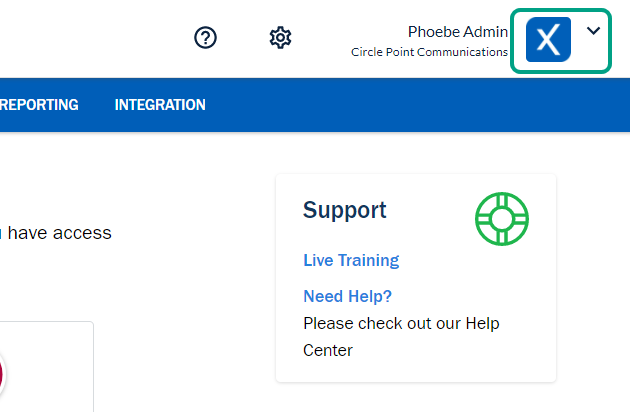
Step 2: Click the Question Mark icon to directly access the Nexonia Support page.
Step 3: To access the Company Settings page, Nexonia Administrators may now click the Gear icon at the top of the page.
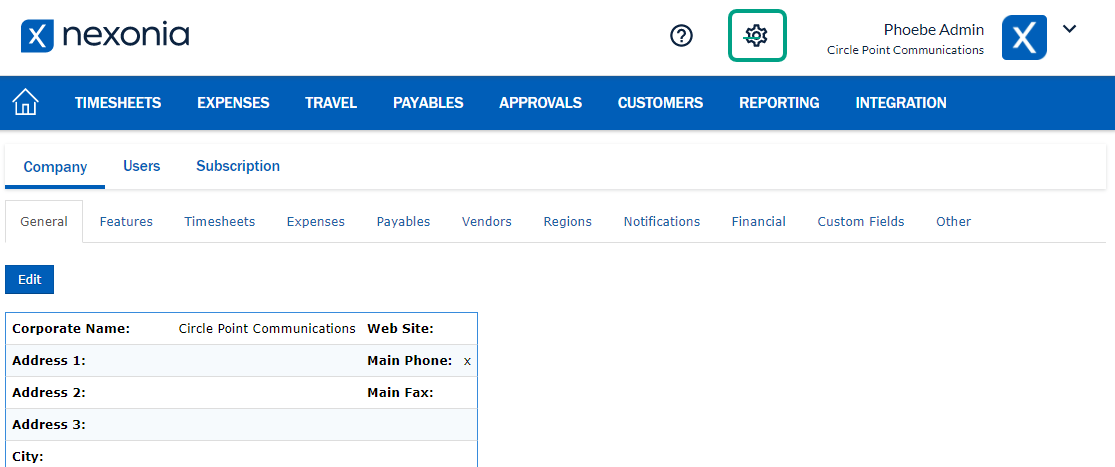
From here, Administrators can manage their company's Nexonia account.
Step 4: Clicking on their Username in the upper right-hand corner of the screen opens a dropdown menu. From here, Users can access their Account Settings or Logout from Nexonia.

Adding an Avatar
After enabling the navigation bar, the Nexonia Administrator must add a company Avatar. Companies that have previously uploaded a Corporate Logo will need to readjust the sizing so it appears properly in the avatar area.
Please Note: Companies without a corporate logo will default to the Nexonia logo once the new navigation bar is enabled.
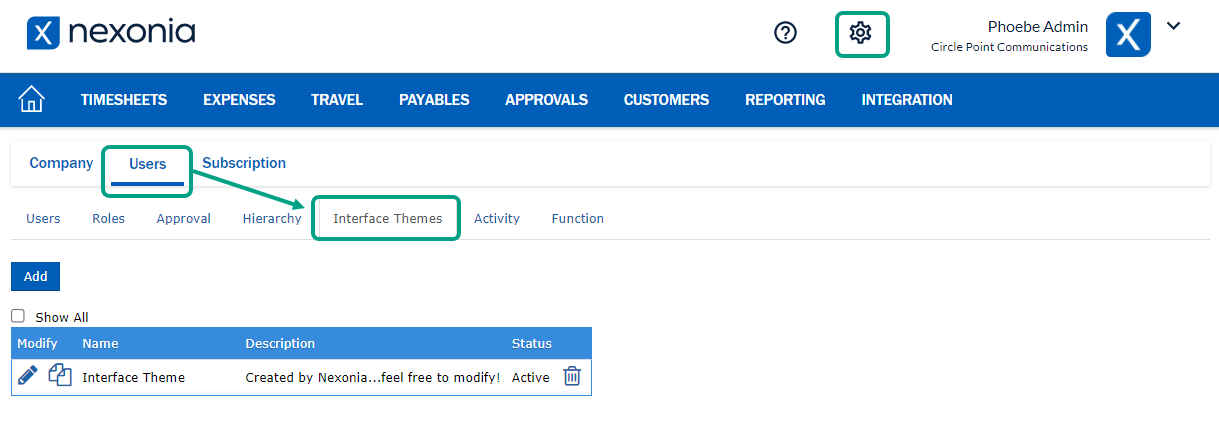
Step 1: Click the Gear icon to open the Company Settings page. Next, open the Users tab and select Interface Themes.
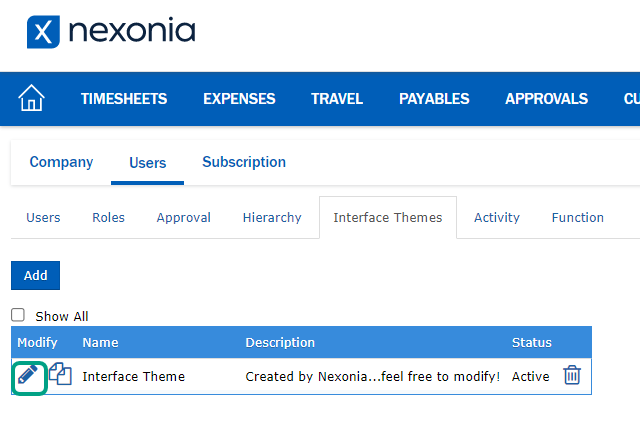
Step 2: Click the Pencil icon to edit the Interface Theme.
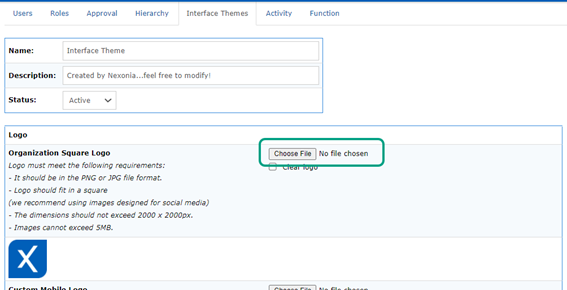
Step 3: Next to Organization Square Logo, click Choose File to upload a logo that meets the image requirements.
Step 4: Click the Apply button at the bottom of the page when finished.
Comments
0 comments
Article is closed for comments.