
If you use the Planning Module and all of your Projects have the Planning function set to Yes, you'll be prevented from entering a Project when configuring your Public Holiday Profiles.
Public Holidays are not compatible with planned projects. To enter a Project for a Public Holiday profile, Planning should be turned off temporarily for the Project you want to use with the Public Holiday profile.
This article will show you, a Nexonia Administrator, how to populate public holidays when using planned projects.
Step 1: From the Nexonia homepage, navigate to Customers tab>>Projects.
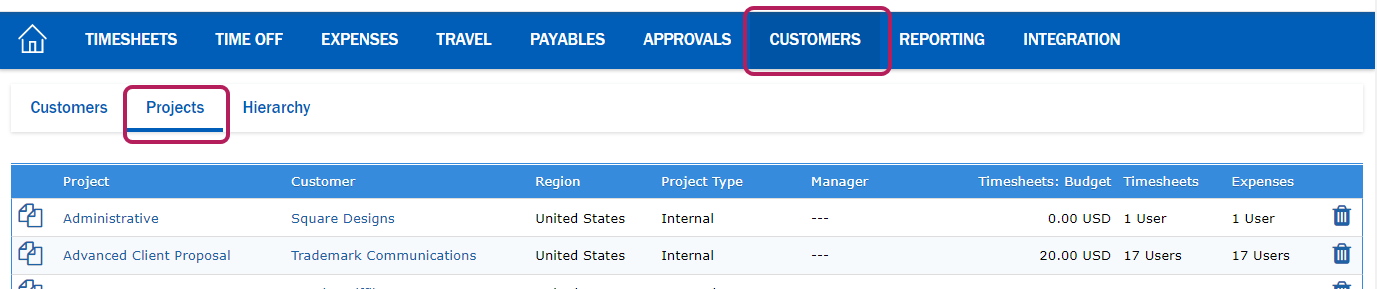
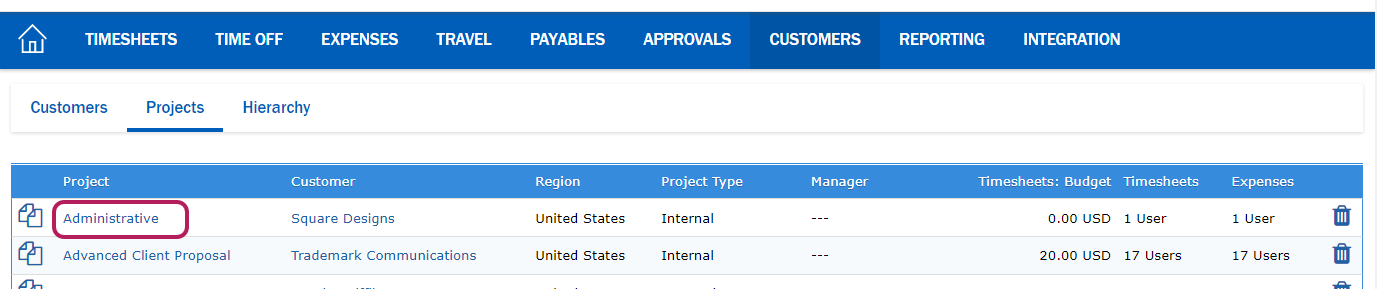
Step 2: Click on the project you wish to use for the Public Holiday profile.
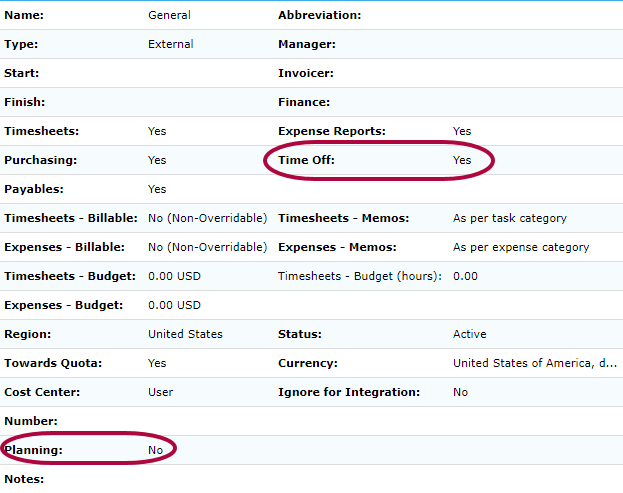
Step 3: Ensure that Time Off is set to Yes and that Planning is set to No.
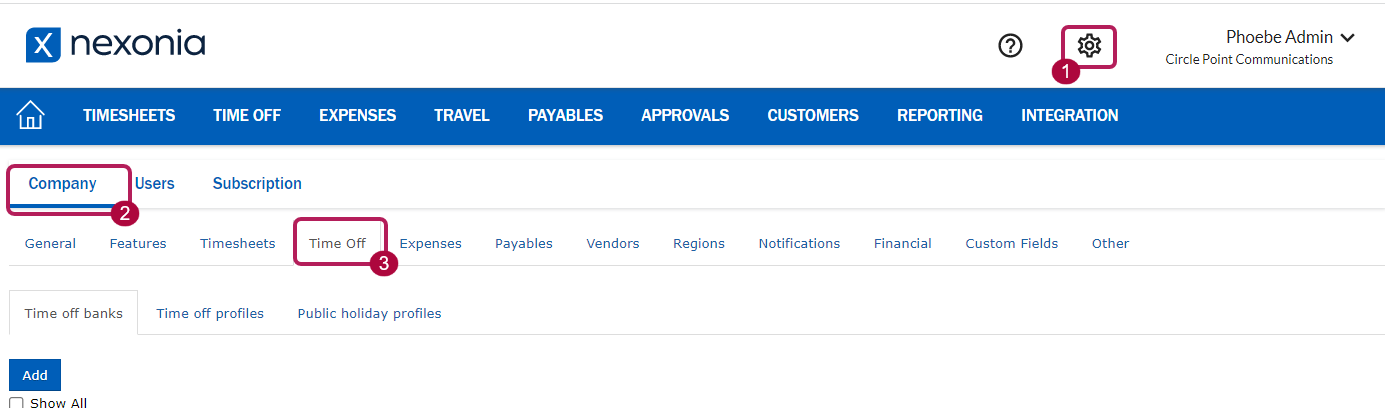
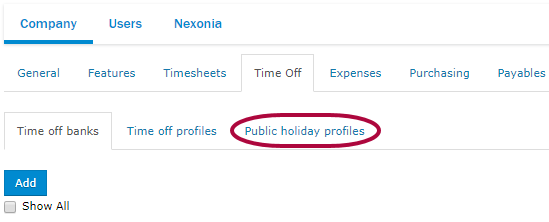
Step 4: Click the Gear icon to navigate to Settings>>Company>>Time Off
Step 5: Click Public Holiday Profiles.
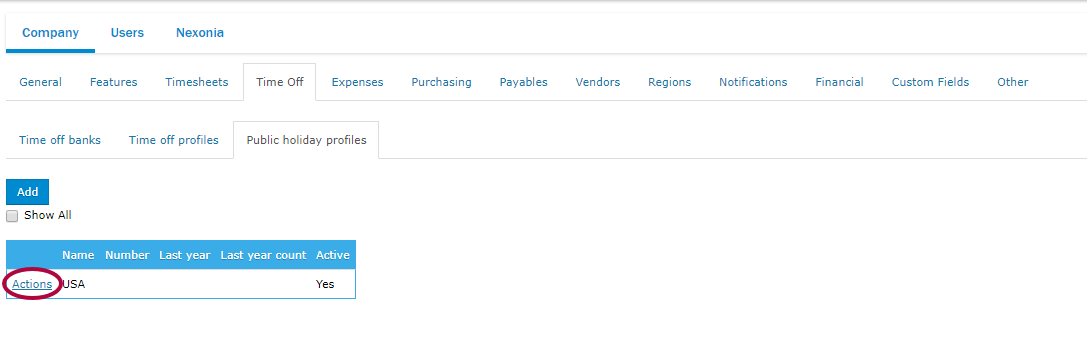
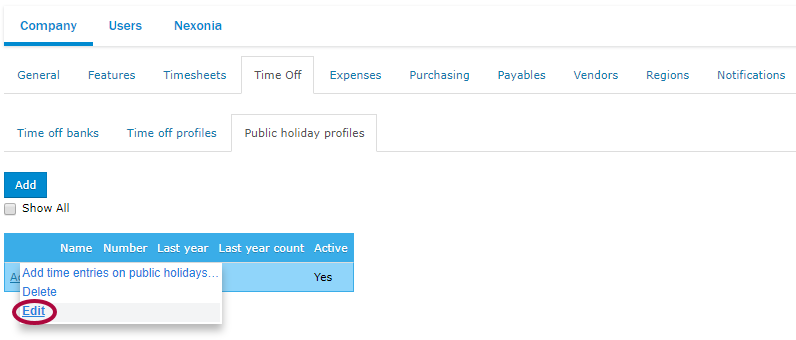
Step 6: Click Actions, followed by Edit next to the relevant profile.
Step 7: Ensure that the Customer tied to the Project you're using is picked in the Customer section. Then, choose the correct Project.
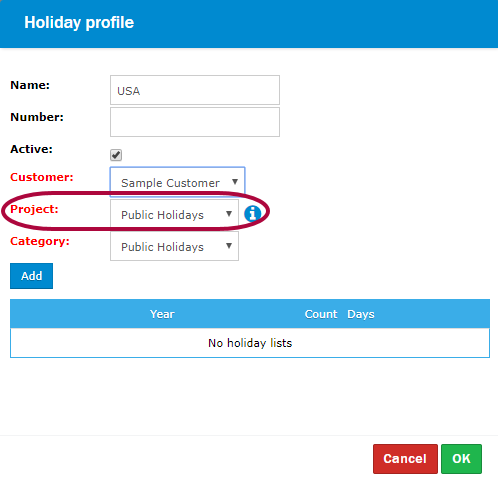
Step 8: Choose a Task Category and click OK to save.

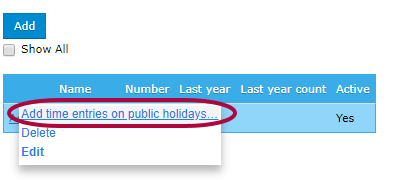
Step 9: Next, go back to the holiday profile and click Actions followed by Add time entries on public holiday.
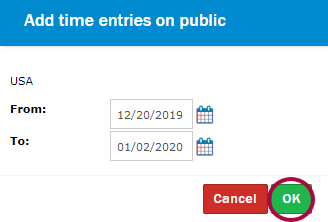
Step 10: Choose a Date Range covering all holidays that you want to populate. Then, click OK.
Step 11: Click Projects under the Customers tab. Then, click on the project that you're using for the Public Holiday profile.

Step 12: Click Edit.

Step 13: Set Planning to Yes. Click Apply when complete.

This gets around the issue of Planned Projects not being available for a Public Holiday profile. Every time you're updating your holidays, this process should be followed. Ideally, this should be done once a year to populate all holidays for that year.
Comments
0 comments
Article is closed for comments.