
For Nexonia accounts integrated with Bill.com, you can manually create Expense Categories in Nexonia and link each Expense Category to a Bill.com Expense Type in the export integration.
Link: Mapping Expense Categories to Bill.com Accounts
Finding the Expense Category List
To create Expense Categories in Nexonia, log in to Nexonia as an Administrator and navigate to Settings > Company > Expenses.
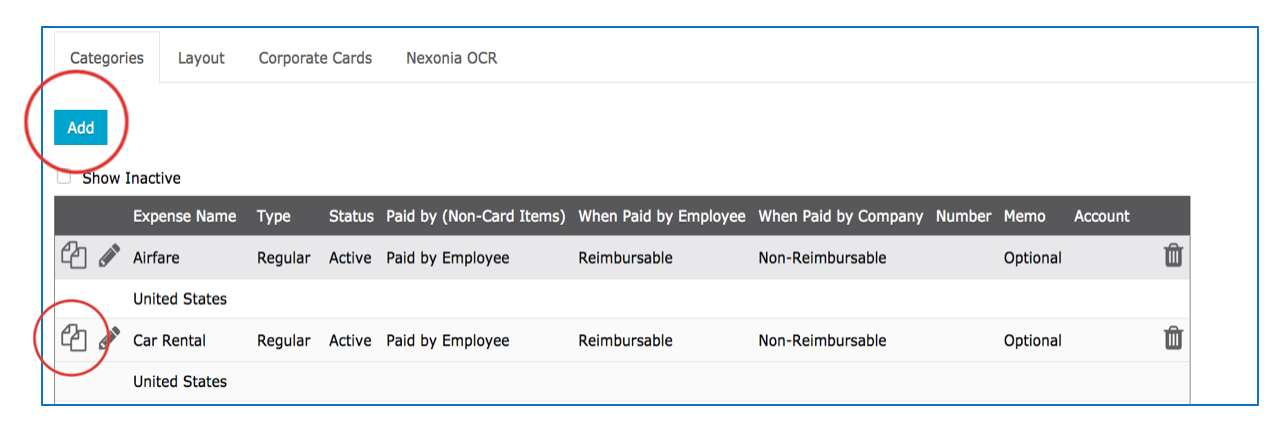
You’ll then see series of subtabs related to Expenses. Click on the Categories tab.
With a brand new Nexonia account, you’ll see a list of pre-existing expense categories. These are common business expense categories (e.g. airfare, car rental, office supplies etc.) that may be relevant to your organization. You can use these pre-existing categories as a start and/or create brand new expense categories.
Editing an Existing Expense Category
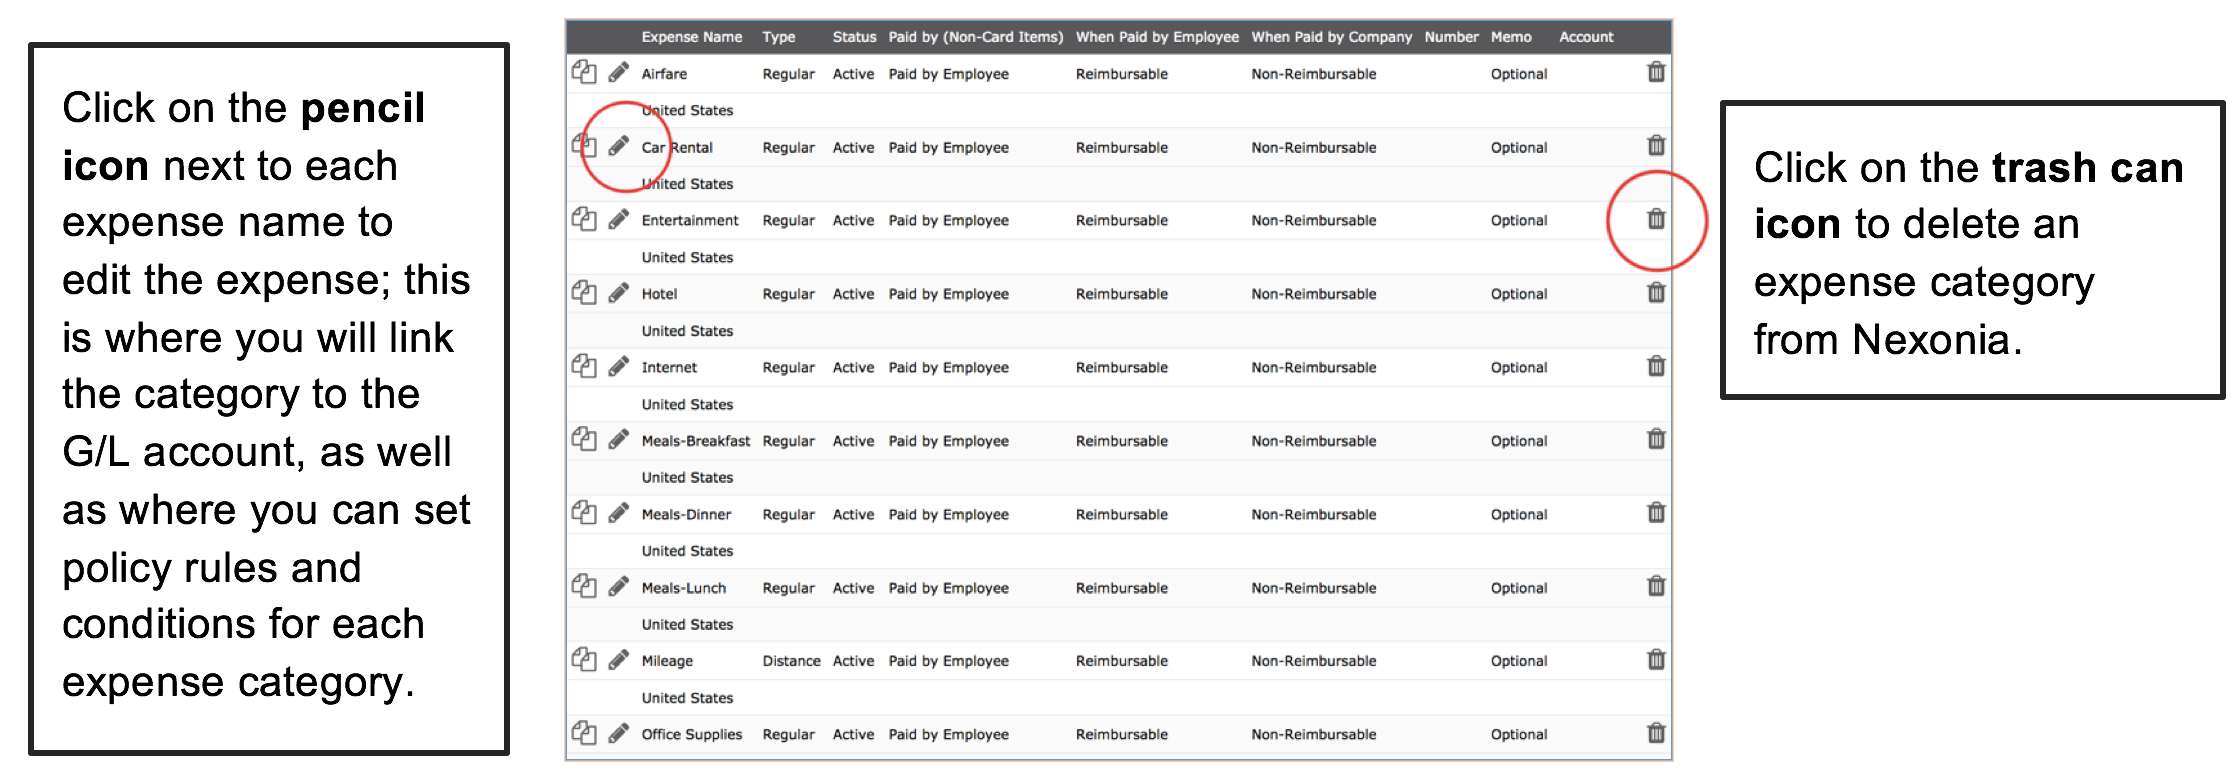
You can edit and modify the pre-existing expense categories, including changing the name or configuring expense policy rules. To do this, click on the pencil icon next to the Expense Name. You’ll be brought to a General tab.
This is also where you can set policy rules and conditions for each expense category. To learn more click here: Configuring Rules and Policies for Expense Categories
Then click Apply.
Adding a New Expense Category
To create a brand new expense category, click the Add button and fill out the details for that expense category under the General tab.
This is also where you can set policy rules and conditions for each expense category. To learn more click here: Configuring Rules and Policies for Expense Categories
Then click Apply.
 Helpful Tip: you can clone a pre-existing expense category by clicking on the clone icon next to the Expense Name. This will create an exact duplicate category, allowing you to quickly and easily create additional categories that may be similar to ones that you already have created. Simply edit the cloned category as needed.
Comments
0 comments
Article is closed for comments.