
Nexonia can be integrated with Bill.com, so that your reimbursable and non-reimbursable expense reports will export to create bills. We can send over all expenses to Bill.com, or filter which ones should be sent to Bill.com, such as only the reimbursable expenses.
![]() Note: Each Nexonia environment can be linked with a single Bill.com Company
Note: Each Nexonia environment can be linked with a single Bill.com Company
Nexonia would typically be integrated with your accounting software such as QuickBooks, Intacct, NetSuite, Xero as our source of configuration data, and the export would be synced to Bill.com. This article will cover how to integrate your Bill.com account with Nexonia.
If you already have a Bill.com account and are integrated with other accounting software such as QuickBooks, QuickBooks Online, Intacct, etc., be sure to synchronize your data first. Once you have synced your Bill.com account with the most updated information, we can link it with Nexonia.
![]() Note: a PDF of the expense report will export to Bill.com automatically. There is no additional expense receipt export from Nexonia required.
Note: a PDF of the expense report will export to Bill.com automatically. There is no additional expense receipt export from Nexonia required.
Integrating Nexonia with Bill.com
Before you start the Bill.com integration, you'll want to do the following:
- Have Administrator level login credentials for Bill.com
- If Bill.com is integrated with your accounting software, you'll want to ensure it's been synchronized recently.
Your first step would be to integrate your Nexonia account with your accounting platform. These instructions assume this has already been done.
To confirm your integration, navigate to Integration* > Integration Setup > Configuration Data. You'll see your accounting platform under the Integration Type.
*This tab is typically relabelled with the name of your accounting platform or ERP.
Once Nexonia is syncing with your accounting platform, you can set up the Bill.com export:
Go to Integration* > Integration Setup.
Click the Add Data Integration button.
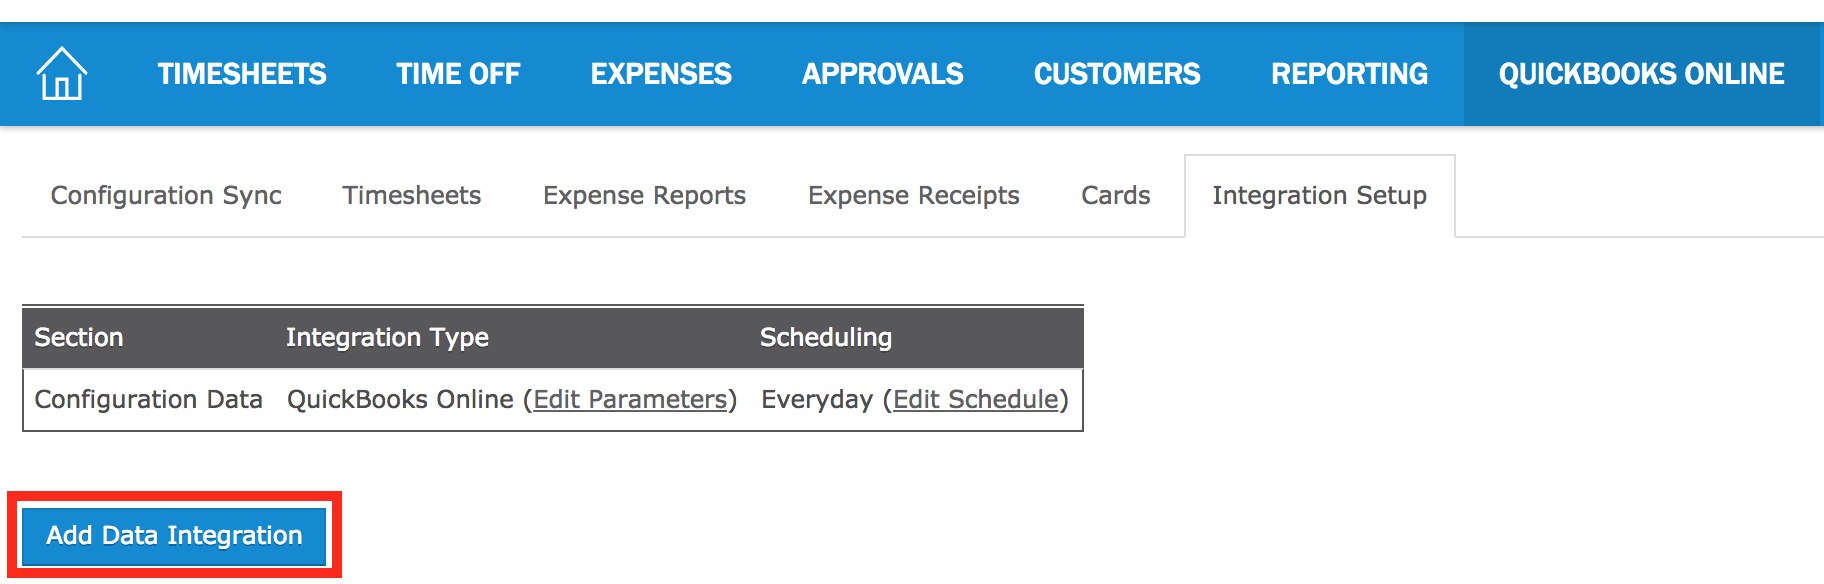
You should see a dialogue window asking you to choose the Data Type - select "Expense".
You'll now see a window for the Data Integration. Configure the following:
Data Integration: Main Tab
Export Number - you can give this export a specific number to more easily identify it when viewing export status for expenses.
Name - name your export (e.g. "Bill.com Export")
Mark reimbursable expenses as paid - if enabled, this will update any expense reports as "Paid" when the export is run.
Send errors to - enter the email address where any error notifications should be sent to.
Active - check this box to enable this export
Scheduling - you can choose whether to turn on the scheduled automated export to Bill.com. To enable it, click the Edit link and check Activate Scheduling
Your scheduling options are:
- Overnight (default) - the default is to send the export Everyday. Unchecking the Everyday box allows you to choose specific days of the week for the export.
- Hourly
Integration Type - choose Bill.com - you should now see two new tabs in this Data Integration, "Filtering" and "Parameters" which you'll need to configure.
View Pending Report - this allows you to preview which expenses will be exported using a report template from the Reporting Module. If you don't have a specific template you want to use, just choose "Detailed Expenses by Month (Approved)".
Data Integration: Filtering Tab
The filtering tab is used if you want to filter which items export to Bill.com. If all expenses will be exported, you can leave this tab as is. If you wish to filter, check off the values to filter here. Some commonly applied filters:
Item Type - allows you to filter reimbursable and non-reimbursable expenses
- Standard and Personal = reimbursable employee expenses
- Company Card Standard/Personal = non-reimbursable credit card expenses
Transaction Source - allows you to filter a specific company credit card feed
Data Integration: Parameters
The Parameters tab is where you will be connecting Nexonia to Bill.com. Starting from the Setup tab:
Under Setup, enter the following:
- Company Name - this will be your Bill.com company name that you want to integrate with.
- User ID/Email - your Bill.com login name.
- Password - your Bill.com password.
Once you've filled in those three values, click the Synchronize button. This will establish the integration between Nexonia and Bill.com. If there's an error, it'll the synchronization will stop and you can click on the Synchronization Failure tab to see what the error message is.
Once the synchronization is successfully run, you should now see 4 tabs under Parameters - Setup, General, Users/Vendors, and Categories/Accounts.
Setup - this is where your Bill.com credentials are saved. If your Bill.com password changes, you'll need to come back here, update the password and rerun the synchronization.
General - this tab manages the information we're entering on the vendor bill in Bill.com.
Value-Added Taxes (VAT)s - if VAT are being written to the bills, switch this to Yes.
Invoice Number - this defines what value we're going to use in the Bill.com invoice number. By default, we enter the Nexonia expense report number as the invoice number. You could modify this with a prefix if needed (e.g. NEX-${report.exportCode} would result in the invoice number NEX-####)
Invoice Description - defines what will be entered as the invoice description. By default, we'll populate the name of the expense report.
Multi Currency - if multi currency is supported in Bill.com, you can switch this to Yes. If not, leave at the default No.
Currency - if multi currency is "No", then you will see this currency field. This defines which currency you want to use for the Bill.com export.
Send Billable Flag - if expenses are being tracked as billable, setting this to Yes will send the billable flag as part of the line item.
Invoice Date, Posting Date, Due Date - by default, the Export Date will populate these dates in Bill.com. You can adjust the values accordingly if you want to use the Report Creation Date, the date of the oldest expense item or date of the newest item.
Company Paid Cards - if you intend to send company paid card transaction to Bill.com, turn this setting to Yes. It'll add a Company Paid Cards tab to the parameters.
Non-Credit Card Company Paid Expenses (rarely used) - if you have non-credit card expenses that are managed as "Company Paid", this setting will need to be enabled for the export.
Export Approval Status (rarely used) - this setting is rarely used as exported expenses will be moving through any approval processes set in Bill.com if one has been set.
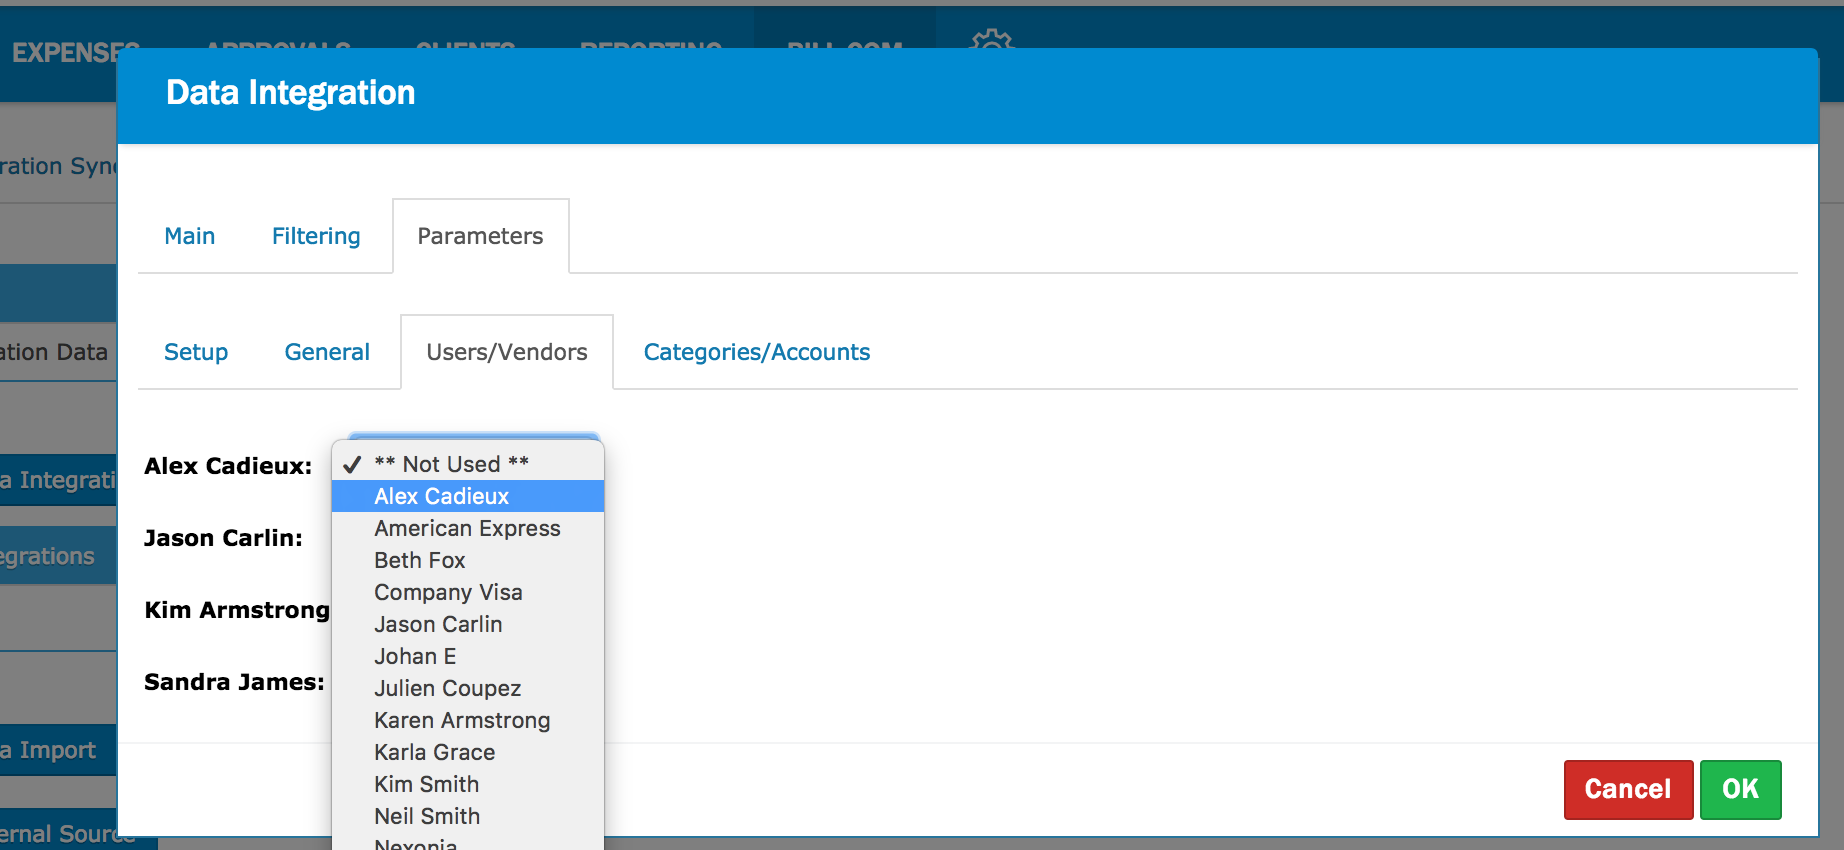
Data Integration: Users/Vendors
The Users/Vendors tab is where you will can map Nexonia users to their Bill.com Vendor values. This will need to be done for any employees whose reimbursable expenses will be exported to Bill.com. The list of vendors seen here will be integrated from Bill.com and any new vendors you add to Bill.com will push an update to the Nexonia list of vendors.
If a user has been newly created and is not mapped to a Vendor, or a user was linked to a Vendor that has since been made inactive in Bill.com, their expenses will not export to Bill.com
To map a Nexonia user profile to a Bill.com vendor, from the Users/Vendors tab, choose the appropriate Bill.com vendor for each Nexonia user in the list.
Data Integration: Categories/Accounts
The Categories/Accounts tab is where Nexonia expense categories will be mapped to the Bill.com accounts.
To export expense data to Bill.com, the Nexonia expense categories must first be associated with accounts from Bill.com.
If an expense category has been newly created and is not mapped to an account, or an expense category was linked to an account that has since been made inactive in Bill.com, expenses that are created using that category will not be exported to Bill.com.
To map a Nexonia expense categories to Bill.com accounts, from the Users/Vendors tab:
To map all Nexonia expense categories to the same Bill.com account, select "Split Account: No" and choose the Bill.com account from the drop-down menu.
To map each Nexonia expense category to separate Bill.com accounts, select "Split Account: Yes" - you'll see a list of your Nexonia expense categories with the integrated list of Bill.com accounts on the right. Choose the Bill.com account from the drop-down menu for each Nexonia expense category.
If you don't see the Bill.com account in the drop-down menu on the Categories/Accounts page but you know it is active in Bill.com, click Setup > Synchronize to update the list with the currently available accounts from Bill.com.
If that's all the tabs you have available, click the OK button to save the settings and close the window.
Data Integrations: Company Paid Cards (if applicable)
The Company Paid Cards tab is where your Nexonia integrated corporate credit cards will be mapped to the Bill.com vendors. This tab only appears if you enabled Company Paid Cards under the Parameters > General tab.
When you navigate to the Company Paid Cards tab, you should see a list of the corporate cards you've integrated in Nexonia. Each row represent a specific Nexonia credit card feed. On the right will be the integrated list of Bill.com vendors.
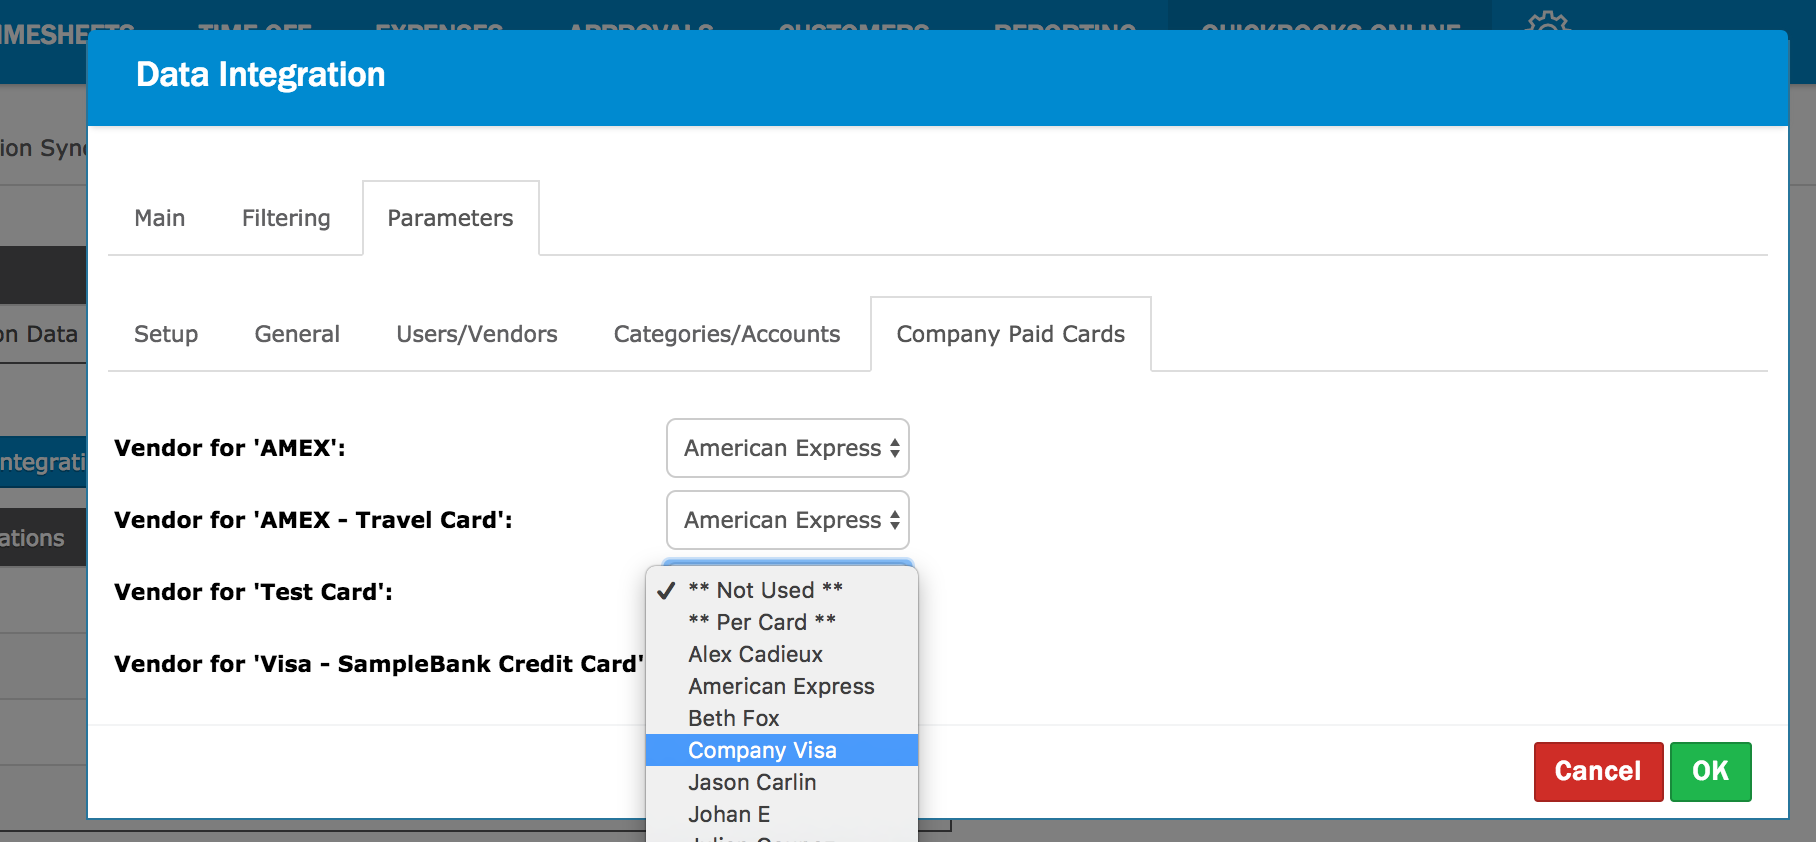
For each row, choose the vendor you would like to export to, from the drop-down menu. Afterwards, click OK to save the settings and close the window.
Running the Bill.com Export
Once you've configured the Bill.com integration, your Bill.com export should now be active.
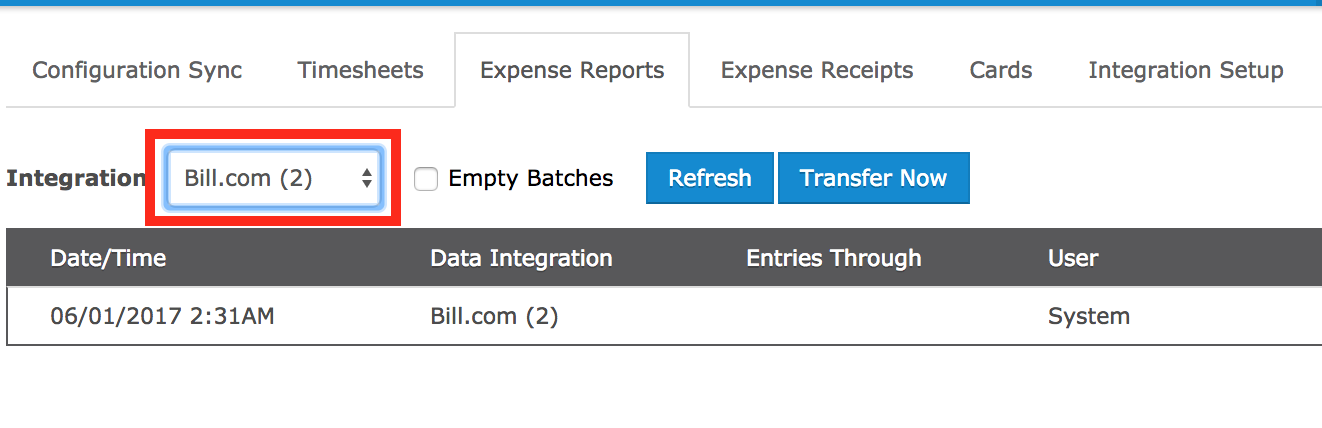
To view the export log or to run the export manually, navigate to Integration* > Expense Reports.
*This tab is typically relabelled with the name of your accounting platform or ERP.
The Bill.com export will be found under "Expense Reports". If you have more than one expense export, you'll find Bill.com in the Integration dropdown menu. You'll be able to view any export logs or click Transfer Now to export approved expenses to Bill.com
Comments
0 comments
Article is closed for comments.