You can connect Nexonia to your Bill.com account to support a web services integration. This integration allows Nexonia to integrate configuration information directly from Bill.com, and export approved expenses directly in to Bill.com as vendor bills. A linked PDF of the expense report and receipts will also be sent.
The integration will automatically integrate the following:
- Expense Types from the Chart of Accounts - used to map expense categories
- Vendor List - used to map users and credit card exports
Additional dimensions can be integrated to Nexonia as custom fields:
- Departments
- Locations
- Classes
- Customers
- Projects
The configuration sync and exports can be schedule to run automatically on a daily basis, and administrators can also trigger a sync or export on-demand.
![]() Note: Each Nexonia environment can be linked with a single Bill.com Company
Note: Each Nexonia environment can be linked with a single Bill.com Company
Authenticate Your Connection to Bill.com
To authenticate your connection to Bill.com, follow these steps:
1. Log in to Nexonia and go to: Bill.com* > Integration Setup > click on the Edit Parameters link.
*May be labelled differently in your integration
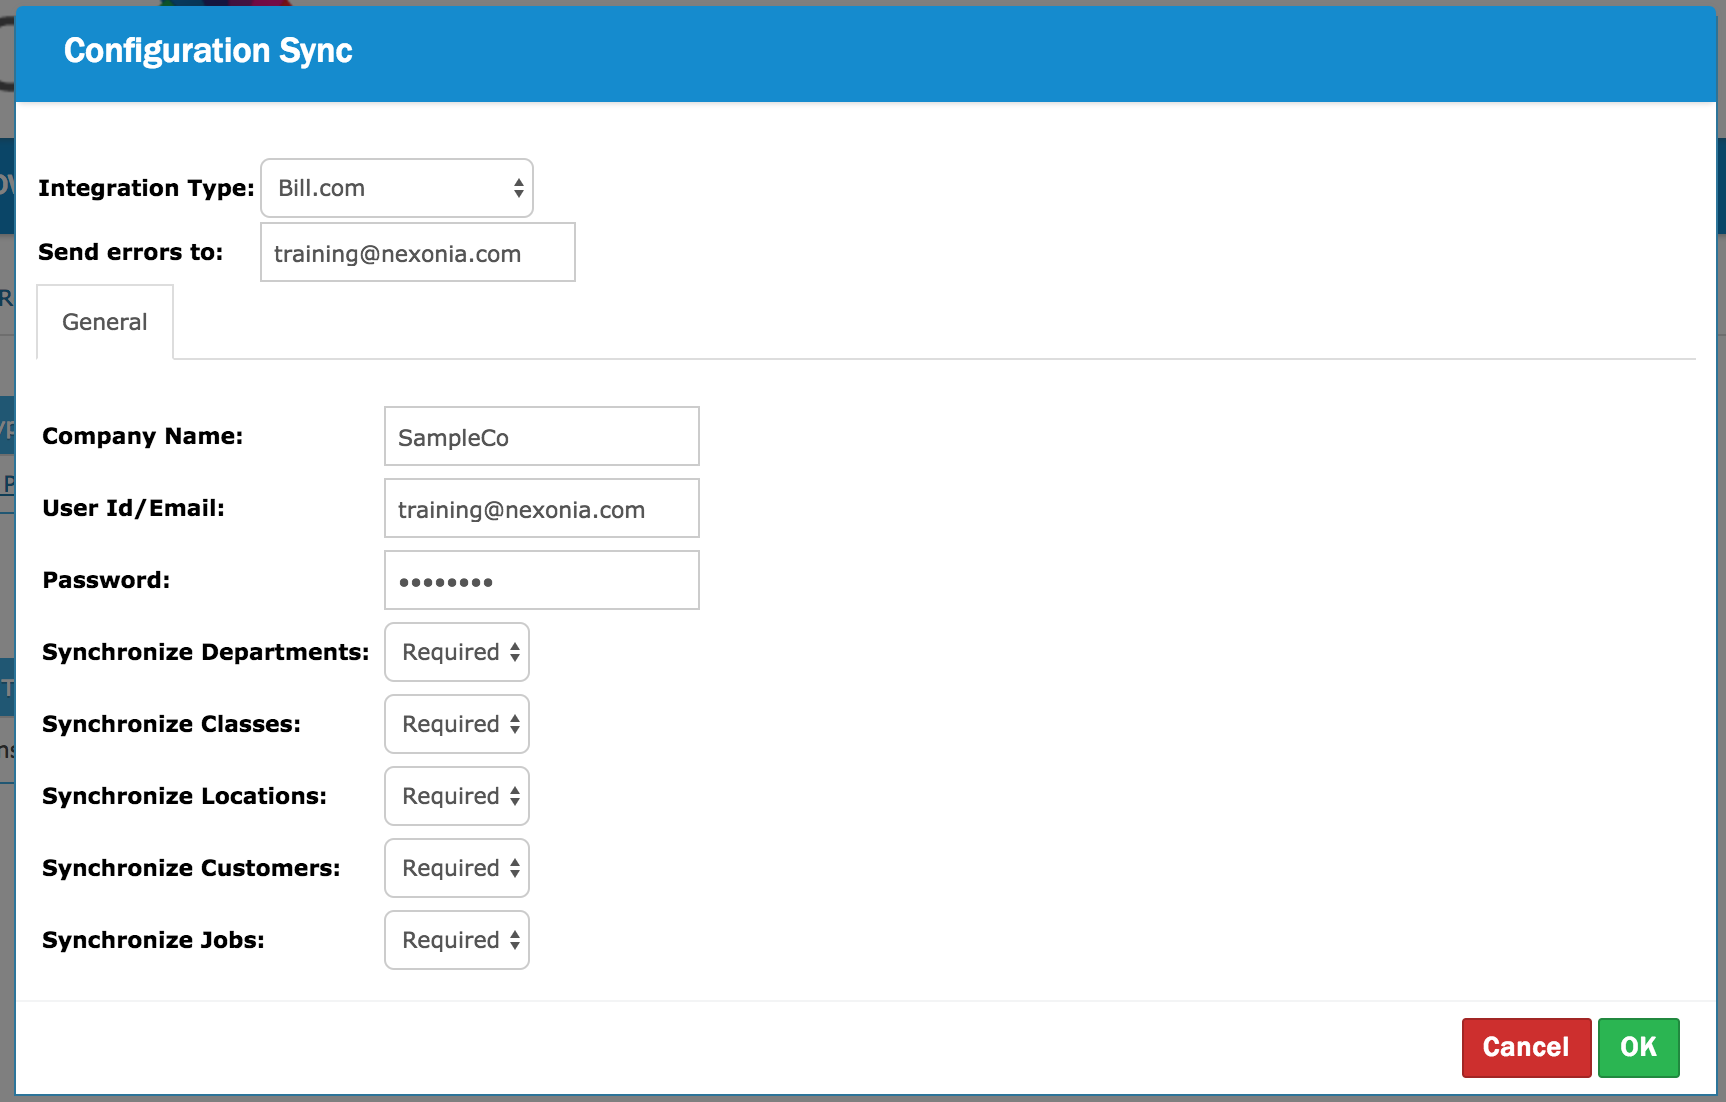
2. You'll see the Configuration Sync window appear. Select the Integration Type as "Bill.com". You'll now see the configuration settings appear for Bill.com.
3. Send errors to: enter the email address of whomever should be alerted if there’s an error with the synchronization, typically the administrator.
4. Under the General tab, enter the following information:
Company Name = your Bill.com company name
User ID/Email = your Bill.com user credential ID (should be Administrator level)
Password = your Bill.com user password
The following fields can also be integrated into Nexonia, depending on whether you're using them in Bill.com as part of the vendor bill layout:
- Synchronize Departments = No, Optional, Required
- Synchronize Locations = No, Optional, Required
- Synchronize Classes = No, Optional, Required
- Synchronize Customers = No, Optional, Required
- Synchronize Projects = No, Optional, Required
5. Click the "OK" button to save your configuration settings.

You can now initiate your first configuration sync with Bill.com, add your users and expense categories, and configure the Bill.com export.
- Synchronizing the Nexonia Configuration with Bill.com
- How to Add New Users in Nexonia (Bill.com Integration)
- How to Create Expense Categories in Nexonia (Bill.com)
- Integrating an Export to Bill.com
![]() Note: your dimensions (Customers, Projects, Locations, Departments, Classes) will be integrated as expense item custom fields. They can be found by navigating to Settings > Company > Custom Fields.
Note: your dimensions (Customers, Projects, Locations, Departments, Classes) will be integrated as expense item custom fields. They can be found by navigating to Settings > Company > Custom Fields.
You also may be interested in the following articles:

Comments
0 comments
Article is closed for comments.