
The following instructions will guide you through how to create a step in the approval process that directs submitted content to a specific approver. A common example of this would be setting up a Finance Department approver as the final step of an approval process.
Navigate to: Settings > Users > Approval > Click the edit pencil on the workflow. Click Add. This opens the field to allow modifications for the step.
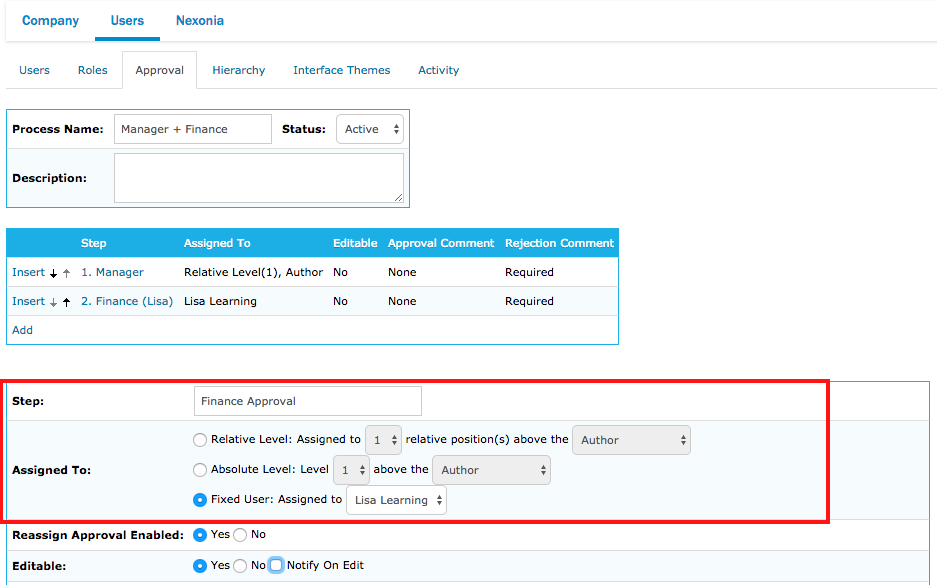
In the Step field, provide a descriptive name about what this approval process step represents (ie. Finance Approval)
In the Assigned To field: select the Fixed User radio button. From the drop down list, select the Nexonia user that should be assigned to this approval step.
 Tip: You can add enhanced approval permission in this step if needed. Two common ones are:
Reassign Approval Enabled - allows an approver at this step to reassign the submitted item to another approver if needed.
Editable - allows an approver at this step to edit the submitted item during the approval review.
Once finished, click Add button at the bottom.
![]() Note: If you’re using an approval workflow for more than one module, then creating this type of step will require a separate approval workflow for each module.
Note: If you’re using an approval workflow for more than one module, then creating this type of step will require a separate approval workflow for each module.
Comments
0 comments
Article is closed for comments.