Nexonia's Pre-Approval feature allows users to submit a pre-approval item that will be automatically approved. For example, if a user is going on a trip and knows they will use $500 for meal expenses, they can submit that amount as a pre-approval item and link meal expenses back to it.
This article will show you, a Nexonia User, how to create and submit pre-approval items.
Please Note: If you're an Admin and would like to enable this feature, click here.
Step 1: On your Nexonia homepage, click the Expenses tab.

Step 2: Click Add Report to create a new expense report.

Step 3: Give your report a title and click Save.

Step 4: Click Add Pre-Approval Item.
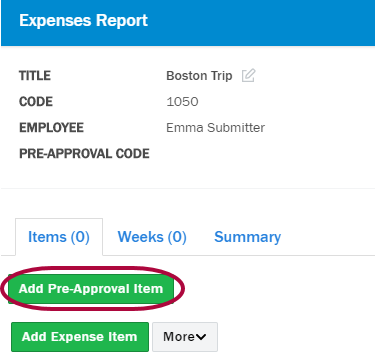
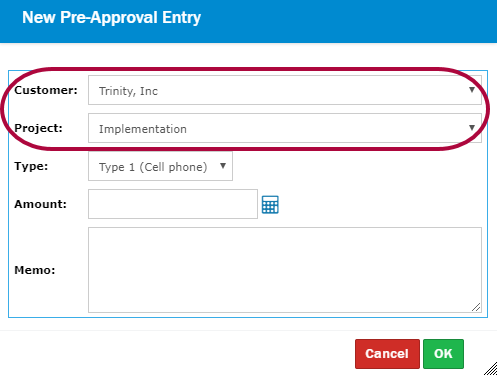
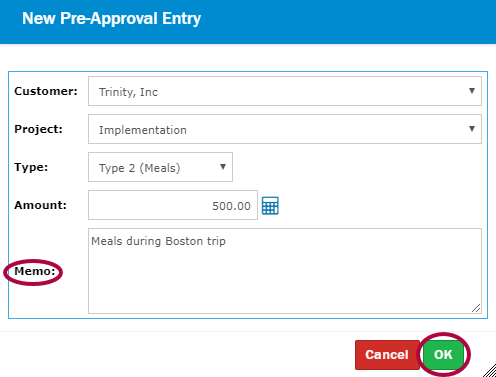
Step 5: First, choose a Customer and a Project.
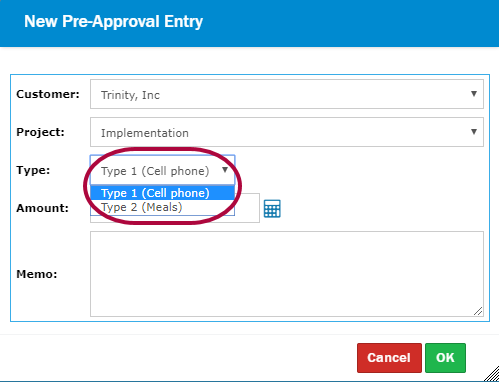
Step 6: Choose a Type from the drop-down. These will be the different pre-approval types that your Administrator has previously entered.
Step 7: Enter the Amount you'd like to be pre-approved for.
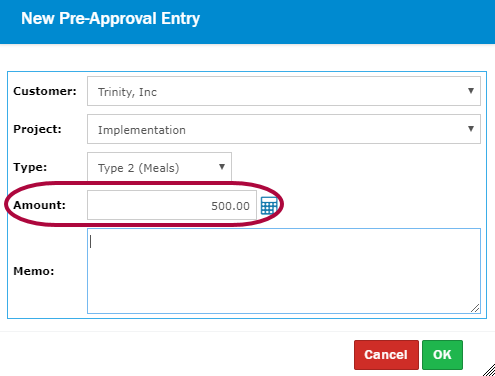
Step 8: Enter a Memo and click OK.
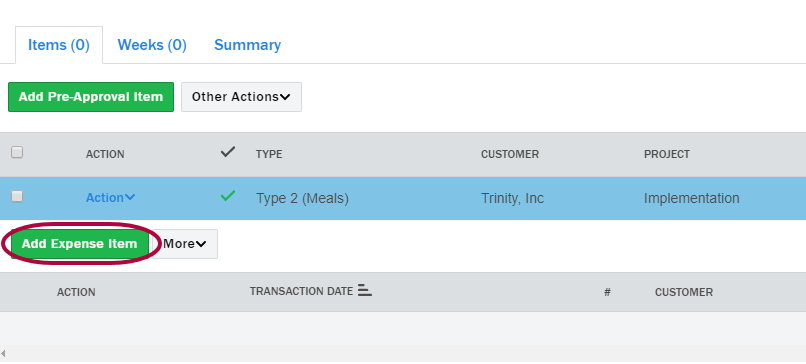
Step 9: You'll now see your pre-approval item. Click Submit.

Step 10: Your pre-approval will be sent through the approval workflow. Once it's approved, you'll have $500 to spend in this category on this expense report. To link an expense item to this pre-approval item, start by clicking Add Expense Item.
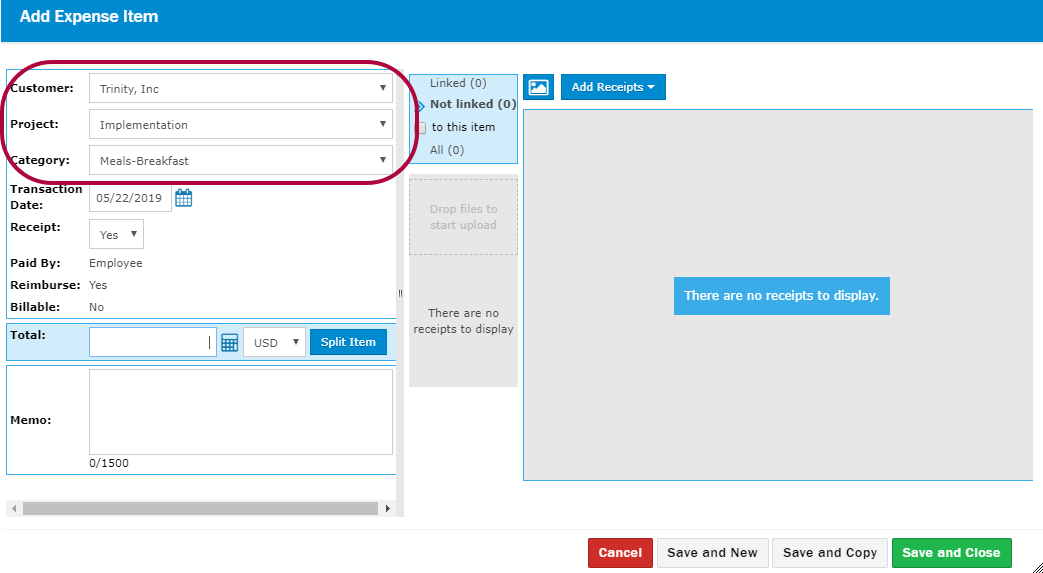
Step 11: In order to have the expense item link to the pre-approval item, you'll need to enter the same Customer, Project, and Category as the pre-approval item had.
Please Note: If your pre-approval item includes multiple expense categories, as long as you choose one of them, your expense item will still link to your pre-approval item.
Step 12: Enter all other expense details, including the Total Amount for the expense. Then, click Save and Close.
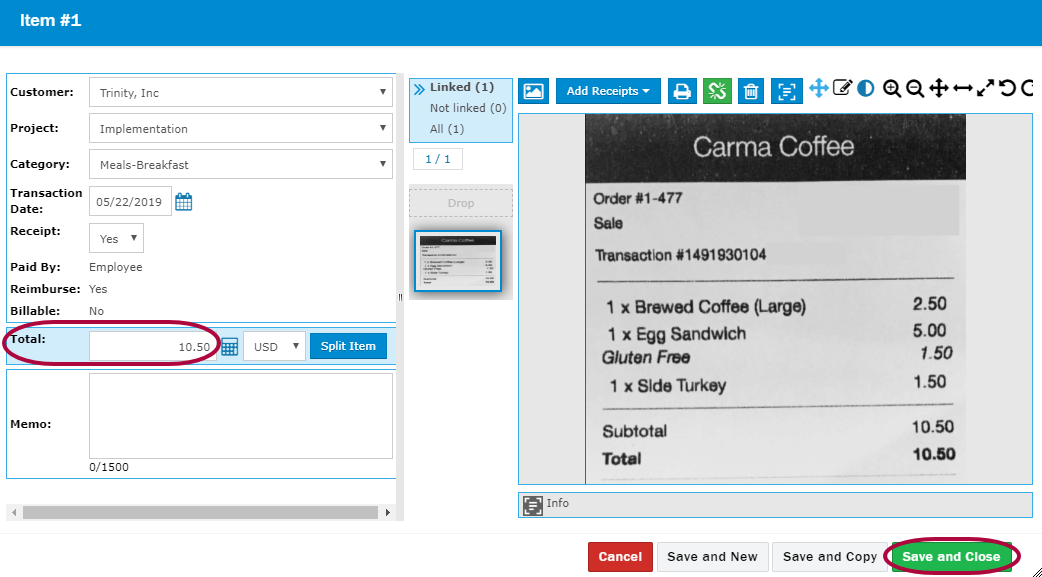
Step 13: You'll see the amount you entered for the expense item has been moved to the Actual column in your pre-approval item.

Step 14: You can now continue to add expense items to your expense report. Any time you enter an item with the same Customer, Project, and Expense Category as your pre-approval item, it will be linked there and the amount in your Actual column will change accordingly.
When you're ready to submit your report, click Submit.
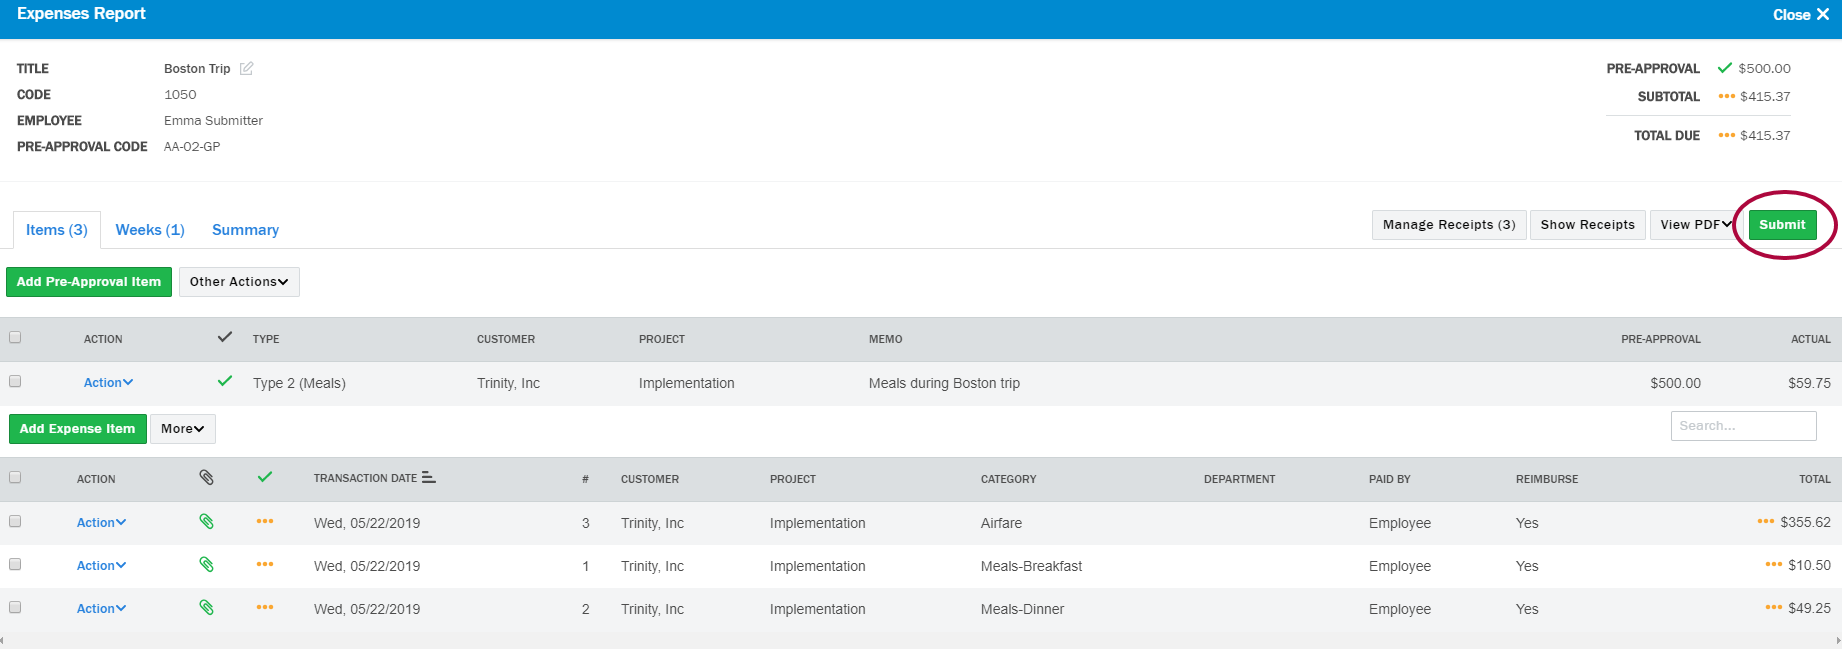
Step 15: If you money leftover in your pre-approval item after you submit, you can go back to the report at any time to add more expense items to link.


Comments
0 comments
Article is closed for comments.