Nexonia Travel works with several Global Distribution Systems (GDS) to provide robust travel services for users. However, some travel vendors, like Amtrak, sell their services outside of the GDS search.
This article will show you, a TMC Administrator, how to activate the SuperSwitch required for Amtrak.
Setting up Amtrak Direct Connect SuperSwitch
Step 1: On your Nexonia Travel homepage, select Admin. Then select Policy Setup, followed by Super Switch Settings.
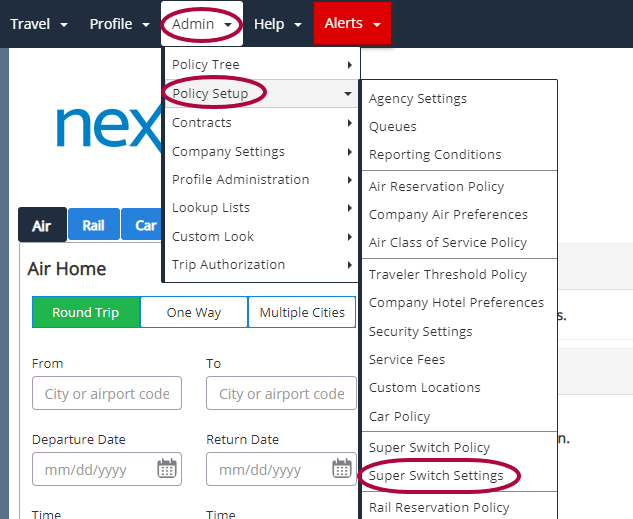
Step 2: Next, click Add New Provider Setting under the Provider Settings menu.
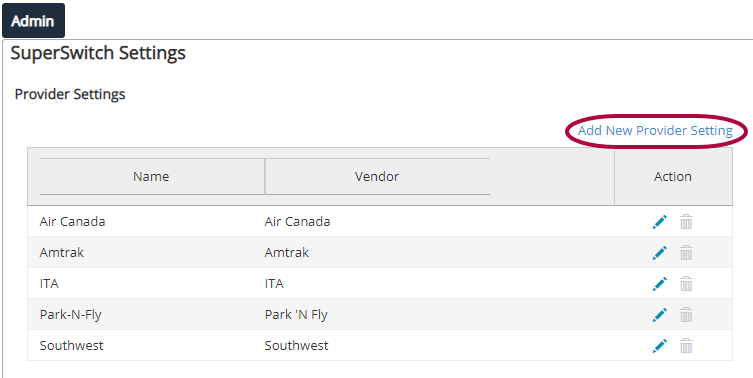
Step 3: Enter in the Super Provider Name and choose Amtrak in the Vendor drop-down menu. When complete, click Save.
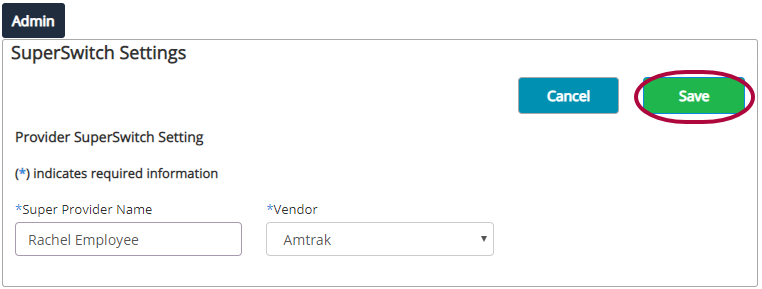
Step 4: Return to the Super Switch Settings page. From here, click Add New Rail SuperSwitch Setting.

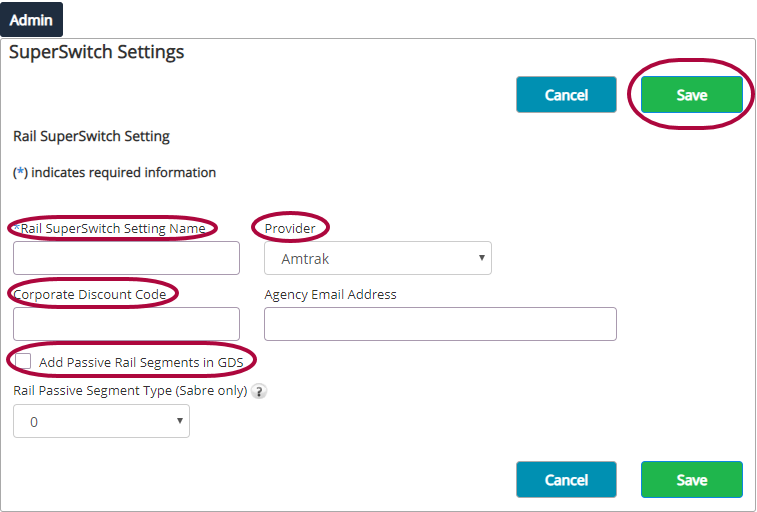
Step 5: Enter a Rail SuperSwitch Setting Name and choose Amtrak under the Provider drop-down menu. Enter in a Corporate Discount Code if you have one and select if you'd like to Add Passive Rail Segments in GDS by checking the checkbox. When complete, click Save.
Add the Amtrack SuperSwitch Setting to a SuperSwitch Policy
Step 1: On the Nexonia Travel homepage, select the Admin menu. Then select Policy Setup, followed by SuperSwitch Policy.
Please Note: Only one SuperSwitch Policy is allowed per branch.
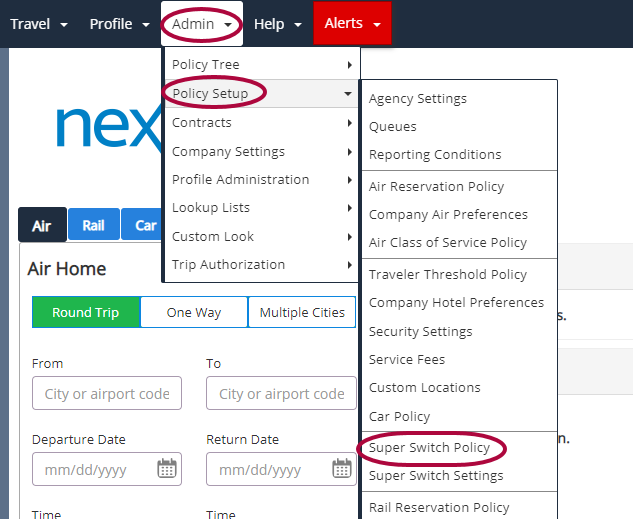
Step 2: Select Add New SuperSwitch Policy.
Please Note: You can also add the Amtrak SuperSwitch Setting to an existing SuperSwitch Policy.

Step 3: Under Available Rail SuperSwitch Setting(s) move Amtrak to Selected Rail SuperSwitch Setting(s) and click Save.
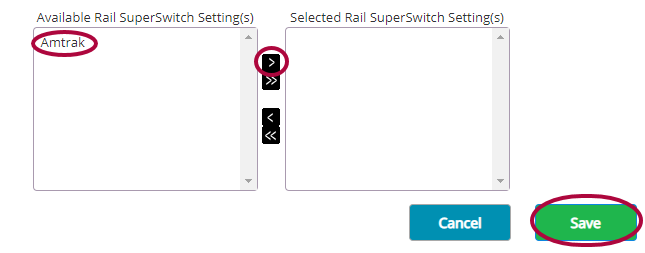
Step 4: On the Nexonia Travel homepage select the Admin menu. Then select Policy Tree followed by Policy Tree Editor.
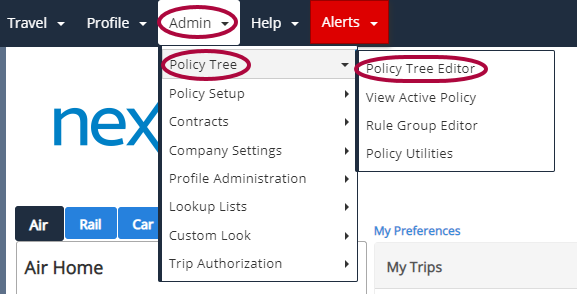
Step 5: Select Edit next to Core Permissions.
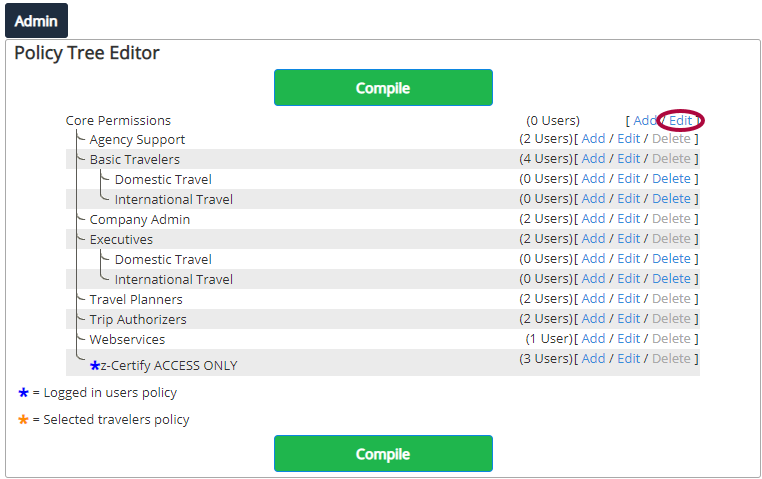
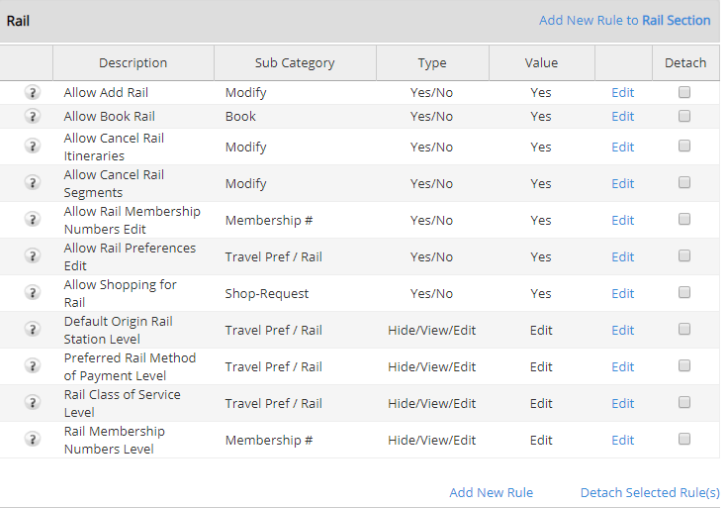
Step 6: Make sure all of the following rules are enabled and compiled in your policy branch.
Please Note: Default Origin Rail Station Level is the only rule that is optional.
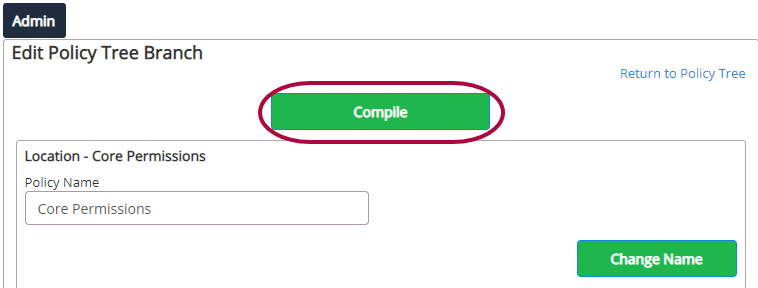
Step 7: Select Compile to complete the process.
For more information about how to book a rail reservation, click here.

Comments
0 comments
Article is closed for comments.