
You can use the Hotel Contracts section to identify a hotel property as a preferred/contract property for a company. These properties are identified as contract or preferred hotels when the company's travelers show for hotels.
This article will show you, a TMC Administrator, how to set up a hotel property contract.
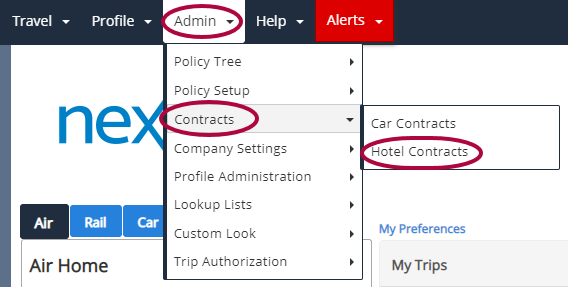
Step 1: From your Nexonia Travel homepage, select the Admin menu. Then, select Contracts followed by Hotel Contracts.
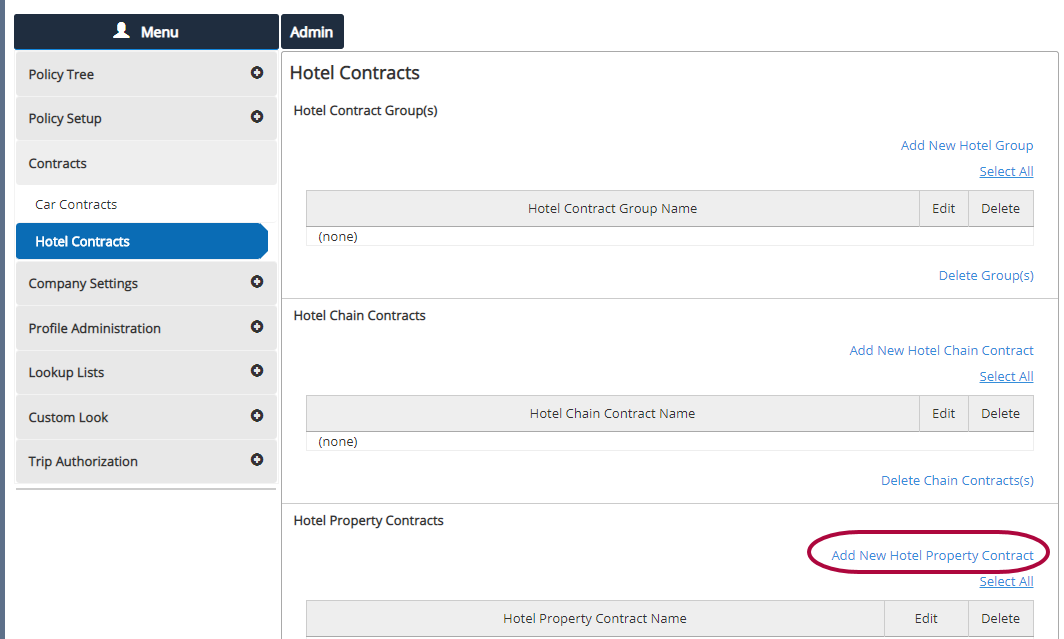
Step 2: On the Hotel Contracts screen in the Hotel Property Contracts section, click Add New Hotel Property Contract.
Step 3: Complete the fields on the Hotel Property Contract editing screen.
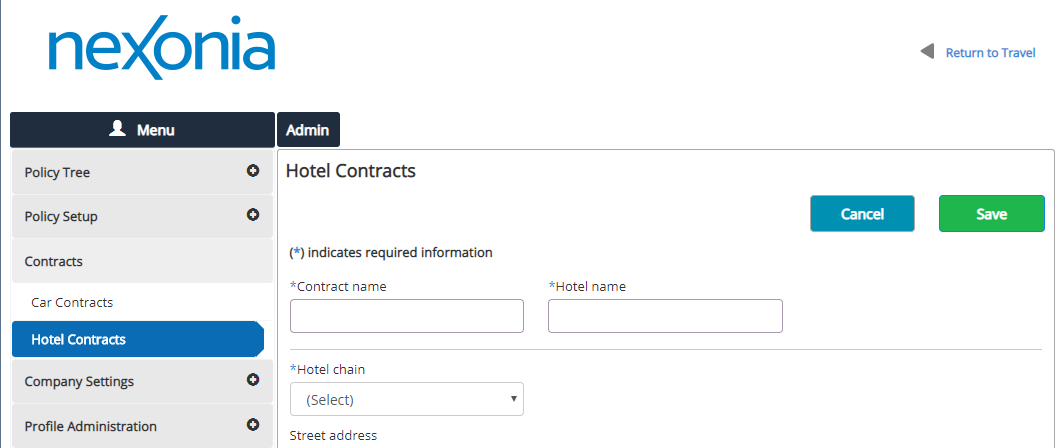
- Contract name: The name of the contract.
- Hotel name: The name of the property.
- Hotel chain: The hotel chain the property is associated with.
- Phone: The phone number for the hotel property.
- Note: If the phone number is not available, use 111-111-1111
- Property Code: This is the property code from the GDS.
- GDS: Select the GDS of the company's TMC.
- Airport or city codes: List the airport and/or city codes nearby the hotel. Multiple codes should be separated by a comma; DFW, DAL.
- Note: When the user makes a hotel request, the hotel property will be included in the shopping results when the location of the shopping request matchse one of the airport or city codes listed.
- Display Criteria: Select how the property should be shown to the user.
- Best Practices:
- If the company does not have a negotiated rate at the hotel but wants their travelers to book at the hotel, select the option "Display as company preffered at top of availability".
- If the company has a negotiated rate at the hotel, select the option "Display as company contract at top of availability".
- Best Practices:
- Contract priority: The priority of the contract (0-999).
- Best practice is to always add a Contract Priority (0) and Rate Code (BEST).
Step 4: Click Save to save your changes.

Adding a Hotel Contract to the Policy Tree
For the new Hotel Contract to be enabled, it must be attached to a branch of the Policy Tree and Compiled.
Hotel contract rule items are inclusive. The rule items can be added multiple times to the same Policy Tree Branch without conflict, and a Policy Tree Branch can support multiple hotel contracts.
A Hotel Contract attached to a Policy Tree Branch with the Include Hotel Contract rule cannot be deleted. To delete an attached contract, first detach it from the Policy Tree Branch.
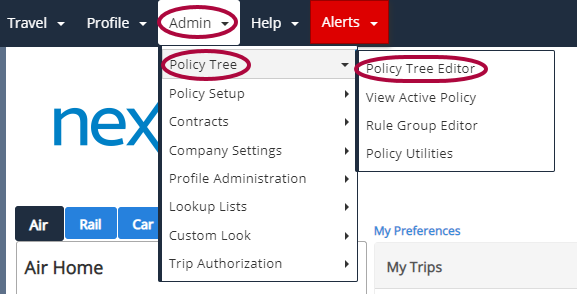
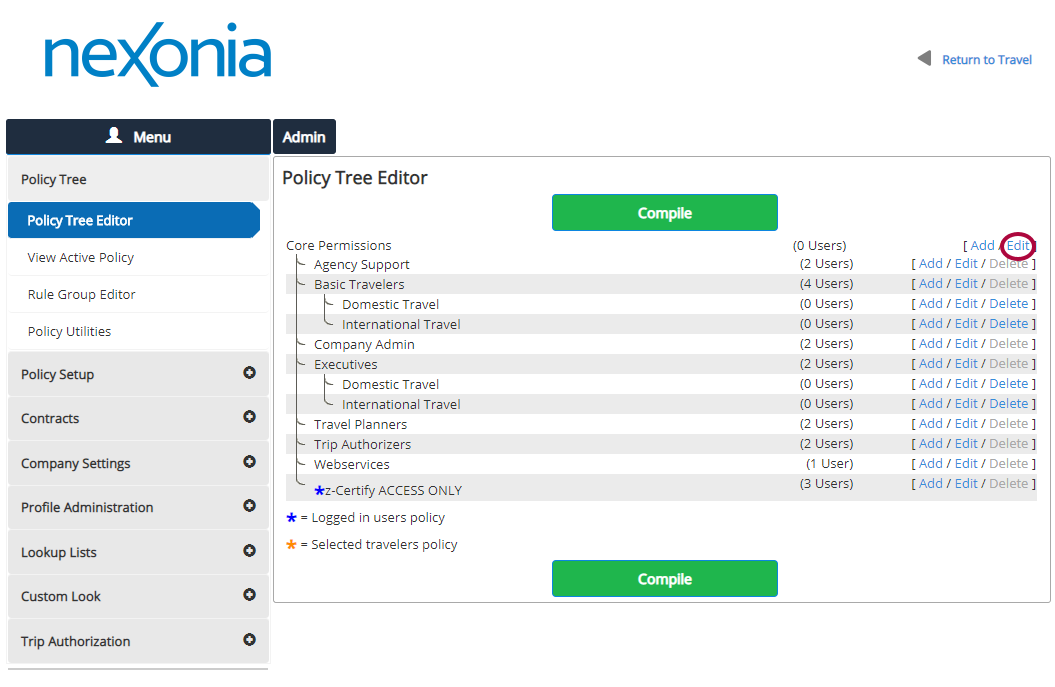
Step 1: On the Nexonia Travel homepage, select the Admin menu. Then, select Policy Tree followed by Policy Tree Editor.
Step 2: The Policy Tree Editor opens. Select Edit for the Core Permissions policy branch.
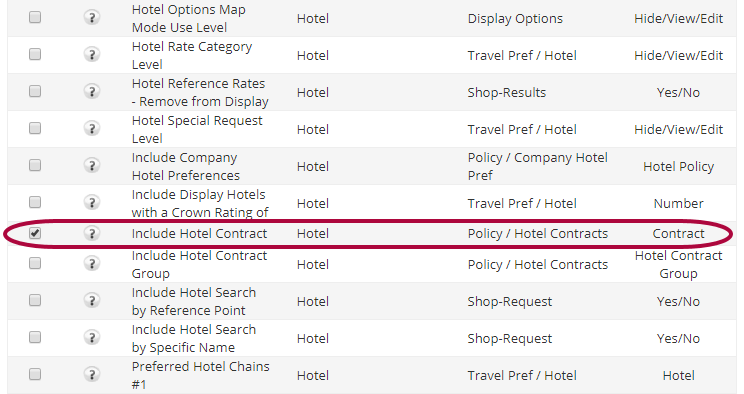
Step 3: Scroll down to the Hotel section and click Add New Rule to Hotel Section.

Step 4: The Policy Rule Search Results section displays. Mark the checkbox for Include Hotel Contract and click Next.
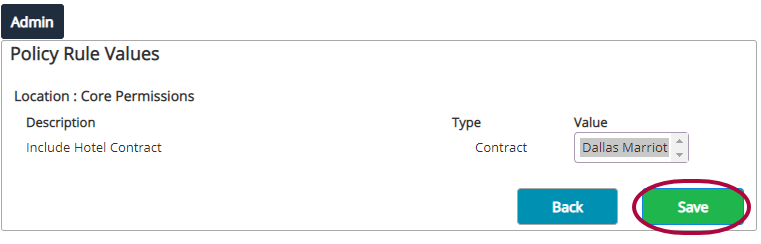
Step 5: The Policy Rule Values section appears. Select the Hotel Contract you created earlier, and then select Save.
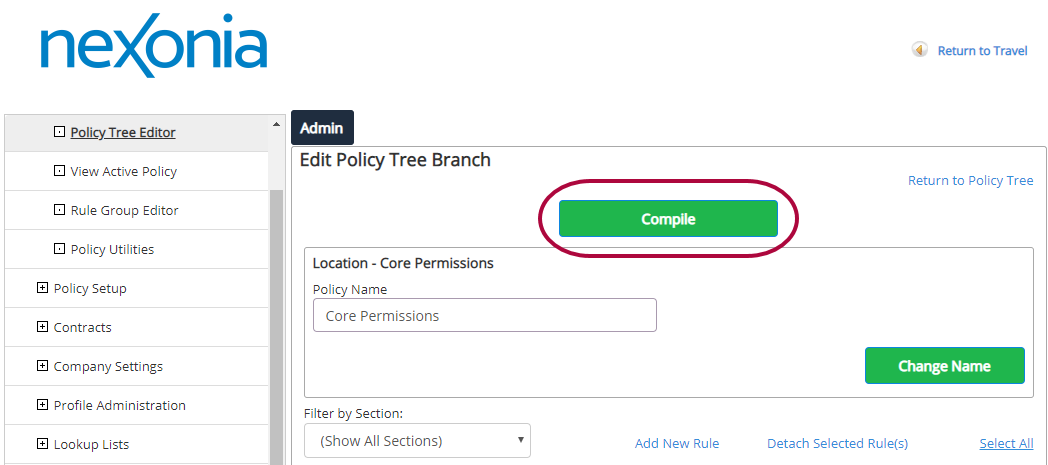
Step 6: On the Edit Policy Tree Branch screen, click Compile for Core Permissions.
The Hotel Contract now appears in the Hotel section of the Policy Tree.
Comments
0 comments
Article is closed for comments.