
When a new company opts to use Nexonia Travel, the Travel Management Company (TMC) sets up much of the information. However, there are places that may require further updates.
This article details how you, a TMC Administrator, how to access and use the Agency Settings page.
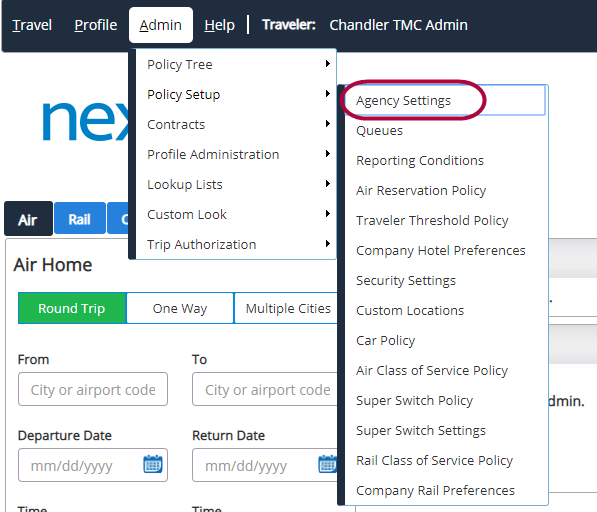
Step 1: On your Nexonia Travel homepage, select the Admin menu. Then select Policy Setup, followed by Agency Settings.
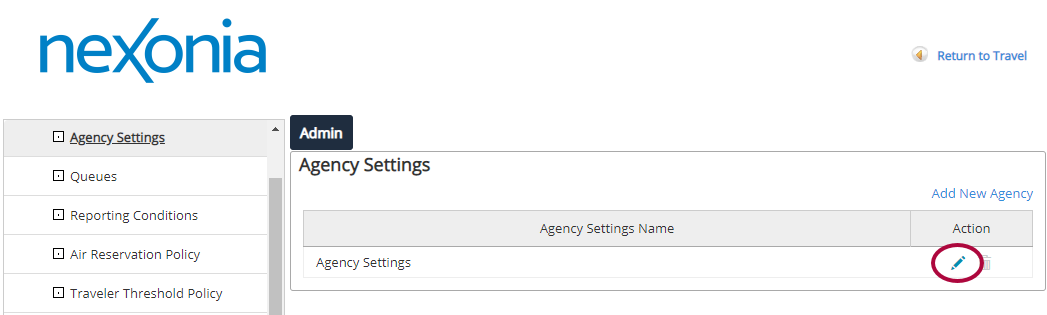
Step 2: From the Agency Settings section that appears, select the Pencil icon.
Step 3: The Agency Settings screen appears. Start by scrolling to the Agency GDS Information section and enter the Company profile in the field provided. This is the name of a specific profile within the TMC's Global Distribution System (GDS).
The Company profile field is required, provided by the TMC, and must be entered exactly as given.
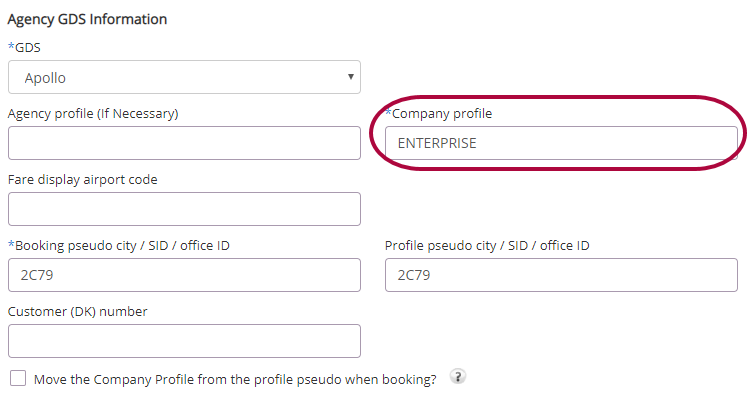
The TMC loads company information into the company's GDS profile to include in bookings. Once established, when a travel booking is made, company-specifics from the GDS profile (such as account code and contact information) are moved into each booking.
When you enter the Company profile name into this field, you are essentially telling the system to import the characteristics from the GDS company profile.
Updating Air Contract Codes
Air Contract Codes basically work like a promo code in that the company gets a certain rate depending on which code is used. The TMC or the company negotiates contract rates, then loads the rates into the system. For example, a code might provide 20% off fares to Minneapolis.
Air Contract Codes:
- Air Contract Codes are used for pricing requests in the GDS.
- Each Airline contract is unique, but the TMC can load multiple airline contracts under the same contract code in their GDS. This keeps things simple for the TMC when pricing air itineraries for the company. When a Travel Agent of the TMC is working directly with a traveler from a company, they only need to know a single contract code.
Entering a new Air Contract Code is a two-step process. First you must enter the GDS contract codes, then you must enter the exact same codes into the ITA Super Switch Settings.
Enter GDS ID and Carrier Code
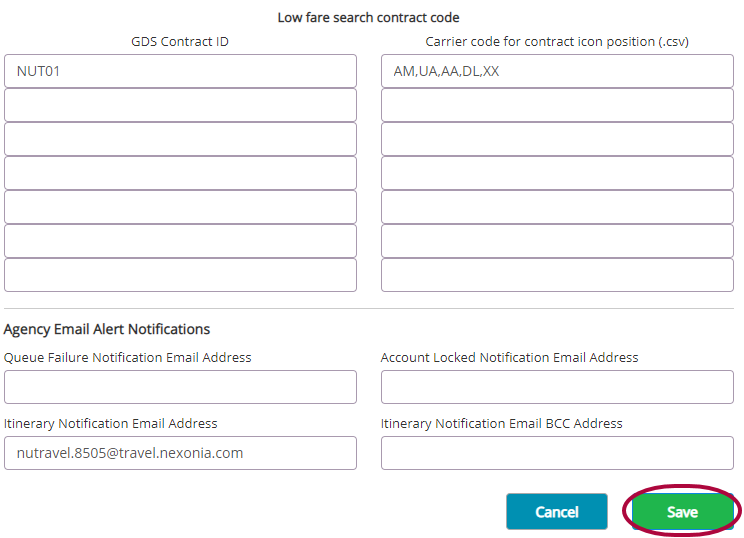
Step 1: On the Agency Settings page, scroll down to the Low fare search contract code section. In the fields provided, enter the GDS Contract ID and Carrier code for contract icon position.
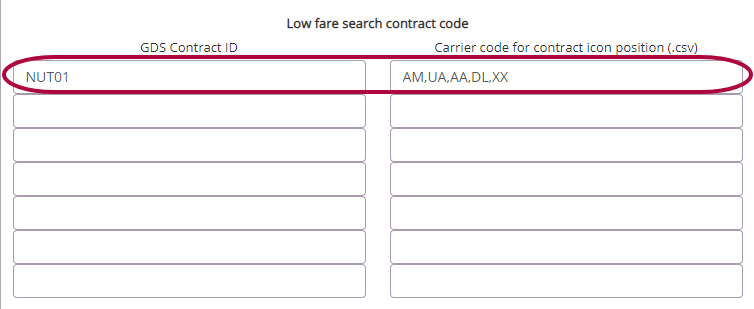
- GDS Contract ID - Enter the GDS Contract ID (provided to you by the TMC).
- Carrier code for contract icon position - Enter the Carrier codes associated with the GDS Contract ID. The Carrier code is a comma-delimited list of codes of carriers associated with the GDS Contract ID. For example: AM, UA, AA, DL, XX. Carrier codes can be searched and found: http://www.iata.org/publications/Page/code-search.aspx
Please Note: The carrier list must end with ,XX. The ,XX is required by the Nexonia Travel system to connect the GDS Contract ID to the listed carriers.
Step 2: Click Save to update the settings for the company.
Enter ITA Super Switch Information
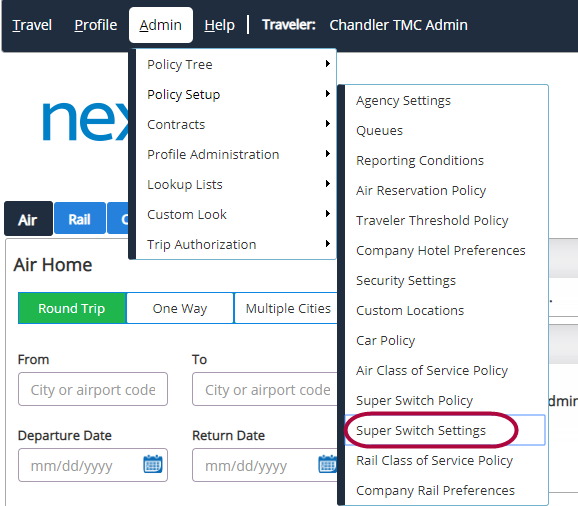
Step 1: From your Nexonia Travel homepage, select the Admin menu. Then select Policy Setup, followed by Super Switch Settings.
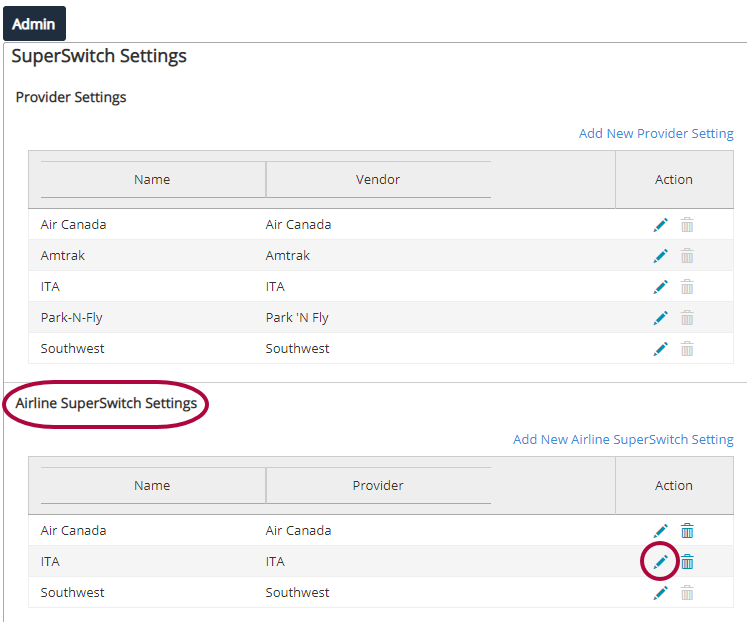
Step 2: Under the Airline SuperSwitch Settings section, select the Pencil icon for the ITA Settings.
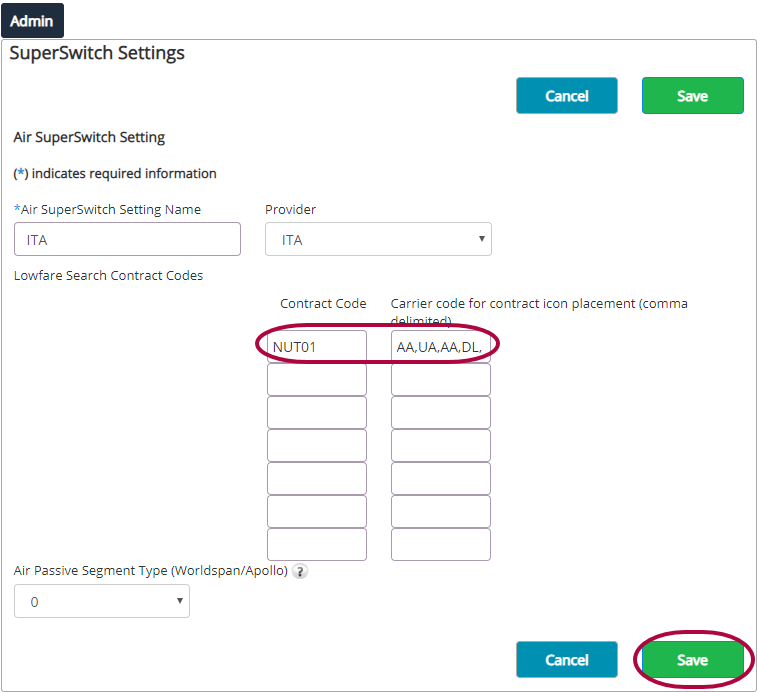
Step 3: The SuperSwitch Settings page opens. In the section for Lowfare Search Contract Codes:
- Contract Code - Enter the GDS Contract ID.
- Contract code... - Carrier code for contract icon placement.
Please Note: The fields must be entered exactly as they were entered into the Agency Settings page in the Low fare search contract code section, including the ,XX at the end.
Click Save to update the settings.
Enter ITA Super Switch Policy
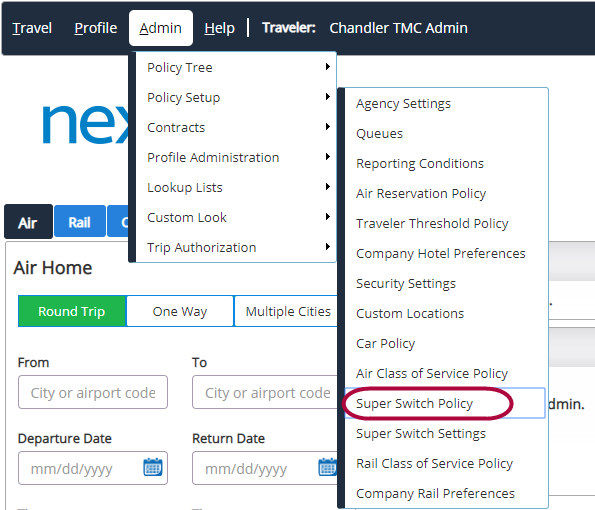
Step 1: From your Nexonia Travel homepage, select the Admin menu. Then select Policy Setup, followed by Super Switch Policy.
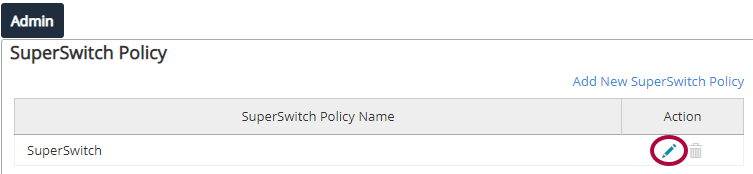
Step 2: Under SuperSwitch Policy, select the Pencil icon.
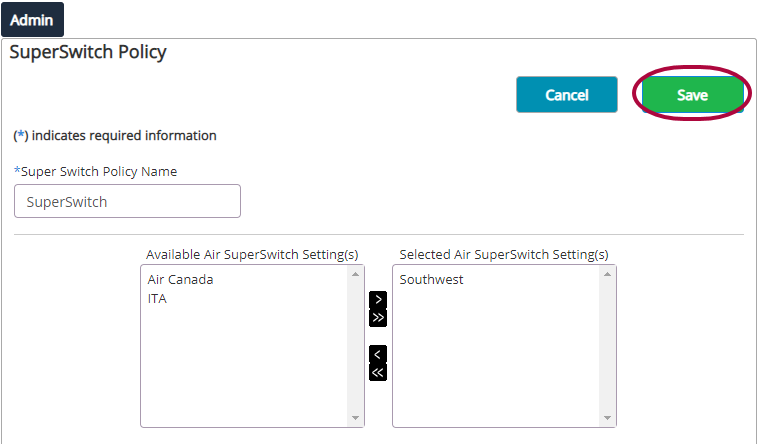
Step 3: The SuperSwitch Policy page appears. Scroll to the section for air travel. If ITA is shown in the Available Air SuperSwitch Setting(s), select ITA with your cursor, then click the Arrow to move the ITA setting to the Selected Air SuperSwitch Setting(s).
Please Note: If the Airline SuperSwitch Setting for ITA is shown in the Selected Air SuperSwitch Setting(s), select Cancel because the setting is already active.

Step 4: Click Save to update your policy. The ID is applied to air options and pricing itineraries for the carriers listed when travelers search for travel.
Comments
0 comments
Article is closed for comments.