
Southwest Direct Connect and the SuperSwitch
Nexonia Travel works with several Global Distribution Systems (GDSs) to provide robust travel services for users. However, some travel vendors only work outside the scope of the GDSs. For example, Southwest only sells their travel services directly, and not through a GDS.
To include Southwest Airlines in search results, Nexonia Enterprise Travel provides the SuperSwitch to connect and still apply company policy.
Please Note: Because travel is sourced directly from the vendor, changes to a purchased trip must be made directly with the vendor, rather than through the Nexonia Travel application.
Southwest Direct Connect is an outside travel shopping source that offers direct access to Southwest Airlines inventory, and enables users to book and purchase ticketless travel through Southwest while complying with their corporate travel policies.
This document shows you, as a TMC Administrator, how to activate the Southwest Direct Connect.
To bring Southwest Direct Connect to Nexonia Enterprise Travel:
- Settings - First, set up the Super Switch Settings (a two-step process).
- Set up Provider Settings.
- Set up Airline SuperSwitch Settings
- Policy - Then, create a Super Switch Policy
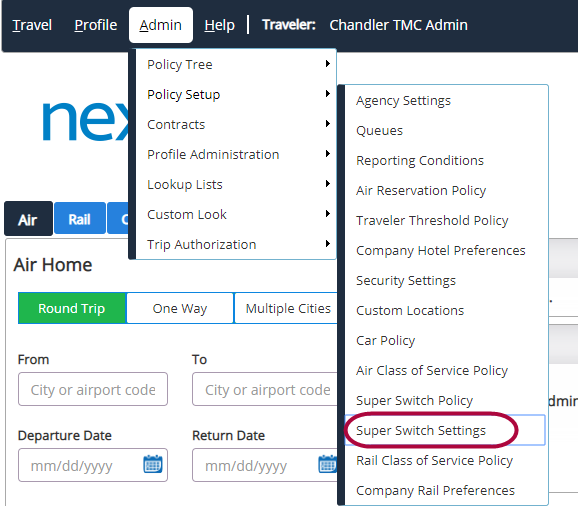
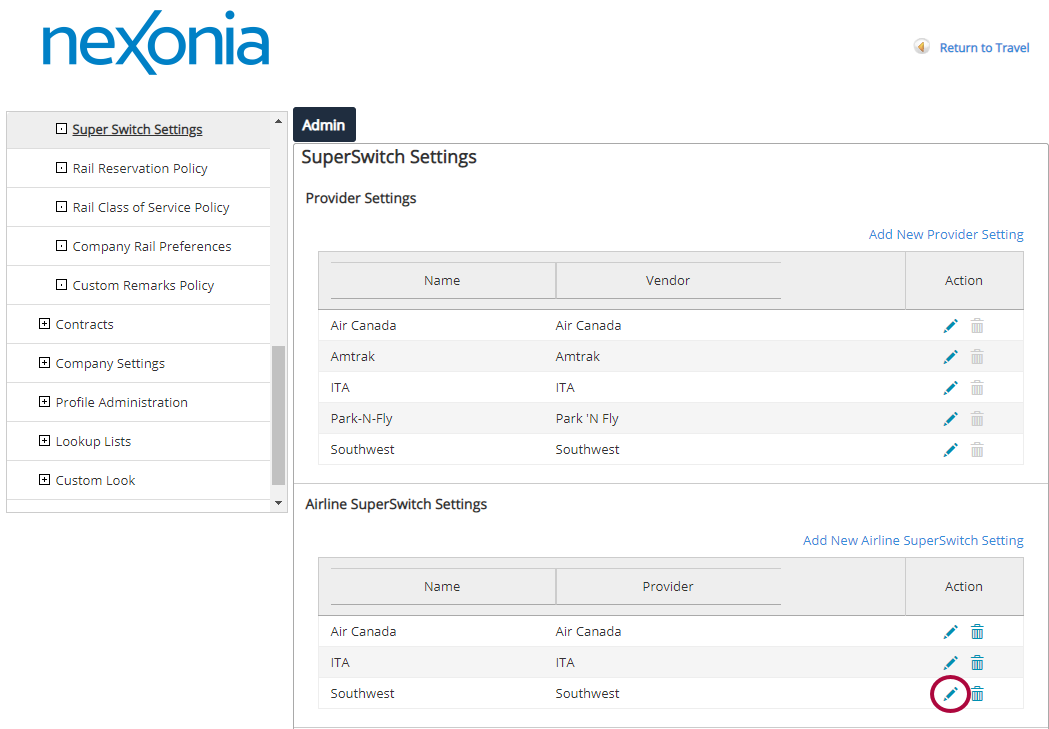
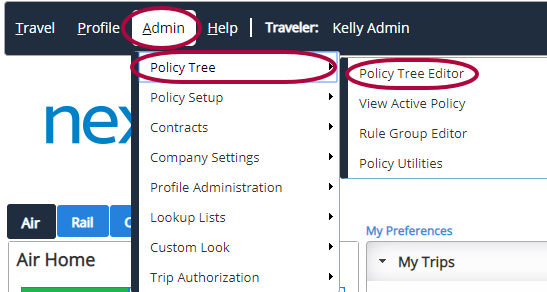
Step 1: From the menu bar at the top of the Nexonia Travel homepage, select the Admin menu. Then select Policy Setup, followed by Super Switch Settings.
Step 2: Once you are on the SuperSwitch Settings list page, you can set the SuperSwitch for Southwest for the company you are working with. This needs to be done for both Provider Settings and Airline SuperSwitch Settings.
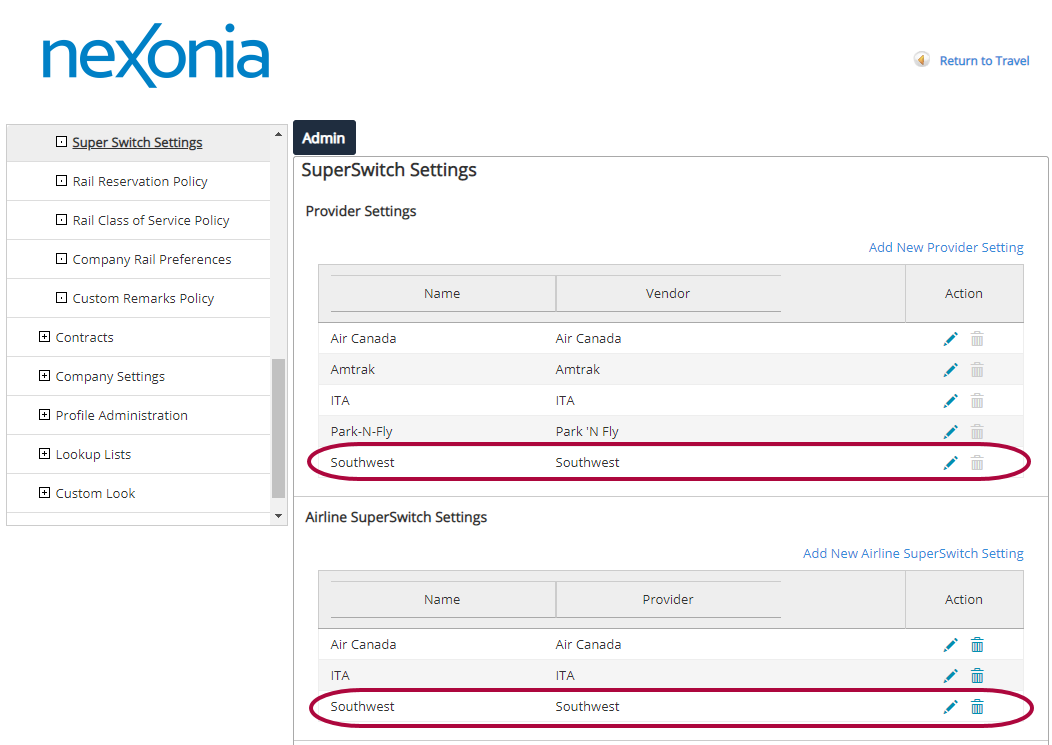
Step 3: To start with Provider Settings, click the Pencil icon next to Southwest.
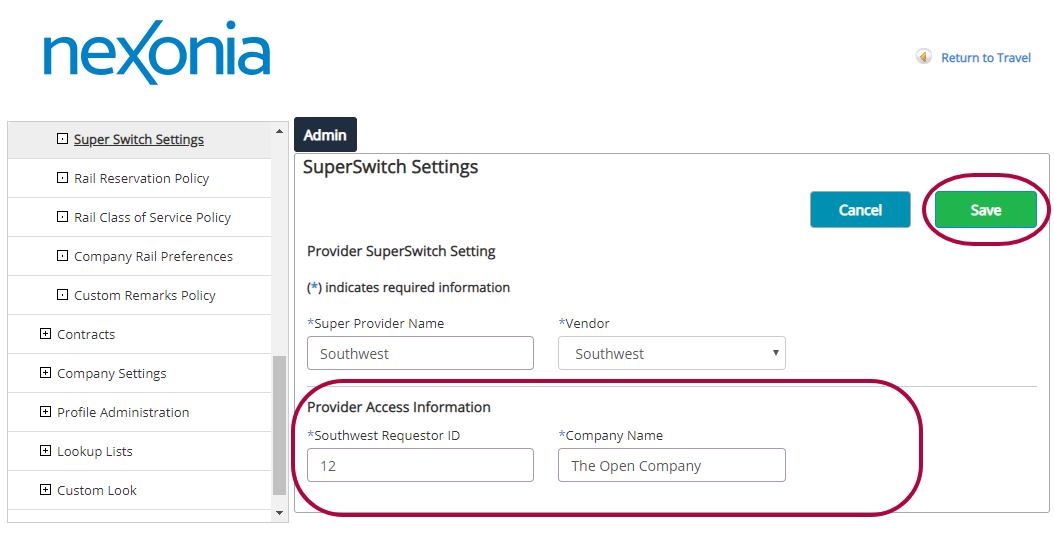
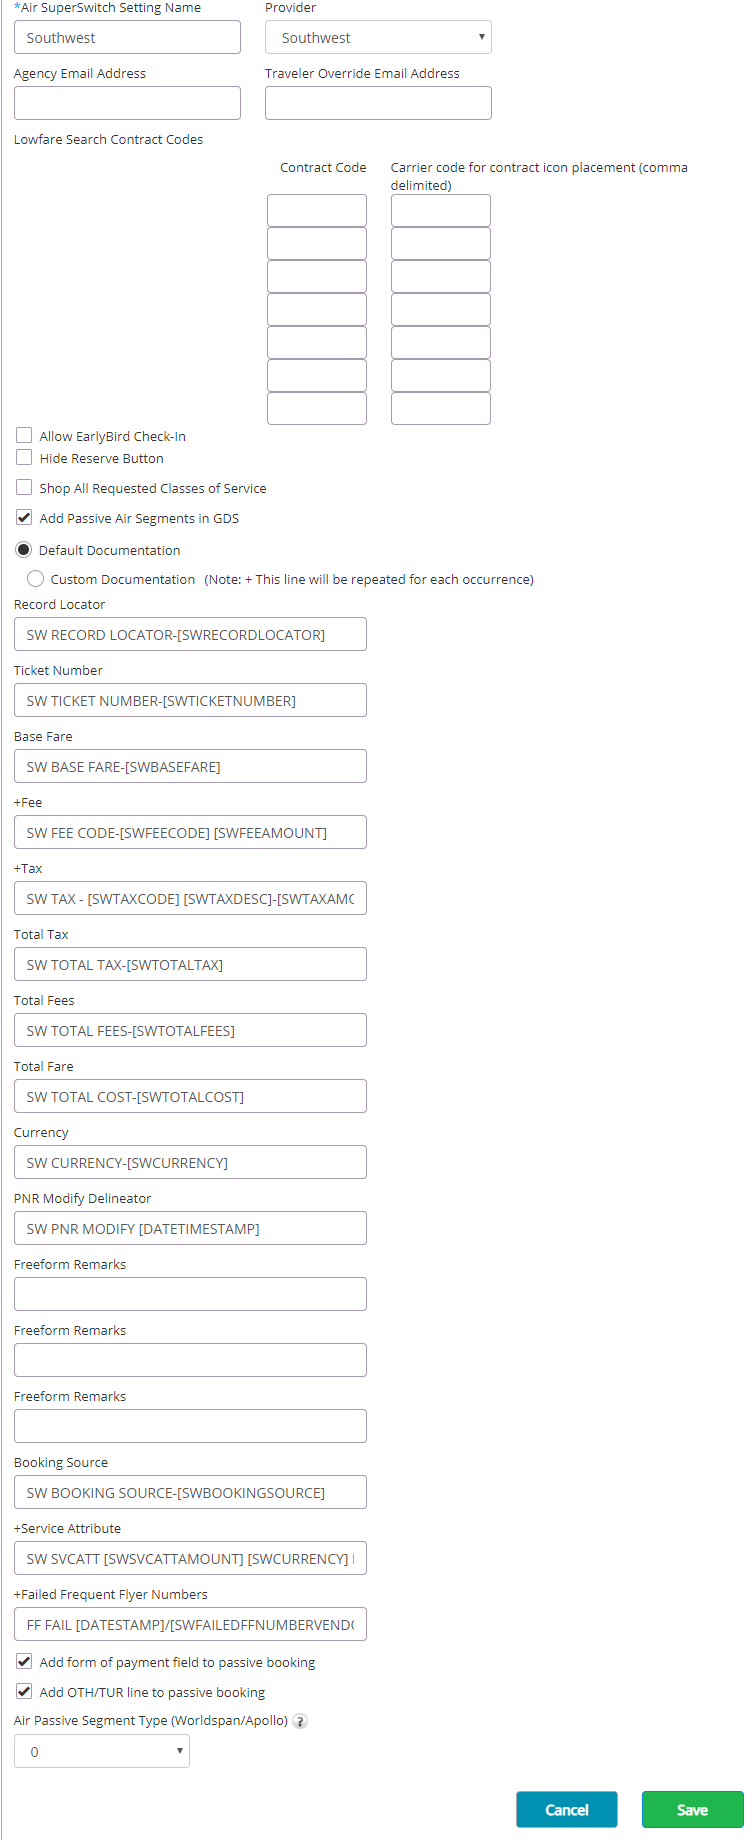
Step 4: When the Provider SuperSwitch Settings section opens, scroll to Provider Access Information. Update the Southwest Requestor ID and Company Name fields with the Southwest credentials provided by the TMC. When complete, click Save.
- Southwest Requestor ID - The SWABIZ ID number from Southwest.
- Company Name - This is the name of the client company for which you are establishing policy.
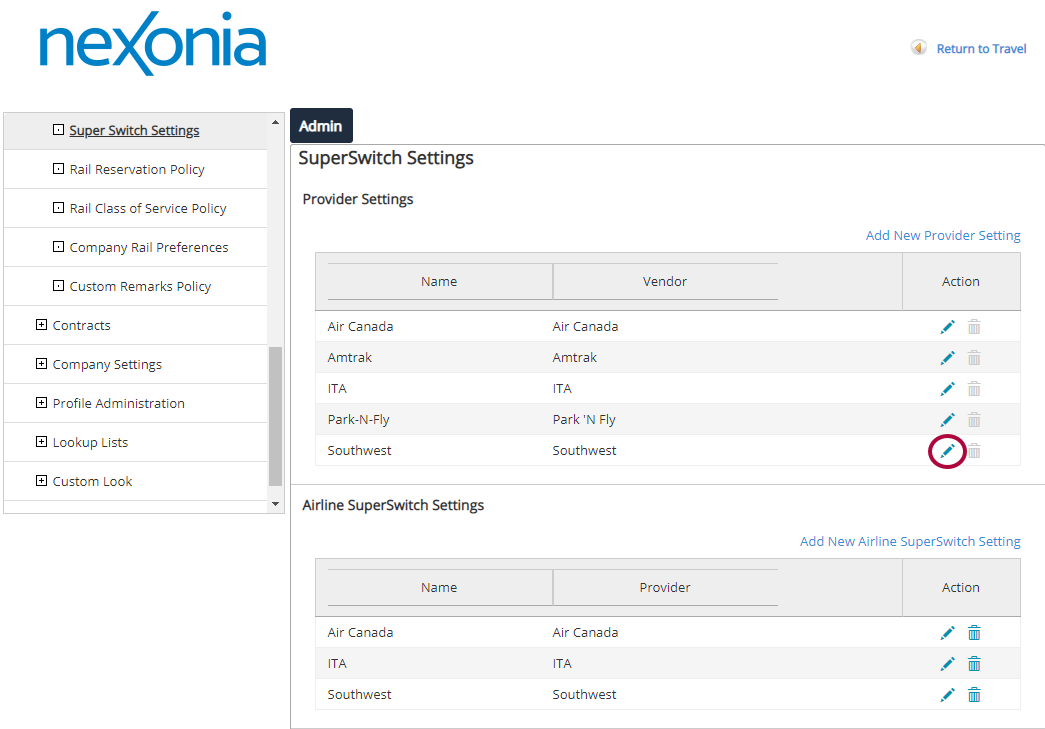
Step 5: Go back to the SuperSwitch Settings page. From here, go to Airline SuperSwitch Settings and click the Pencil icon next to Southwest.
Step 6: Next, scroll to Provider Access Information. Update the fields with the information for Southwest. Updates are provided by the TMC. Click Save to update the settings.
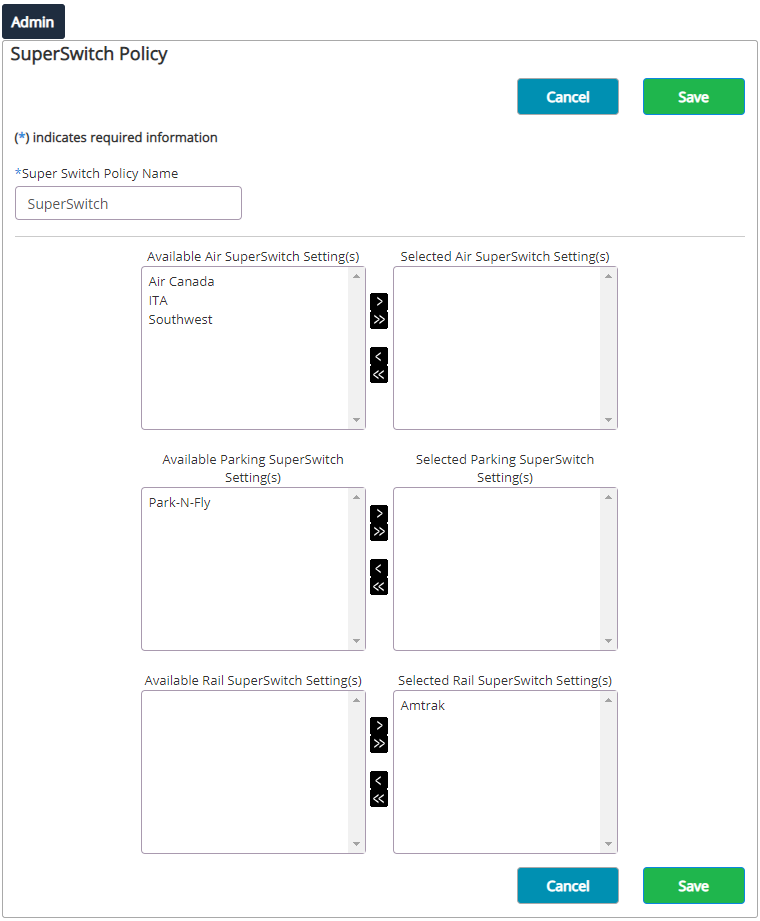
Adding the SuperSwitch Policy
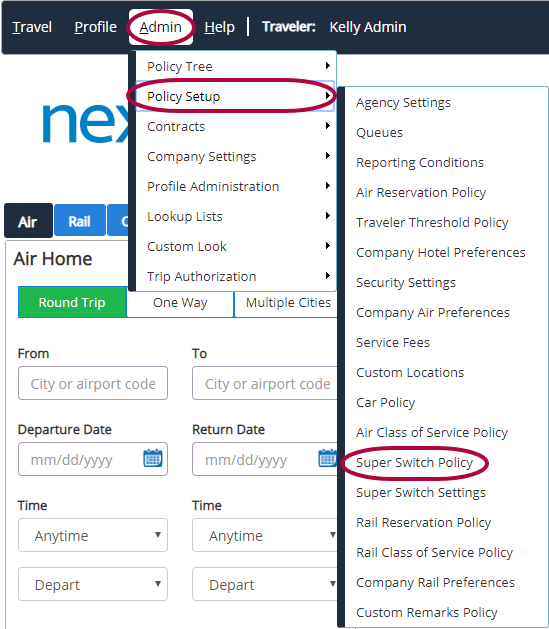
Step 1: From the Nexonia Travel homepage, click the Admin menu. Then, click Policy Setup, followed by Super Switch Policy.
Step 2: On the SuperSwitch Policy page, you can edit the settings for Southwest for the company you are working with. Click the Pencil icon.
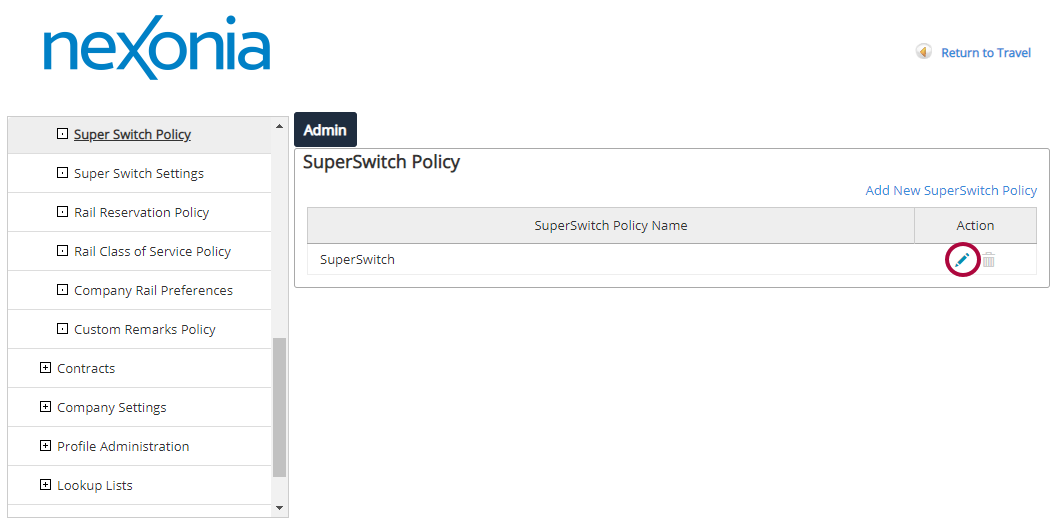
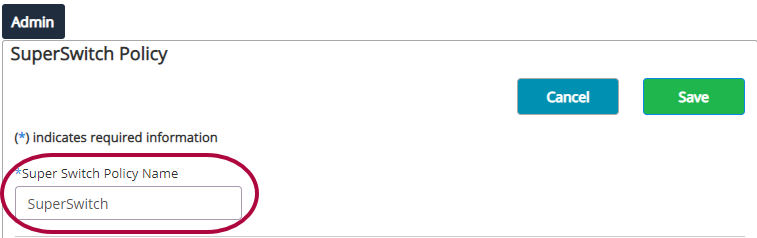
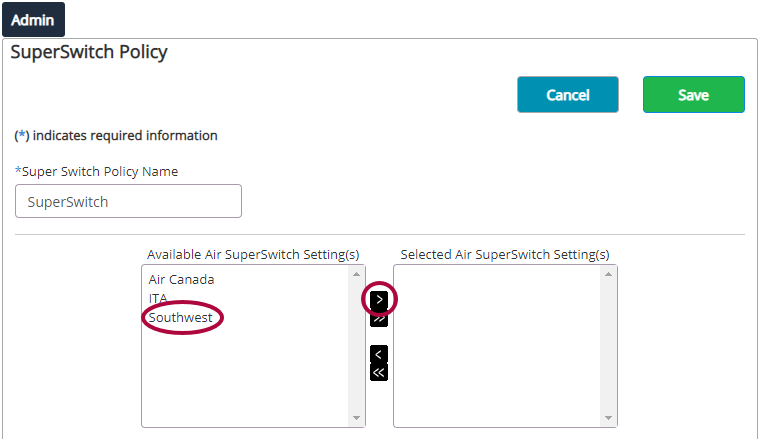
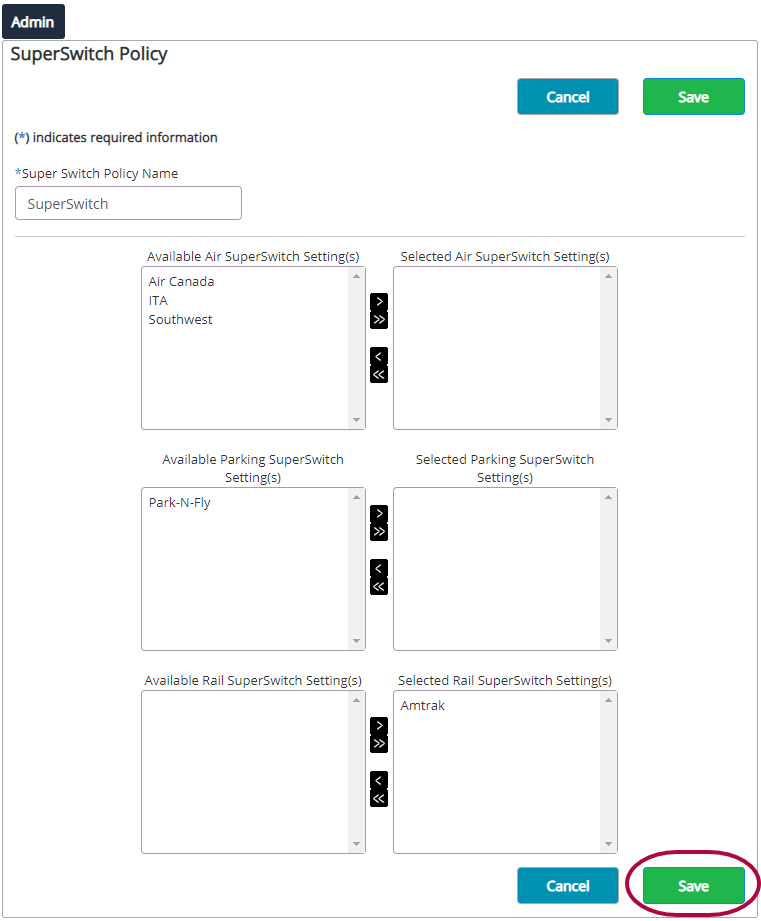
Step 3: Name the policy and use the arrows to move the policy from the Available column to the Selected column. Active SuperSwitch Policies show in the right pane.
Please Note: If the Air SuperSwitch setting for Southwest is shown in the Selected Air SuperSwitch Setting(s), select Cancel because the setting is already active.
Super Switch Fields:
- Super Switch Policy Name - The name of the policy. More than one policy may exist for a company, but only policy can be active at a time.
While only one policy can be active at a time, a policy can contain more than one setting. For example, a policy might contain both Air Canada and Southwest Airlines.
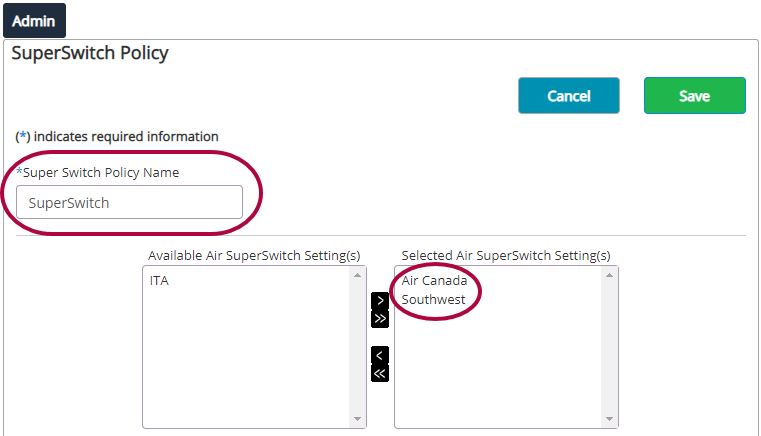
- Available Air SuperSwitch Setting(s) - This column contains the settings available for use. Vendors listed here are not yet connected. To set up the Southwest Direct Connect link, highlight Southwest and use the Arrow to move Southwest to the Selected Air SuperSwitch Setting(s) column.
- Selected Air SuperSwitch Setting(s) - This column holds active SuperSwitch settings. Travel options provided by vendors in this column show up in traveler searches.
Step 4: Click Save to active Super Switch.
Policy Tree
Step 1: From the Nexonia Travel homepage, click the Admin menu. Then click Policy Tree, followed by Policy Tree Editor.
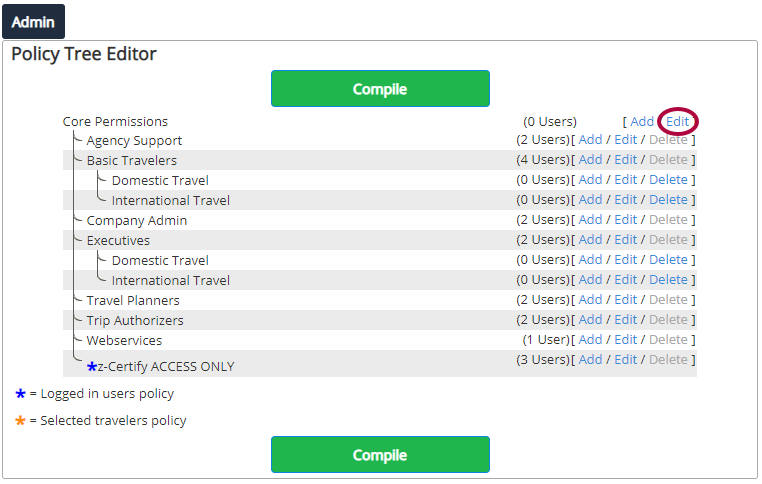
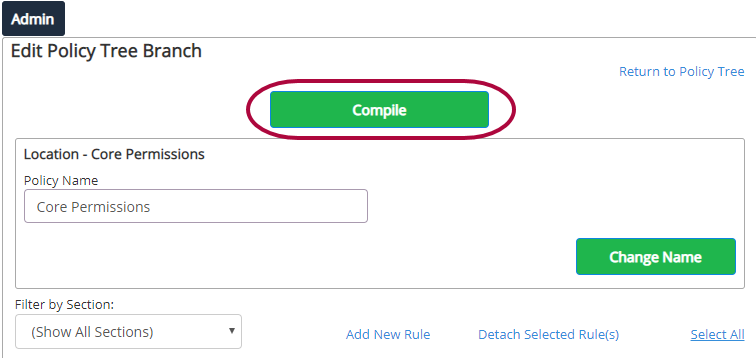
Step 2: After you have created the SuperSwitch Policy, you must attach it to the Policy Tree. Start by clicking Edit next to Core Permissions.
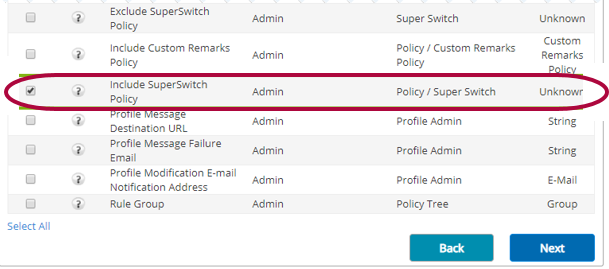
Step 3: Check Include SuperSwitch Policy then click Next.
Step 4: Click Compile.
Comments
0 comments
Article is closed for comments.