
You can use the Car Contracts section to enter the terms of rental car contracts between a company and a car rental agency. Car Contract terms are applied when the company’s travelers shop for rental cars.
This document describes how you, a TMC Administrator, how to create a new car contract.
Creating a new Car Contract is a two-step process:- Create the Car Contract.
- Then add the new contract to the Policy Tree to enable it.
Creating the Car Contract
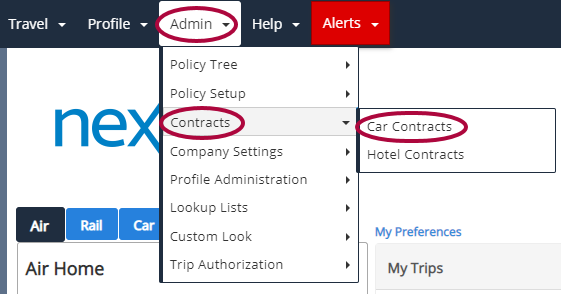
Step 1: Select Contracts in the Admin menu. Then, Car Contracts.
 Step 2: You can create a new Car Contract for the company you are working with.
Step 3: Click Add New Car Contract to display the Car Contracts editing screen. 
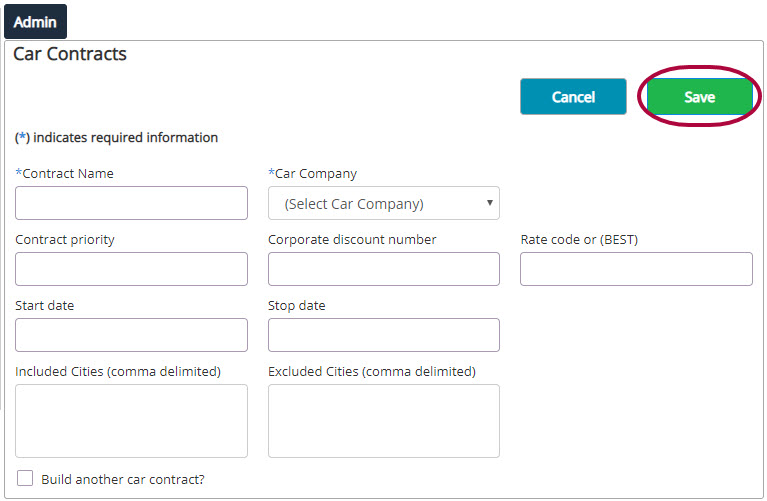
Step 4: Fill out the fields on the Car Contracts editing screen.
- Contract Name: The name of the contract.
- Car Company: The contracted car company.
- Contract priority: The priority of the contract (0-999).
- Best practice is to always add a Contract Priority (0) and Rate Code (BEST).
- Corporate discount number: A Corporate discount number should always be added. This is the discount number associated with the company's discount ,and is provided by the company you are working with.
- If working with a TMC, this information must be confirmed with the TMC.
- Rate code or (BEST): The rate code supplied by the rental car company, or BEST code.
- Start date: The date the contract goes into effect. If left blank ,the contract is always effective.
- End date: The date the contract expires. If left blank ,the contract is always effective.
- Included Cities (comma delimited): City code(s) / Zone(s) where contract applicable
- Excluded Cities (comma delimited): City code(s) / Zone(s) where contract not applicable.
- Build another car contract?: A check indicates that you want to add another car contract after this one is saved.
Step 5: Click Save to save your changes.
You are returned to the Car Contracts list screen and the new contract has been added to the list.
Add a Car Contract to the Policy Tree
For the new Car Contract to be enabled, it must be attached to a branch of the Policy Tree and Compiled. Attaching a Car Contract to a Policy Tree Branch results in cars returned to users that comply with that contract displaying a car contract icon at availability.
Car contract rule items are inclusive. The rule items can be added multiple times to the same Policy Tree Branch without conflict, and a Policy Tree Branch can support multiple car contracts.
A Car Contract attached to a Policy Tree Branch with the Include Car Contract rule cannot be deleted. To delete an attached contract, first detach it from the Policy Tree Branch.
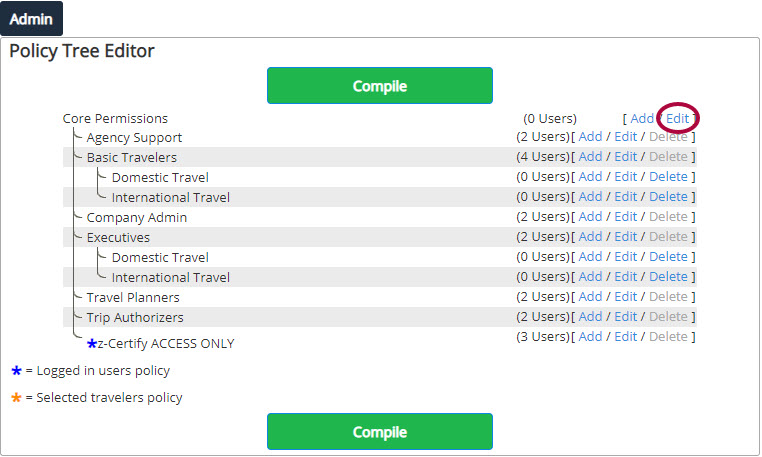
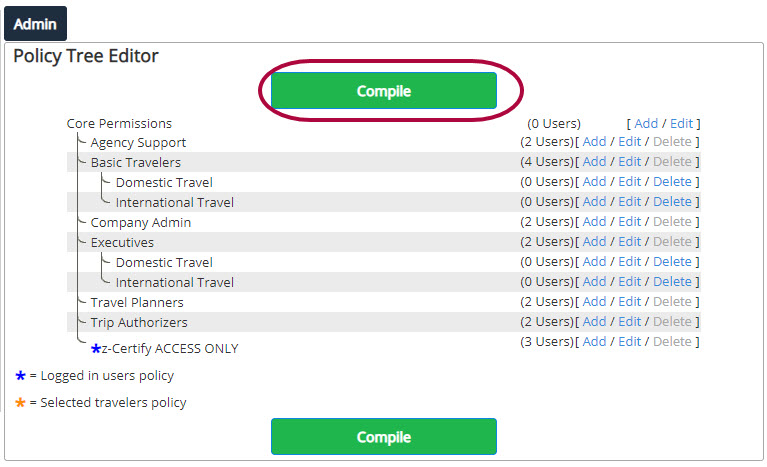
Step 1: Select Policy Tree in the Admin menu. Then, Policy Tree Editor.

Step 2: The Policy Tree Editor opens. Select Edit for the Core Permissions policy branch.
Step 3: Scroll down to the Car section and click Add New Rule to Car Section.
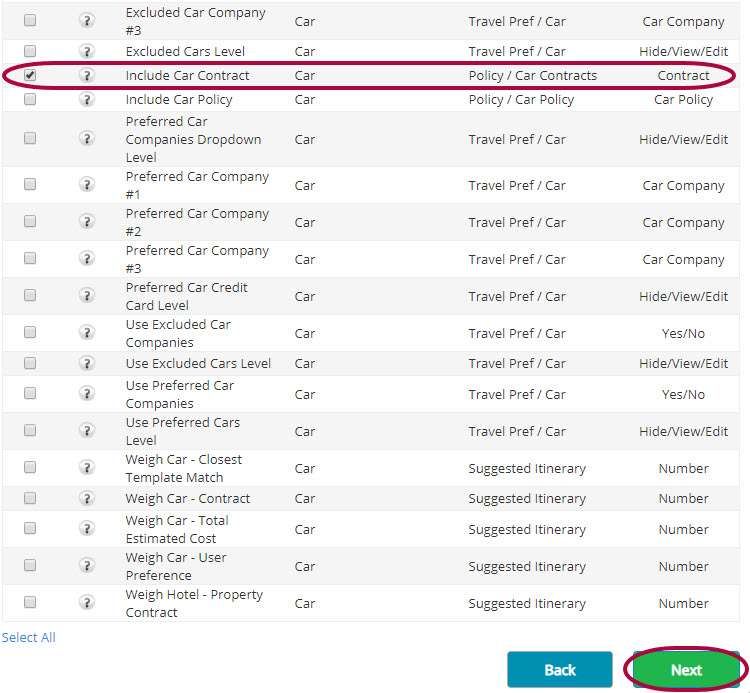
Step 4: The Policy Rule Search Results section displays.
Mark the checkbox for Include Car Contract and click Next.
 Step 5: The Policy Rule Values section appears. Select the Car Contract you created earlier, and then select Save.
Step 6: On the Edit Policy Tree Branch screen, click Compile for Core Permissions.
The Car Contract now appears in the Car section of the Policy Tree.
Comments
0 comments
Article is closed for comments.