This document shows you, as TMC Administrator, how to add custom air and hotel locations.
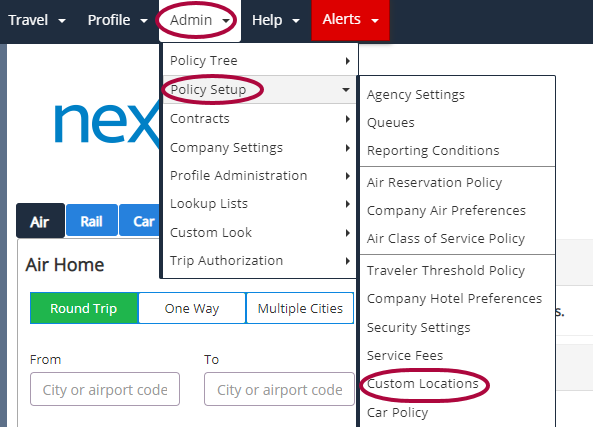
Step 1: Select Policy Setup in the Admin menu. Then, Custom Locations.
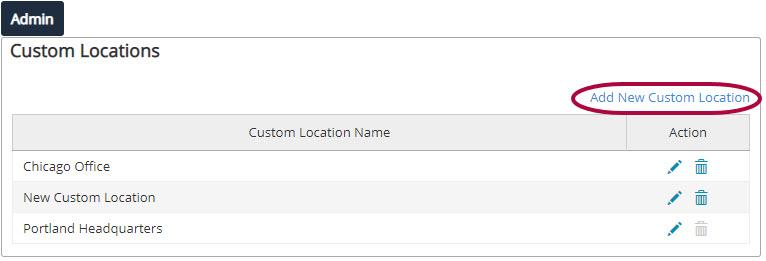
Step 2: The Custom Locations list page opens.
Please Note: Nexonia Travel offers a databridge feed option if a company requires a bulk import of custom locations. Contact Level 2 Support for this functionality.
Step 3: From the Custom Locations list screen, select Add New Custom Location.
Step 4: The Custom Locations screen opens. Use the fields to create the new Custom Location.
Custom Locations
- Custom Location Name: The name for this Custom Location. The name is displayed to end users and should be kept as short and clear as possible. A shorter name has less impact in the UI. The name should be one users are familiar with so users can easily identify it for use.
- Include for Air Search: Checkmark this box to make this custom location available for air availability searches.
- Include for Air Search: Checkmark this box to make this custom location available for air availability searches.
- Include for Hotel Search: Checkmark this box to make this custom location available for hotel searches.
Airports
When using Custom Locations, Nexonia Travel processes flight availability by replacing GDS defined co-terminal airports with the airports entered in here. Nexonia Travel then searches availability for Best Time, Lowest Fares, andAir Contracts for each of the airport codes entered below.
- Main Airport Reference: The airport code for the primary airport used for this custom location. City codes are not recognized by the system.
- Use alternate airports for Custom Location Search Only:
- Mark this checkbox if you want Nexonia Travel to use alternate airports ONLY when the user searches using the custom location.
- Leave unmarked if you want Nexonia Travel to use alternate airports when the user searches by custom location or by the primary airport code.
- Alternate Airport #1: Enter the airport code for the first alternate airport (if the custom location is in a city with more than one airport).
- Alternate Airport #2: Enter the second alternate airport code (if the custom location is in a city with more than one airport).
Interactive Map
The Interactive Map is accessed from the Air Home screen. To find the quadrants for a custom location, place your mouse over the location on the map. The quadrants appear in the right side of the margin below the map. Example: For Dallas they are X=325 Y=300.
- Map Quadrant X: Enter the X quadrant on the Interactive map.
- Map Quadrant Y: Enter the Y quadrant on the Interactive map.
- Map Zone: The area of the world in which the custom location is located (North America, South America, Central America, Middle East, Asia, Australia, or Africa).
Address Information (used for Hotel Search):
For hotel processing, room availability is searched based on the address provided in the Custom Location. If an address is not provided, the search is based off the main airport code entered in the Custom Location area.
- Reference Address: The street address of the hotel.
- City: The city in which the hotel is located.
- State/Province: The state or province where the hotel is located.
- Zip/Postal Code: The zip or postal code of the hotel.
- Country: The country in which the hotel is located.
- Latitude/Longitude:
- When you click Save, the Latitude/Longitude fields are automatically populated based on the address entered above.
- To override the Latitude/Longitude, by manually enter your own coordinates here.
Step 3: Click Save to retain your changes.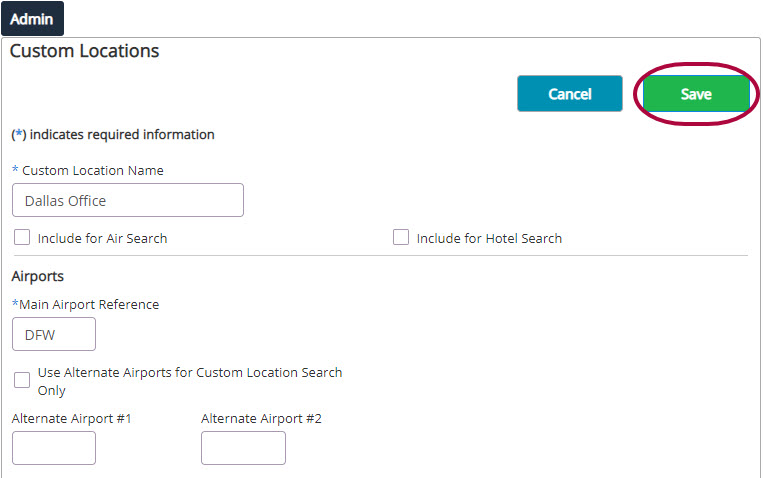
You are returned to the Custom Locations screen, where the new Custom Location has been added to the list.
Attaching a Custom Location to a Policy Tree Branch
To make a Custom Location active for a policy branch, the Include Custom Location rule must be attached with the Custom Location as the Value.
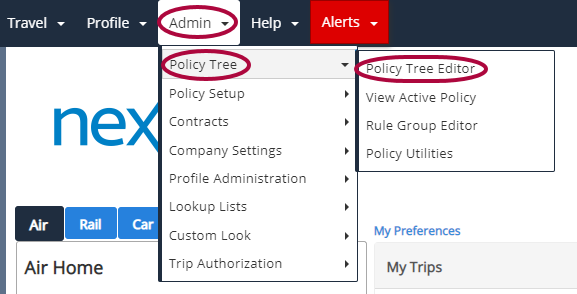
Step 1: On the Nexonia Travel homepage, select Policy Tree in the Admin menu. Then, Policy Tree Editor.
Step 2: The Policy Tree Editor opens. Click Edit next to the Branch to which to attach the Reporting Condition.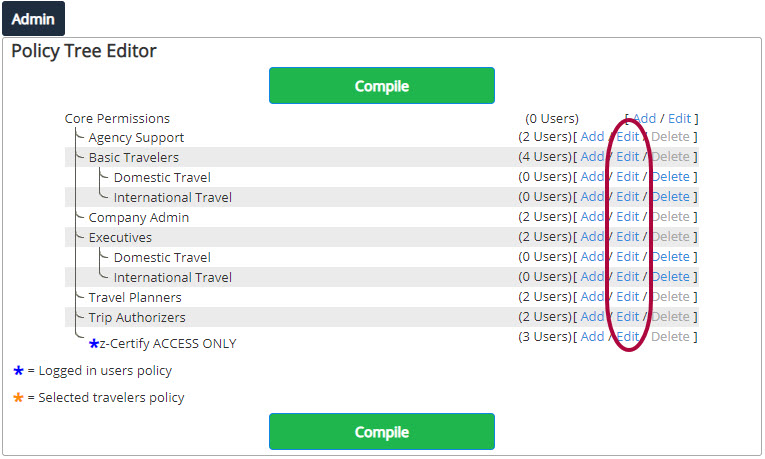
Step 3: On the Edit Policy Tree Branch screen, click Add New Rule.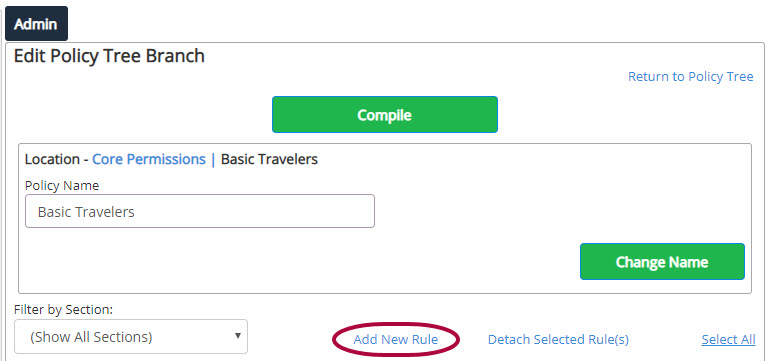
Step 4: In the for keywords field, enter keywords and then click Next. Keywords are a way of querying the list of available rules.
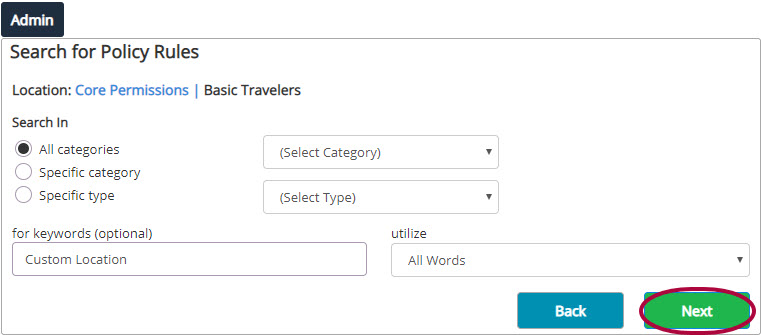
Step 5: Select the Reporting Condition you created earlier, and then select Next.
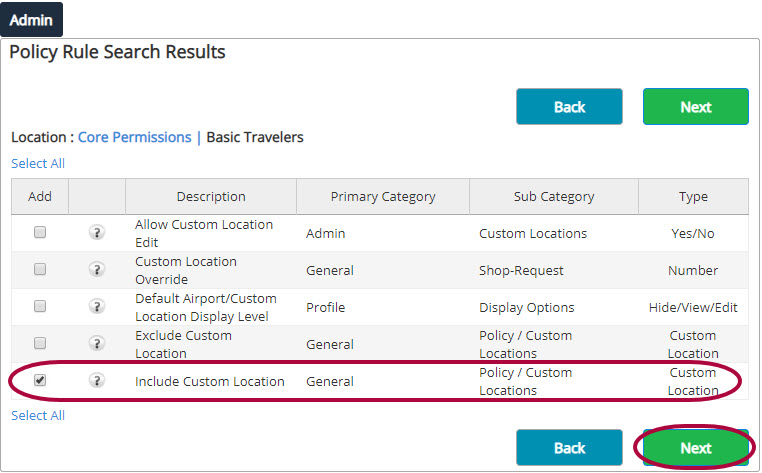
Step 6: From the Policy Rule Values screen, select the Value and then click Save.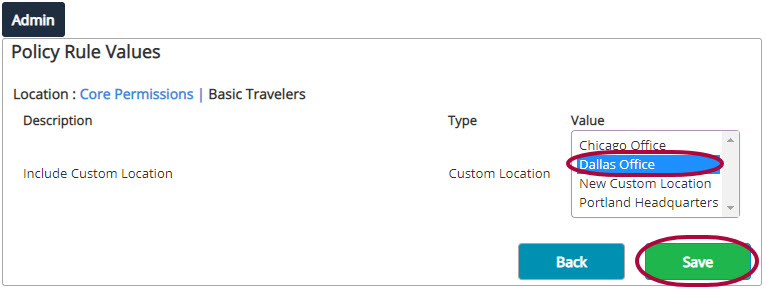
Step 7: Click Compile. 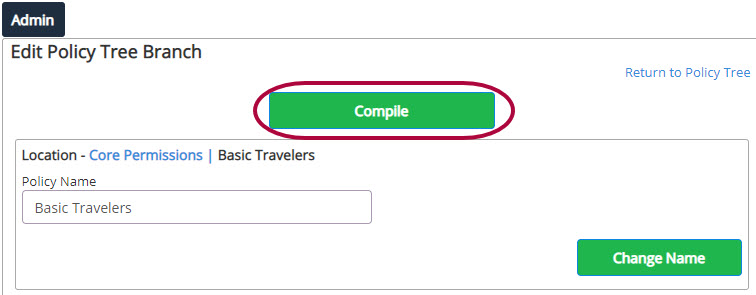
Excluding a Custom Location from a Policy Tree Branch
To exclude a Custom Location, the process is almost identical to Attaching a Custom Location, except the Exclude Custom Location rule must be attached with the location, instead.
Go to the Policy Tree Editor page.
Step 1: On the Nexonia Travel homepage, go to the menu bar:
- Hover your cursor over Admin.
- Scroll to Policy Tree.
- Click Policy Tree Editor.
Step 2: The Policy Tree Editor opens. Click Edit next to the Branch to which to attach the Reporting Condition to exclude.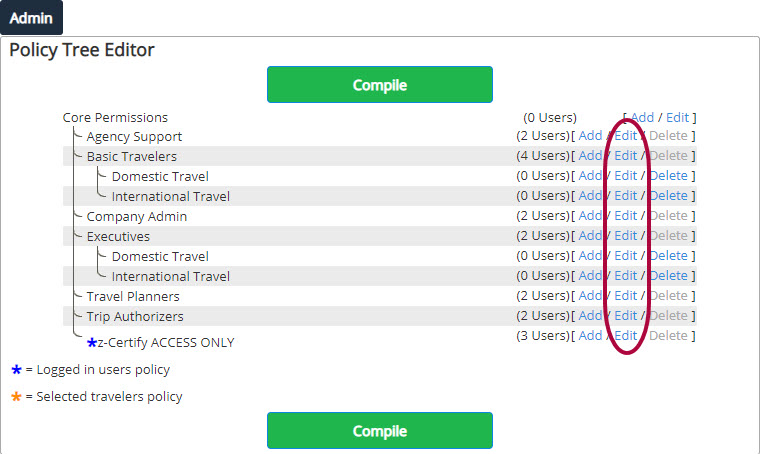
Step 3: On the Edit Policy Tree Branch screen, click Add New Rule.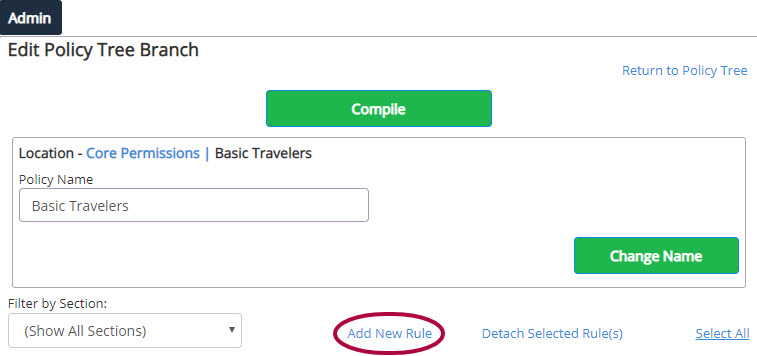
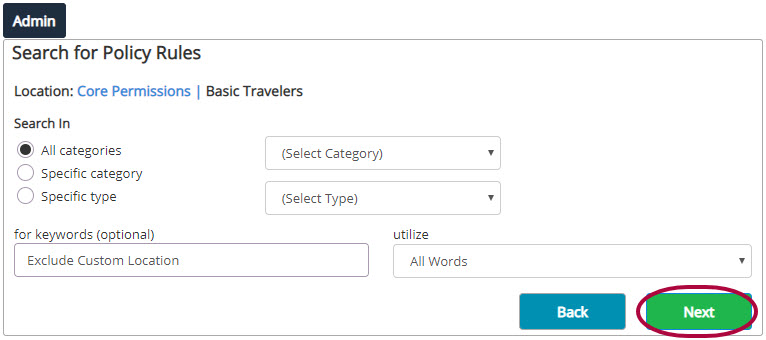
Step 4: In the for keywords field, enter keywords and then click Next.
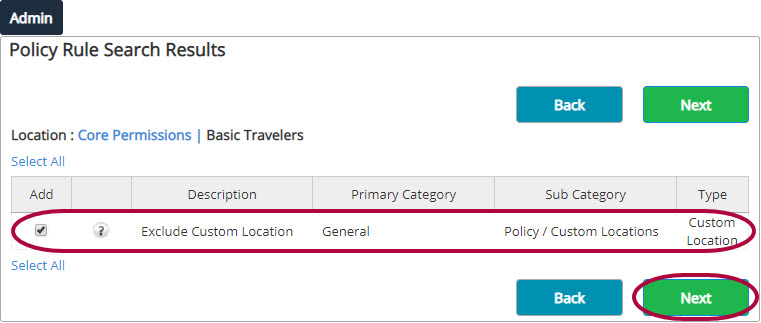
Step 5: Select the Reporting Condition you created earlier, and then select Next.
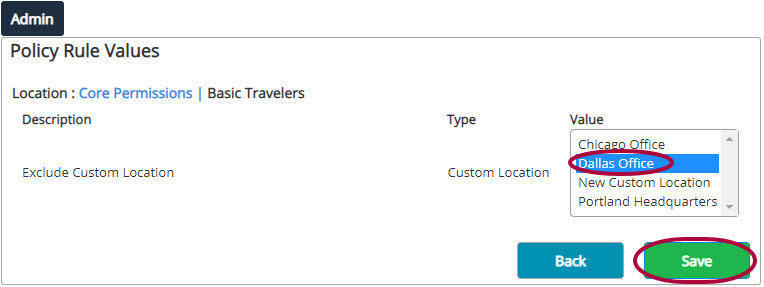
Step 6: From the Policy Rule Values screen, select the Value and then click Save.
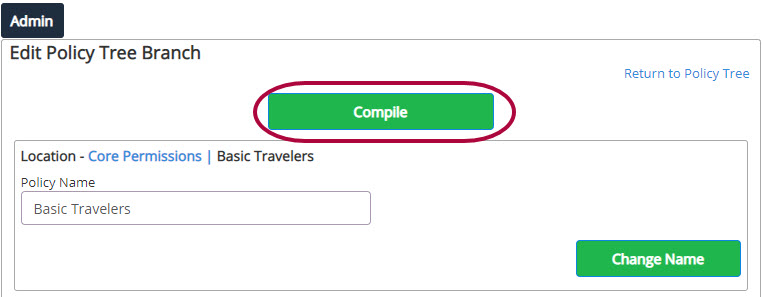
Step 7: Click Compile.




Comments
0 comments
Article is closed for comments.