
Once a receipt is added to Nexonia, users can utilize Optical Character Recognition technology (OCR) to scan the image for receipt data, including the date and amount.
Web: How to Scan an Expense Receipt
Log in to your Nexonia account on the web. Navigate to Expenses > Open or Add Report.
Add a receipt in your report, either via upload, drag and drop, email, fax or webcam. To learn more: How to Add Expense Receipts on the Web
Once the receipt is added, it can be scanned for receipt data.
Note: receipts can be scanned from the Manage Receipts button, or from the expense item window. The icons and process to scan the receipt are the same in both areas. The screenshots below show how to scan a receipt from the Manage Receipts button.
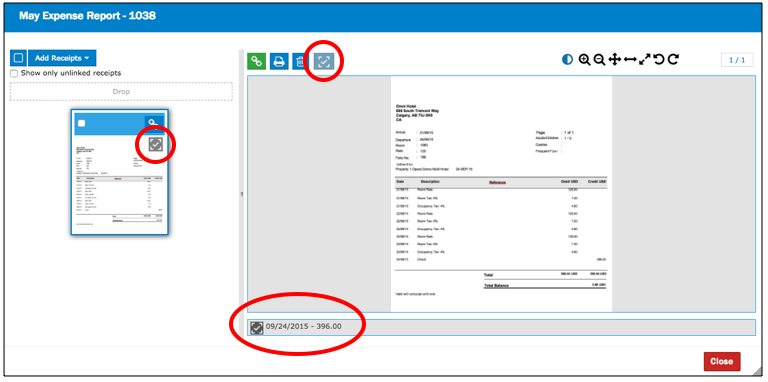
Step 1: With the receipt selected, click on the "Scan the receipt" icon.
Step 2: Once the receipt has been scanned, a Checkmark icon will appear and the receipt data will populate below.
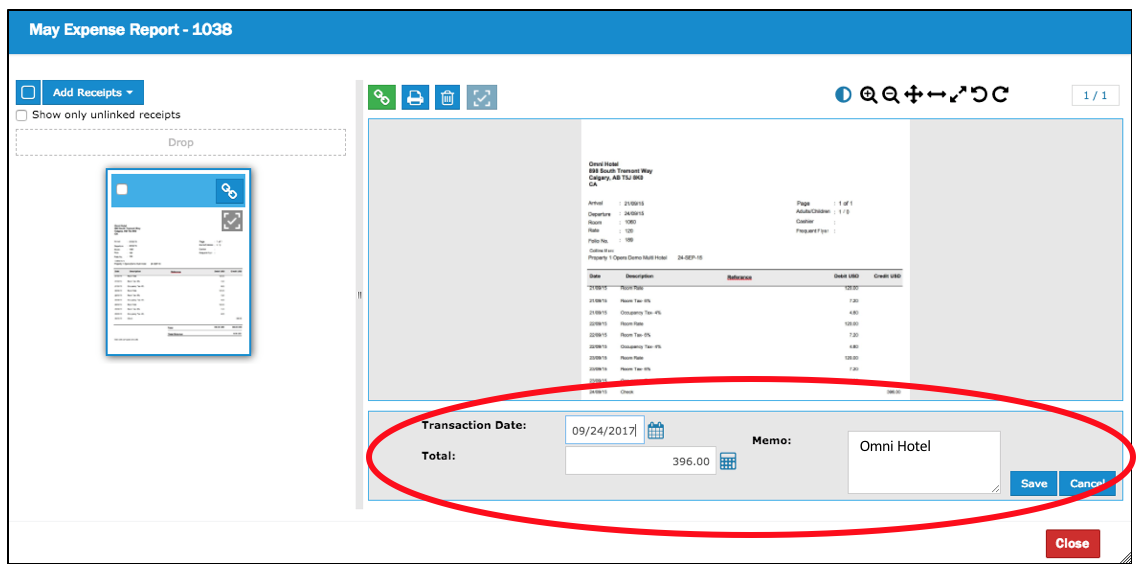
Step 3: Receipt data can be edited. Click on the Checkmark icon below to expand and edit the receipt info and/or add a Memo. Click Save to save any changes.
App: How to Scan an Expense Receipt
Log in to your Nexonia account on the app.
Add an expense receipt, either via the camera, camera roll, or by retrieving a receipt that is saved in your expense report. To learn more: How to Add Expense Receipts on the App
Once the receipt is added, it can be scanned for receipt data.
Note: receipts can be scanned from the Add Receipt icon, Add Item screen, or the receipt management area inside a report. The screenshots below show how to add and scan a receipt using the Add Receipt icon from the homescreen.
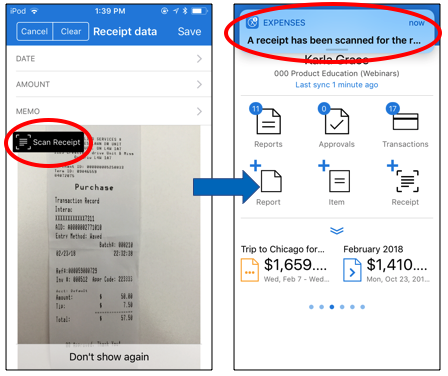
Step 1: From the homescreen, tap the Add Receipt icon and select a report to save the receipt in. Snap a photo of your receipt and then tap Use Photo. To learn more: Receipt Upload Tips
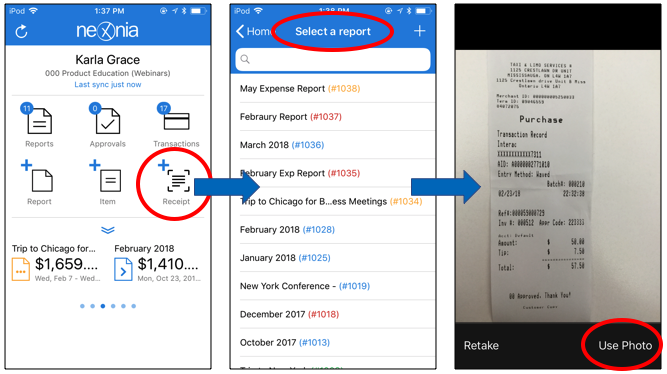
Step 2: Tap the "Scan Receipt" icon to utilize Optical Character Recognition technology. Next, you will automatically return to the homescreen. You will receive a notification on the app once the receipt has been scanned!
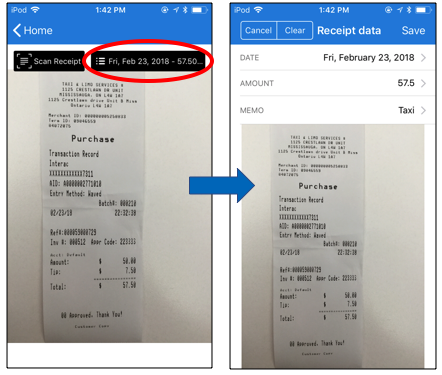
Step 3: Tapping on the notification allows you to see the details of the receipt data. Tap the receipt info on the right to edit the info and/or add a Memo. Click Save to save any changes.
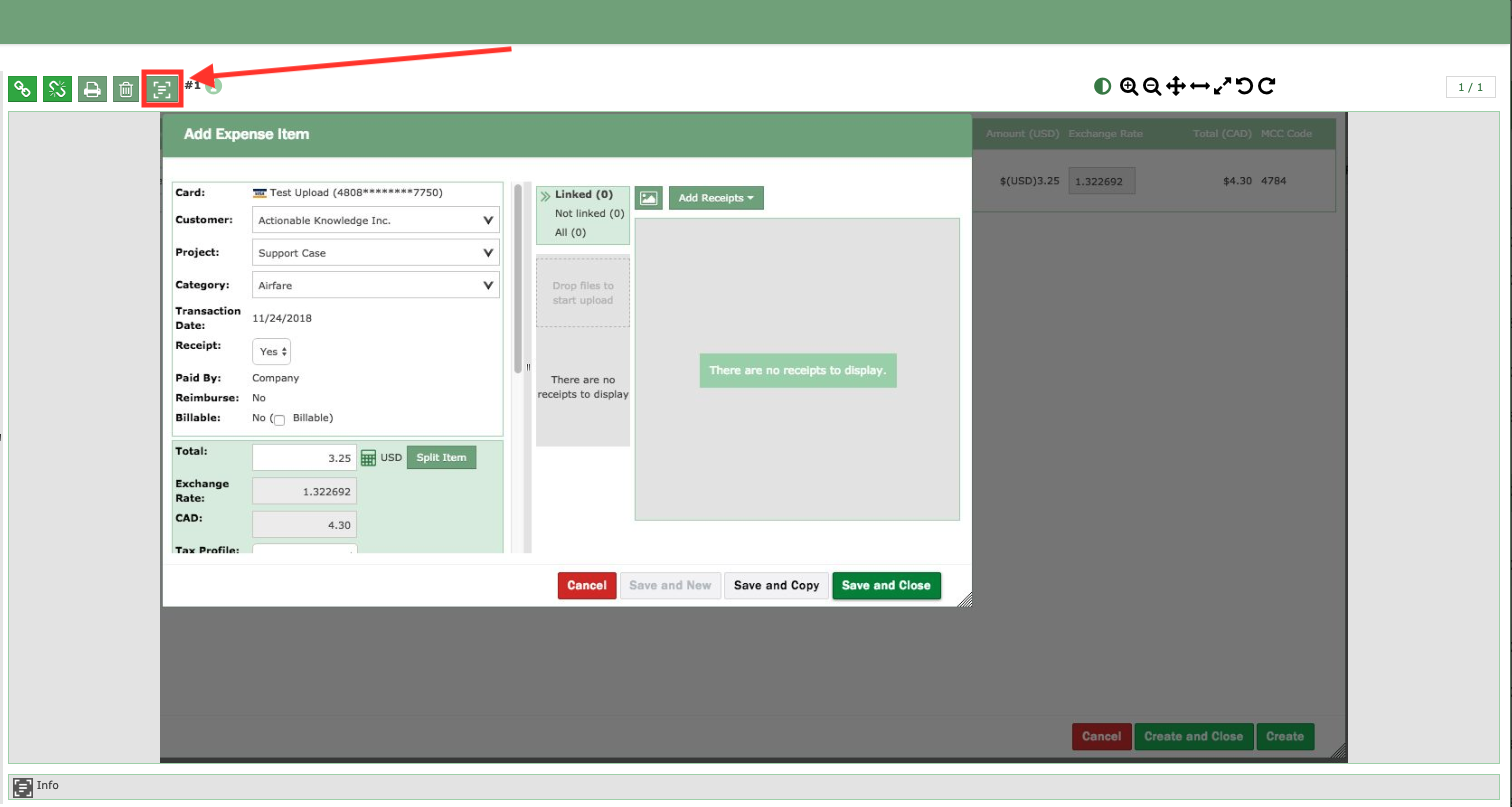
 Once a receipt is scanned, and then linked to a new item, the receipt data will automatically populate in the new expense item!
Comments
0 comments
Article is closed for comments.