
Nexonia allows users to link receipts to expense items. Depending on your organization's expense policies, this may be a requirement. It is possible to link one receipt to a single expense item or to link multiple receipts to a single expense item.
Some examples of reasons to link multiple receipts to a single expense item:
- A receipt was processed into multiple images
- Multiple receipts are applicable to a single expense item (i.e. Hotel bills)
You can link upload and link receipts to an expense item in a few different ways:
Link A Receipt To An Expense Item
1. In Expenses, create a new expense item or edit an existing item within your expense report.
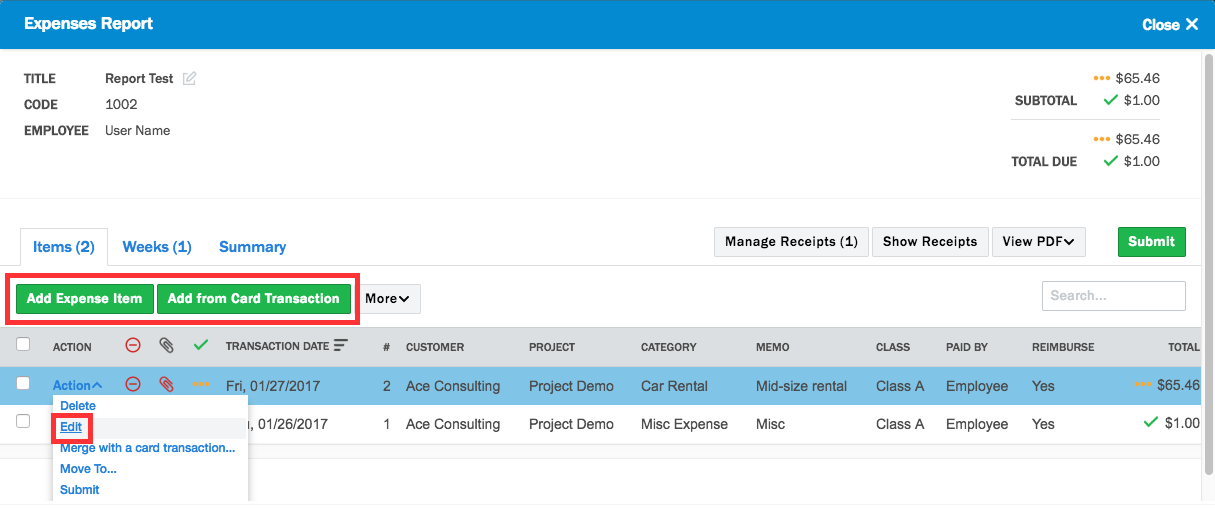
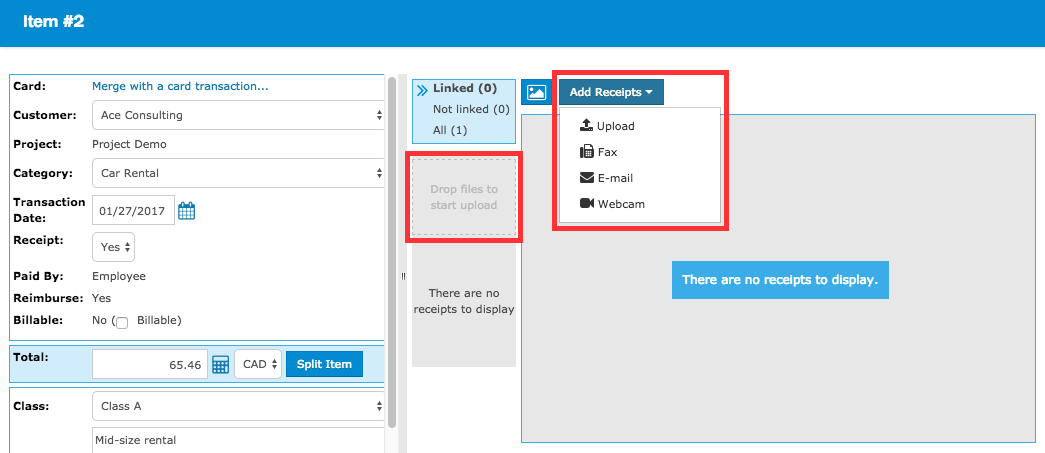
2. On the right hand side of the expense item window, click on the Add Receipts dropdown. If you Upload a receipt or photograph one using the Webcam, the receipt will be automatically linked to the expense item (Email & Fax will be covered towards the bottom of this article). If you choose to drag and drop a file into the Drop files to start upload box, the receipt will also be automatically linked.
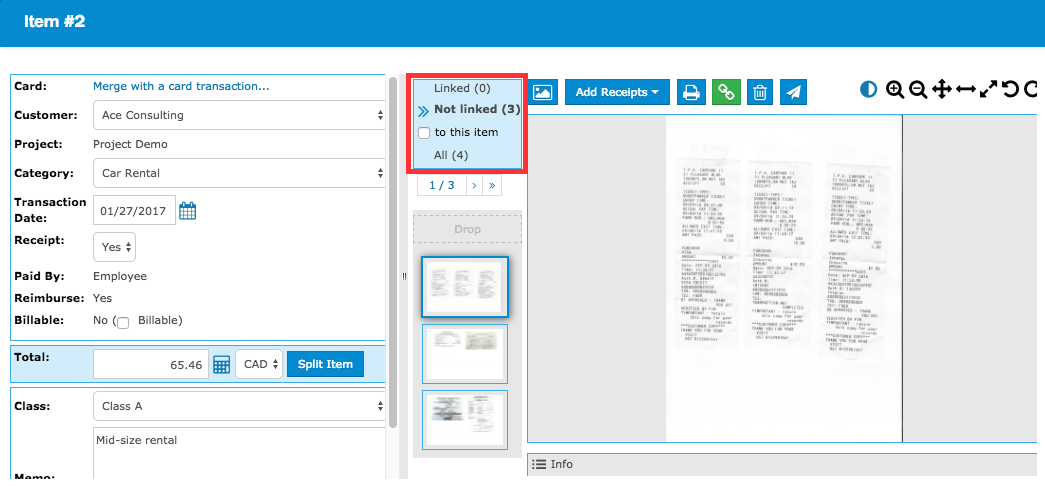
3. You can also choose to link a receipt that has already been added to the expense report. Either click on Not linked (to view all receipts within report not yet linked to an expense) or click All (to view all receipts within the expense report). Locate the receipt you'd like to link, then click on the link icon. ![]()
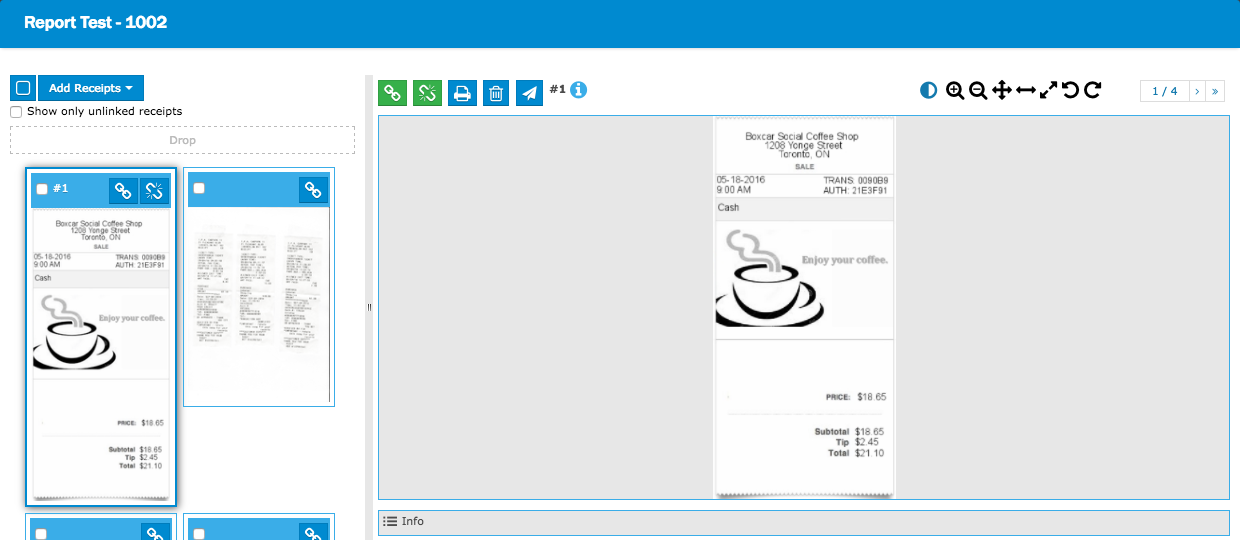
4. Finally, you can opt to Open manage receipts window by clicking on the icon ![]() which is just to the left of the Add Receipts dropdown.
which is just to the left of the Add Receipts dropdown.
Within this window, you can choose to Upload, Webcam and Drop files to start upload to link a receipt to the expense item via the Add Receipts dropdown.
Below this area in the window, you'll find the receipts not linked to this expense item and by using the checkbox, you can filter between all the receipts in the expense report or just the receipts not linked to any expense. Once you have chosen your receipt, click the link icon. ![]()
Linking Multiple Receipts To An Expense Item
Follow the same steps above to add receipts.
- If Uploading receipts, choose multiple files
- If using Webcam, photograph multiple receipts
- If Dragging and Dropping, include multiple files
- If selecting from receipts already in expense report, click the link icon
 on each desired receipt
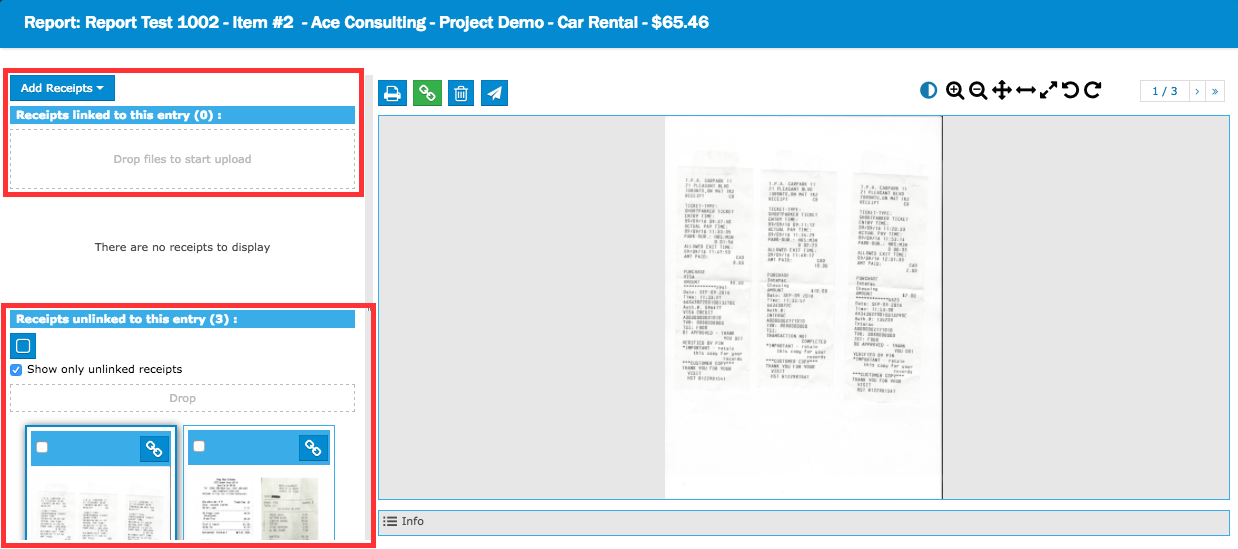
Manage Receipts Window
An alternate way of managing receipts and linking them to expense items is via the manage receipts window separate of any expense. Click on Manage Receipts within the expense report.
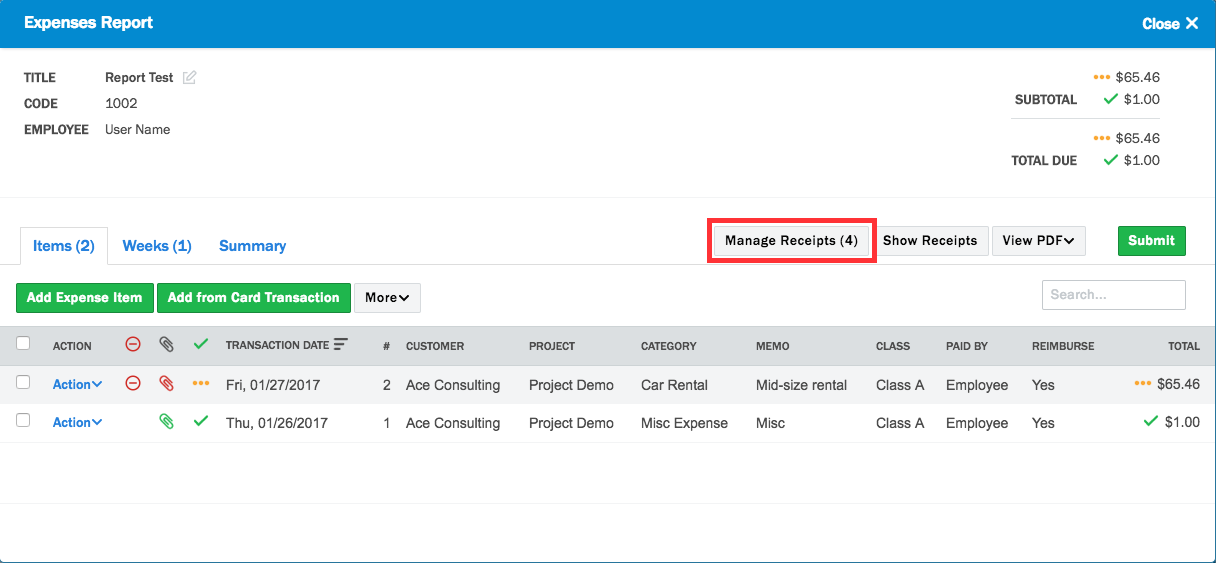
The next window is very similar to the Manage Receipts window covered in the previous section. Here, you still have the option of adding receipts via the dropdown or linking receipts that already exist in the expense report.
When you click on the Email option to add receipts, a list of options and notes will appear. Follow the option and/or note that suits your current preference for submission.
When Emailing receipts to Nexonia, the receipts will be added to your expense report and will be 'Not linked' to any expense item. From here, you can follow step 3 or 4 from the Link A Receipt To An Expense Item section, Linking Multiple Receipts To An Expense Item or Manage Receipts Window.
Please note for all receipts added to Nexonia:
- If the file uploaded contains multiple pages, there will be multiple images.
- The following file formats are supported: JPG, PNG, GIF, TIFF, PDF.
- The file size can be at most 10MB.
Comments
0 comments
Please sign in to leave a comment.