Reimbursable expenses that are exported from Nexonia into Intacct, NetSuite, or Bill.com can be marked as paid in those ERPs. We can then import that payment information into Nexonia so that the user sees that their expenses have been paid out and to give administrators an overview of which reports in Nexonia have been paid. To transfer that data into Nexonia, it is required to set up a new data import integration.
This article will show you how to set up a new data import integration.
Step 1: Open the Integration tab and click Integration Setup.

Step 2: Click Add Data Import.
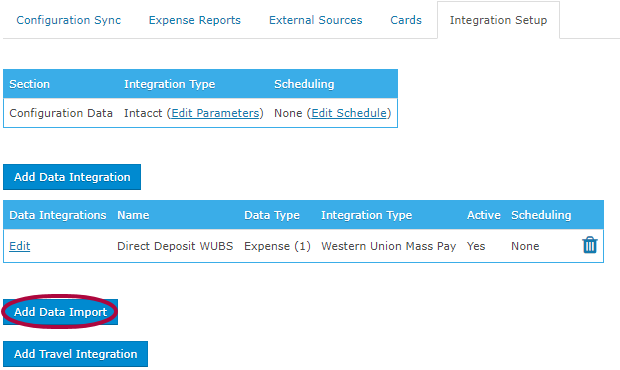
Step 3: Choose Expense Payments in the Data Type drop-down menu.
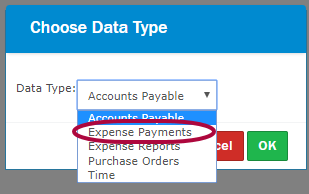
Step 4: Click OK.
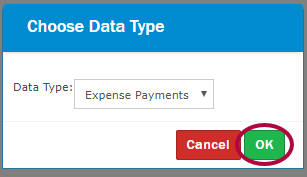
Step 5: The Data Import window appears. Enter the following information:
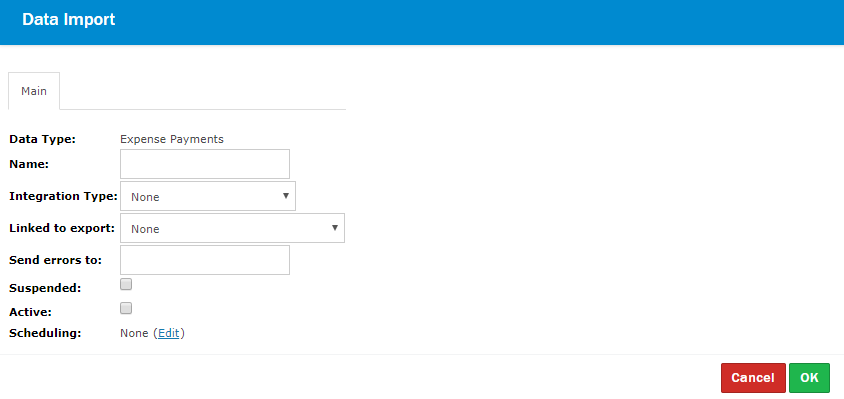
- Name: Enter the name of the data import
- Integration Type: Choose the applicable ERP (Bill.com/Intacct/NetSuite)
- Linked to Export: Every integration is defined by a bracketed number (you can see this in the Data Integrations list). In the screenshot below, the data import has been linked to the Reimbursable Expenses Integration which is defined by number 1.
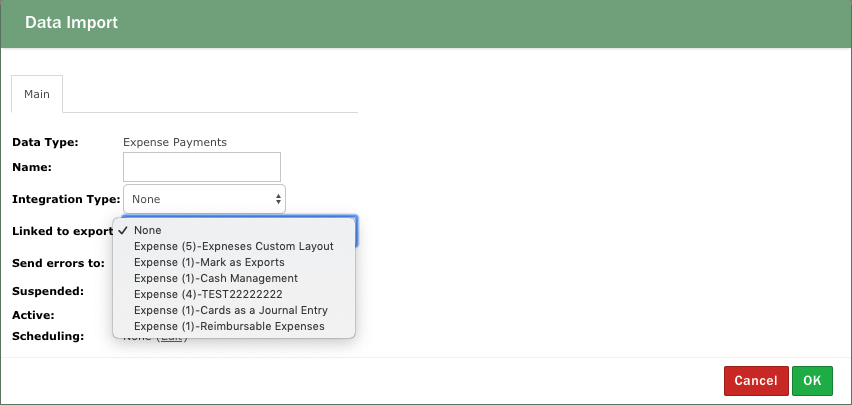
- Send errors to: You can enter the email address of an administrator who should be receiving any error messages for this integration.
- Active: Check mark this option
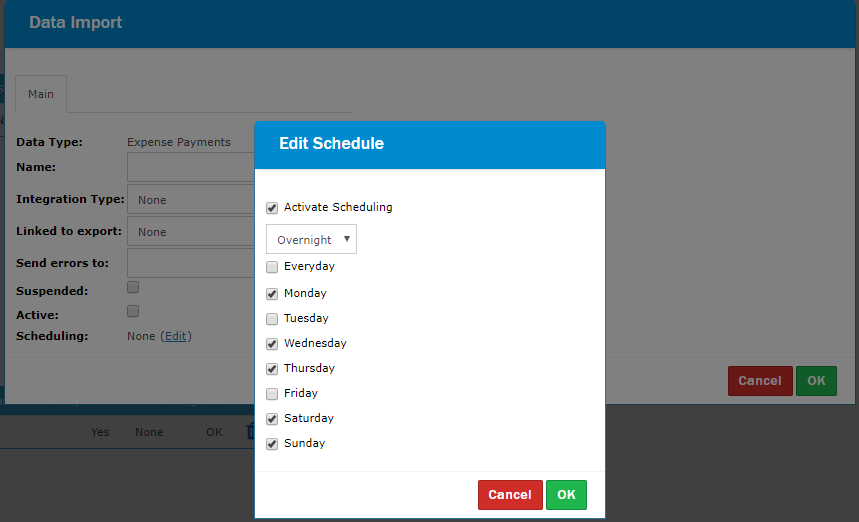
- Scheduling: If you want payments to import automatically, click the Edit button. Then, check mark Activate Scheduling. Next, choose the frequency of the import, and click OK.
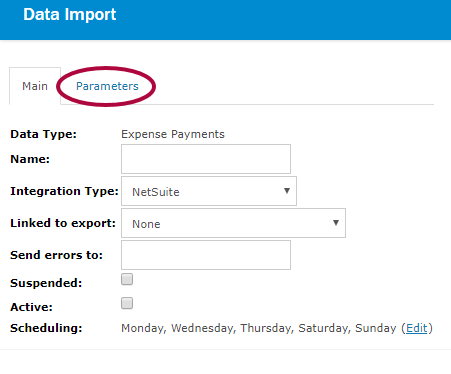
Step 6: When you choose the Integration Type, a Parameters tab will appear. Click into it.
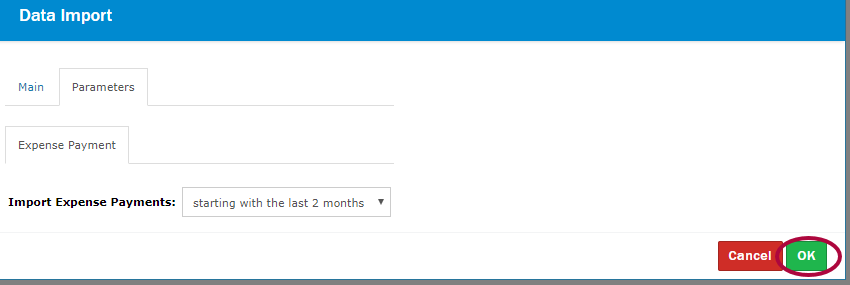
Step 7: Here, define how far back payment data is imported from. The default setting is 90 days. Click OK to save.
Step 8: When the data import integration has been finalized, you will see a new tab called Expense Payments next to the other integration tabs. You can trigger the first import manually instead of waiting for the integration to run overnight by clicking the Transfer Now button in the Expense Payments tab.

Comments
0 comments
Article is closed for comments.