If you're a Nexonia user who integrates with Intacct, you have the ability to import the following Dimensions:
- Department
- Class
- Location
In addition to those dimensions, you can import other native and non-native Intacct Dimensions using Nexonia's User Defined Dimensions (UDD) function. This lets you import those Dimensions as Custom Fields within Nexonia.
This article will show you how to enable and import Intacct Dimensions using Nexonia's User-Defined Dimensions.
Step 1: On your Nexonia homepage, open the Integration page.
Step 2: Click Integration Setup and select Edit Parameters.

Step 3: Choose Intacct from the drop-down menu. Then, click OK.

Step 4: Click the General tab.
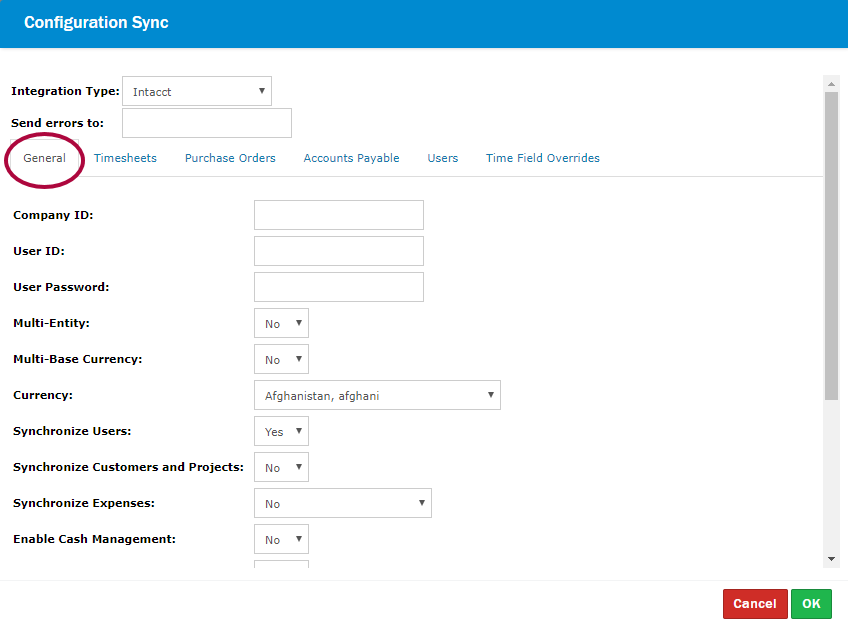
Step 5: Scroll to the bottom of the screen, and set Synchronize User-Defined Dimension to Yes.
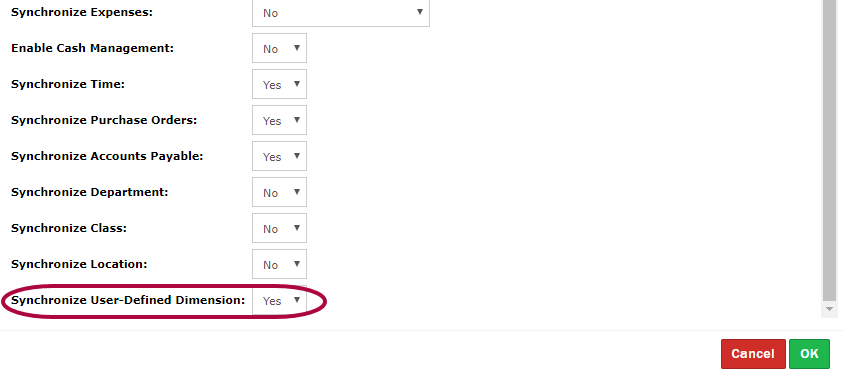
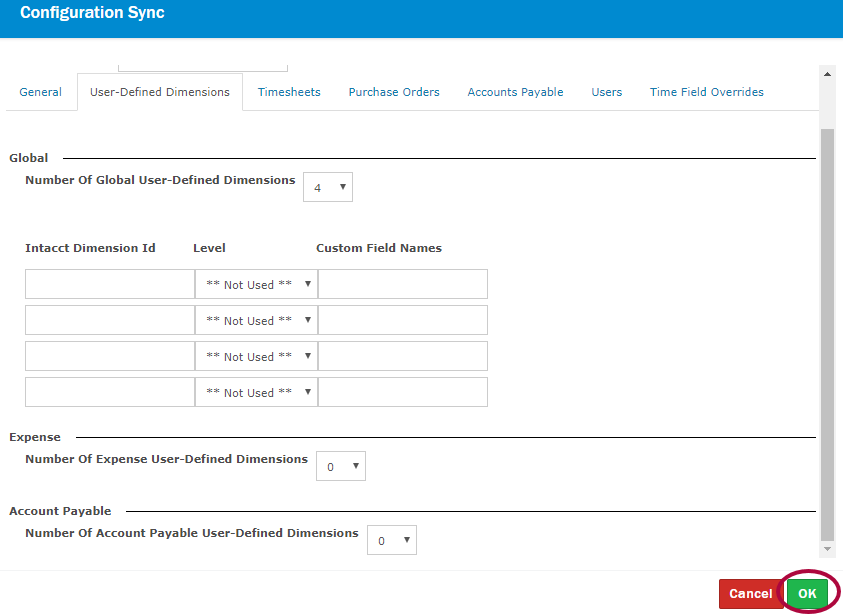
Step 6: This will make another tab at the top of the screen called User-Defined Dimensions. Click into it.
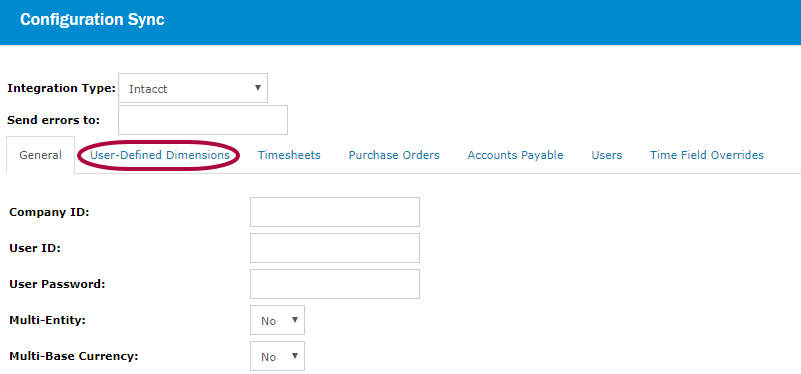
Step 7: There are two settings:
- Global: This refers to Dimensions that are available in multiple modules in Intacct
- Expense: This refers to Dimensions only available in your Intact Expenses.
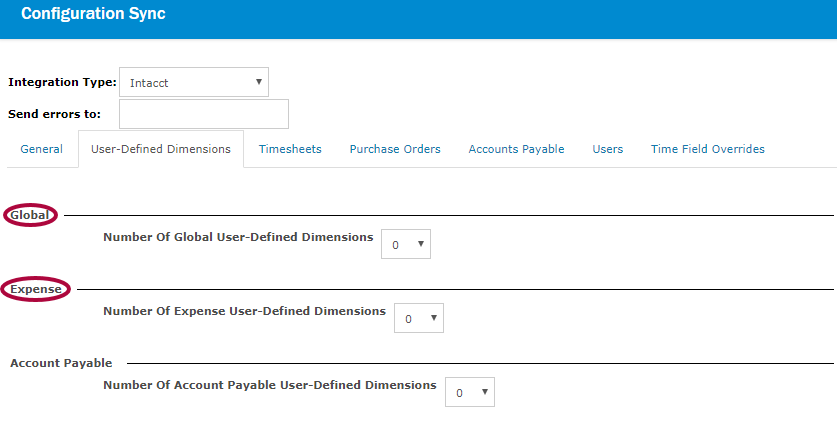
Step 8: Set the Number of Global User-Defined Dimensions to however many Dimensions you'd like to add. That will make a line appear with the following fields:
- Intacct Dimensions ID: This is the internal ID of the Dimension, usually something like budget_udd. This can be found in Intacct by going to Company > select Dimension > View Object Definition > Integration name (Integration Name is the Dimension ID).
- Level: Global as two options: User and Project. This lets you choose if the Dimension should import to and be configurable on the User or Project level.
- Value From: You may not see this field depending on your organization's configuration. This lets you choose which value you want the Expense Item field to be based on the value defined in the Custom Field, User Profile, or Project.
- Custom Field Names: Enter the name that you want the Custom Field created for the Dimension to be called.
- Export: You may not see this field depending on your organization's configuration. Set this to Yes if you want these values to import back to Intacct. Note that you also need to use Advanced Field Mapping in order to map the UDD for export to Intacct.
Click OK when complete.
Step 9: Click the Advanced Field Mapping tab.
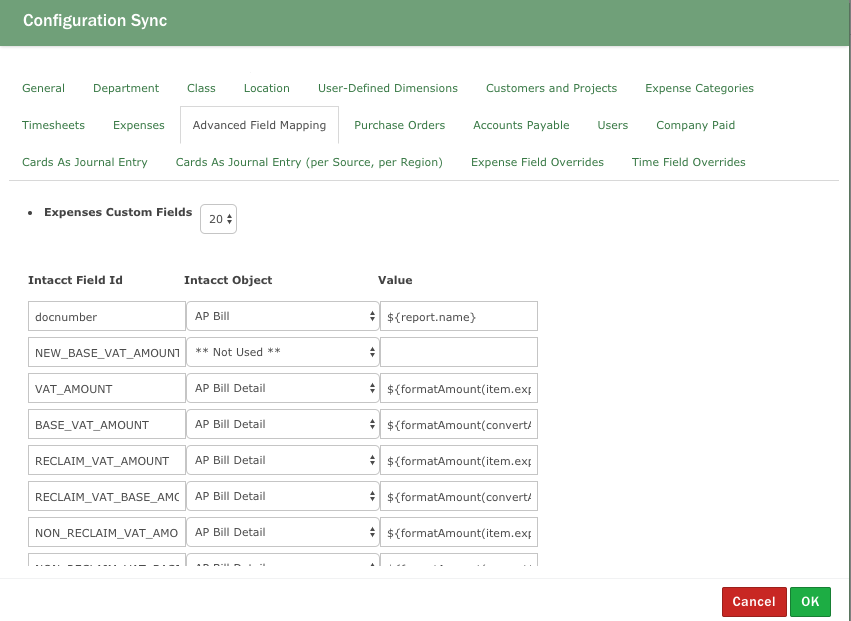
Step 10: Scroll to Expense/Global Custom Fields and pick the number of fields that you added in the User-Defined Dimensions tab. Then, fill out the following sections:
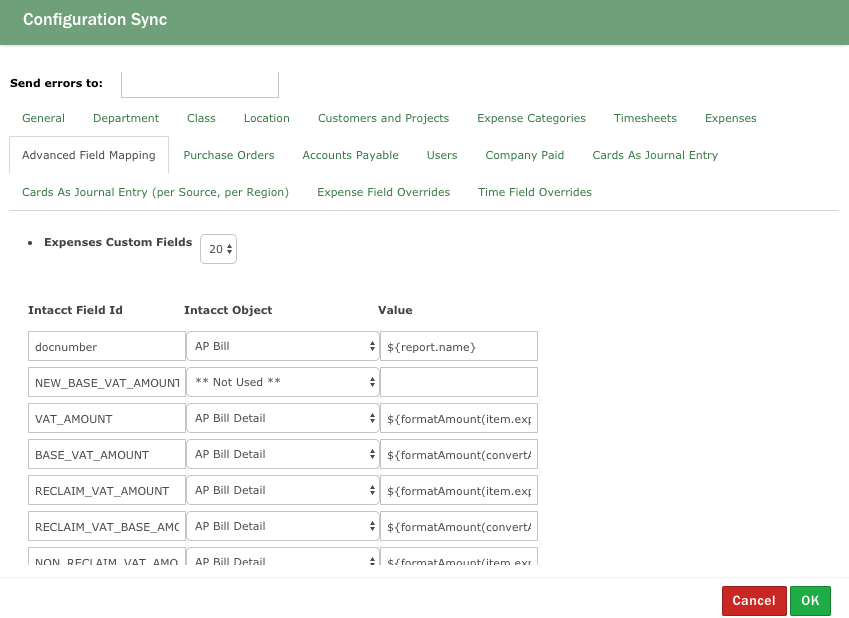
- Intacct Field ID: Enter the Field ID/Dimension ID of the Intacct field that you'd like the information exported to. If you're unsure what the ID is, you can get it from the Custom Field that was created in Nexonia for the imported Dimension.
- Intacct Object: Choose if you want this information to go to the AP Bill/AP Bill Details, Employee Expense/Employee Expense Details, Charge Card Transaction/Charge Card Transaction Entry.
- Value: This is where you are telling Nexonia which field you'd like to export. Use this expression format: ${item.custom['put the number from the custom field in here']} for expenses. You can find the custom field number value by going to Settings > Company > Custom Fields > Expense > look in the Number section for the applicable custom field.
Step 11: Click OK when complete.
Step 12: You can now import the Dimension(s) from the Integration page.

Step 13: Under the Configuration Sync tab, click Synchronize Now.

If you'd like to filter the custom field, see this article on Creating and Configuring Fields in Nexonia Expenses.

Comments
0 comments
Article is closed for comments.