
Nexonia offers an integration with Lyft to allow users to integrate their Lyft business profiles with Nexonia to generate expense items automatically. Administrators are able to configure this integration themselves in their Nexonia environments and enable users to take advantage of this feature.
Any rides requested using your business profile via the Lyft app will automatically create a Nexonia expense report, as well as a pre-filled expense item with relevant information from the ride. Additionally, the Lyft receipt will be automatically linked to the expense item in Nexonia. You will simply need to complete the expense item, if applicable, and submit it for approval!
The configuration steps are primarily to enable the feature and set default parameters for the expense items. Once you've configured the integration, you can share this Help Article with your expense users and let them know this integration is available: How to Set Up and Use Your Lyft Business Profile
![]() Note: as this integration relies on using a default expense category, the integration is not compatible if using the “filter Expense Categories by Project” feature.
Note: as this integration relies on using a default expense category, the integration is not compatible if using the “filter Expense Categories by Project” feature.
To configure the Lyft integration, log in to Nexonia as an administrator on the web:
1. Navigate to Integration* > Integration Setup > Add Travel Integration
*This tab is typically labelled with the name of your ERP or accounting software
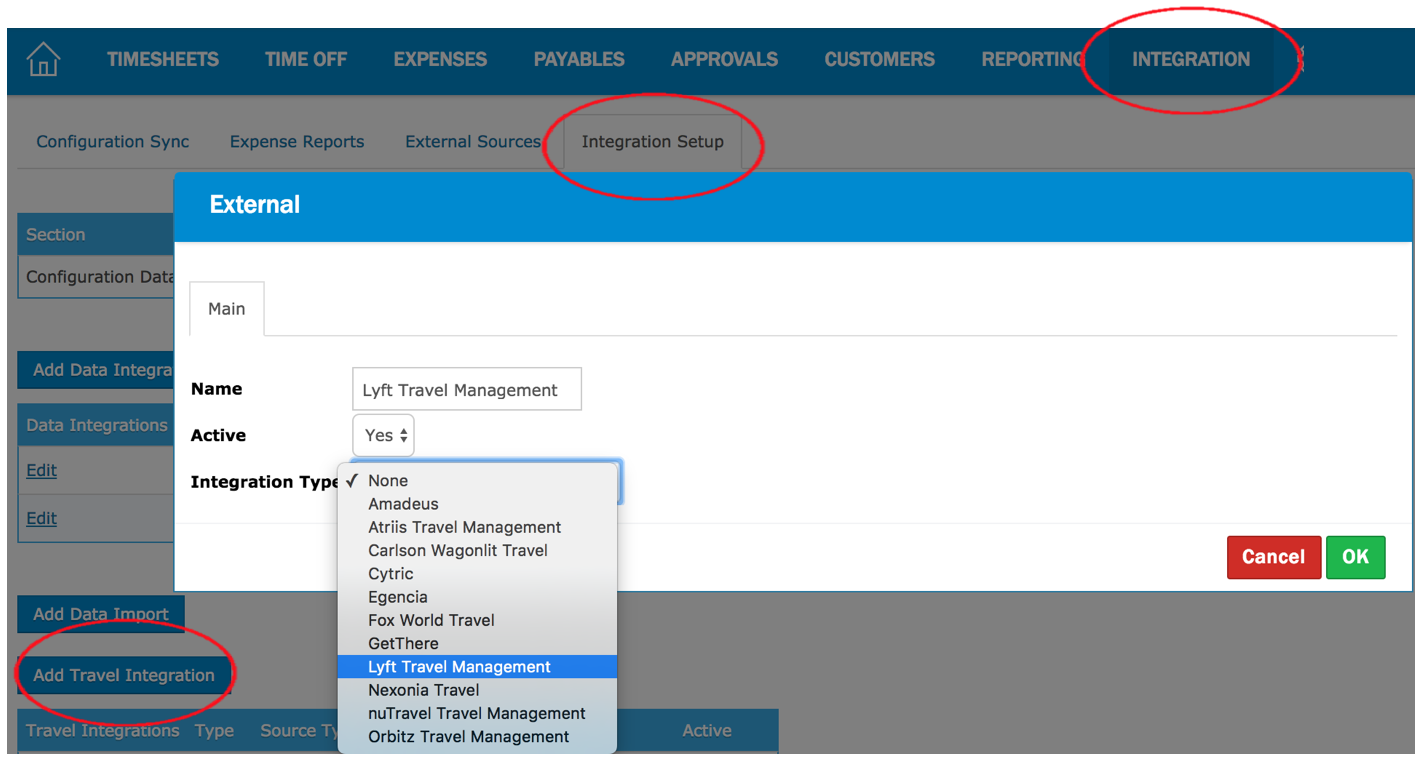
2. Enter the details under the Main tab:
- Name (e.g. "Lyft Travel Management")
- Active: Yes
- Integration Type: Lyft Travel Management
- A Warning window will appear asking if you are sure you want to change the source type. Click OK.
3. Once you click OK, two additional tabs will appear: Parameters and Receipts
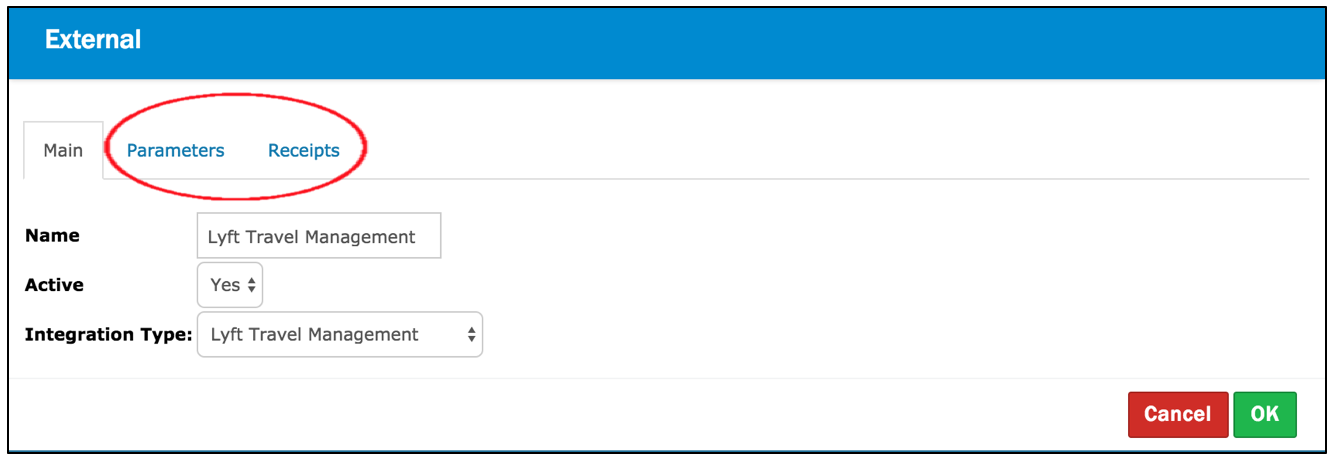
4. Click on the Parameters tab.
- Customer/Project Mode:
- Predefined: allows you to set one Customer and Project which will apply globally to all Lyft expense items, across all users.
- Default then First Available: if selected, the Customer (Default) and Project (Default) as set in the User settings will be pre-selected in the Lyft expense item. In this instance, Customer and Project will vary by User. If no Customer (Default) and Project (Default) are set in the User settings, then the first available value from the Customer and Project lists will be pre-selected.
- Default Customer:
- Only applicable if you've selected "Predefined" as the "Customer/Project Mode". Select which Customer you want to apply to all Lyft expense items, across all users.
- Default Project:
- Only applicable if you've selected "Predefined" as the "Customer/Project Mode". Select which Project you want to apply to all Lyft expense items, across all users.
- Car Rental Category:
- Select which expense category you want to have pre-selected for all Lyft expense items (e.g. "Taxi" is a common expense category for Lyft)
- Car Rental Paid By:
- Paid by Employee - this sets the "Paid By" field in the expense item to "Employee". This value will be non-editable by the user.
- Paid by Company - this sets the "Paid By" field in the expense item to "Company". This value will be non-editable by the user.
- User category - the "Paid By" field in the expense item will be determined by what is set in the expense category. Administrators can set the expense category "Paid By" settings as either editable or non-editable by the user.
![]() Note: If necessary, Nexonia users can always override any pre-selected default values in the expense item.
Note: If necessary, Nexonia users can always override any pre-selected default values in the expense item.
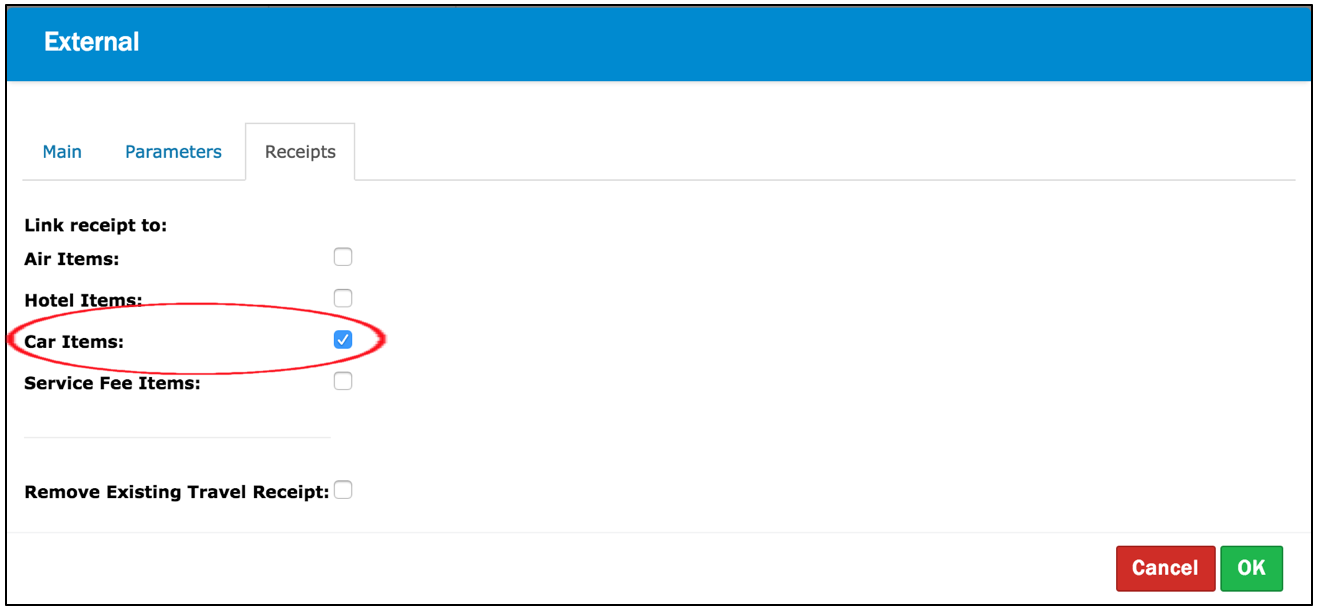
5. Click on the Receipts tab.
Checking the box next to "Car Items" will automatically link the Lyft receipt to its corresponding expense item in Nexonia.
Click OK.
Your users are now able to link their Lyft business profiles to Nexonia and start using the integration.
Comments
0 comments
Article is closed for comments.