
Custom fields can be used in Nexonia to capture additional details and can be used for reporting purposes, approval processes, or specific types of integrations or file exports.
Some examples of Custom Fields:
- Add a “Business Purpose” field for specific expense categories.
- Add “Travel Details” for travel-based expense categories.
- Add “License Number” for software expense categories.
- Capture the “Paid to Merchant” information from credit card transactions.
- Add a “Payroll ID Number” to the user record to support a payroll file.
- Add a “Second Approver” to the user record.
Nexonia Custom Fields are created by the administrator directly in Nexonia. Custom fields can be filtered, defaulted, have role-based permissions such as Read Only or Write, or be set as required or optional.
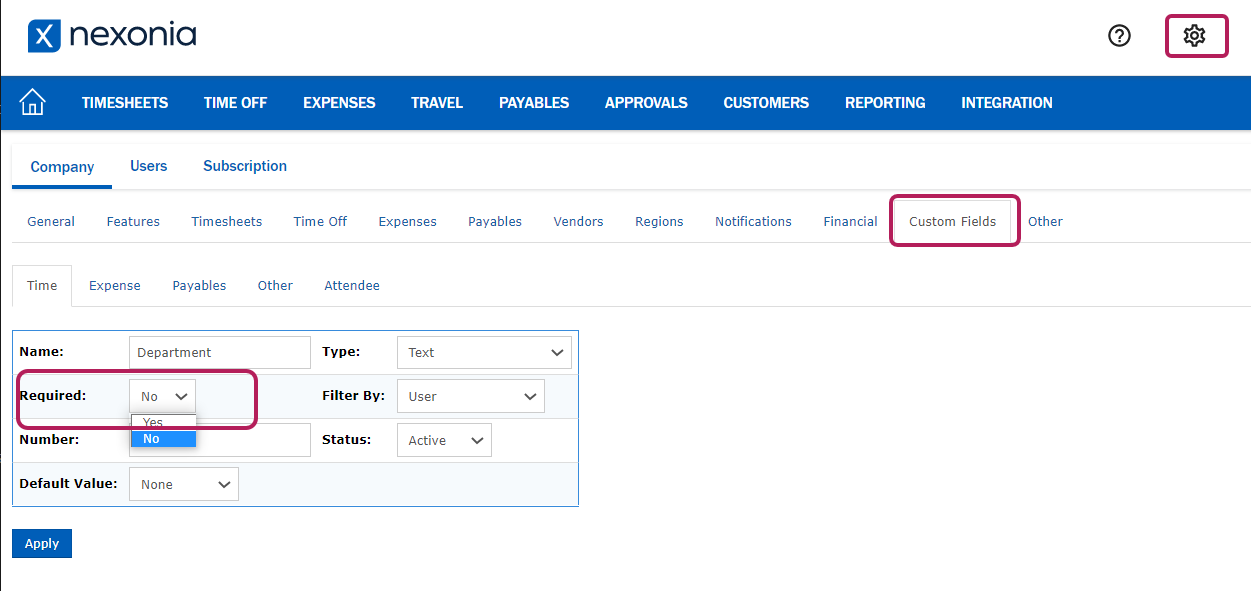
To make a custom field a required field, go to:
Settings > Company > Custom Fields (If your company uses multiple Nexonia products, such as Time and Expenses, click on the product name to edit a custom field specific to that product).
Click on the pencil icon next to the custom field you wish to edit.
Set the 'Required' field to 'Yes'.
Click Apply.
Comments
0 comments
Article is closed for comments.