
If you are using Intacct as your ERP, you will have the option to export data from Nexonia into Intacct Cash Management. This article will show you, an administrator, how to add and configure your Intacct Cash Management export.
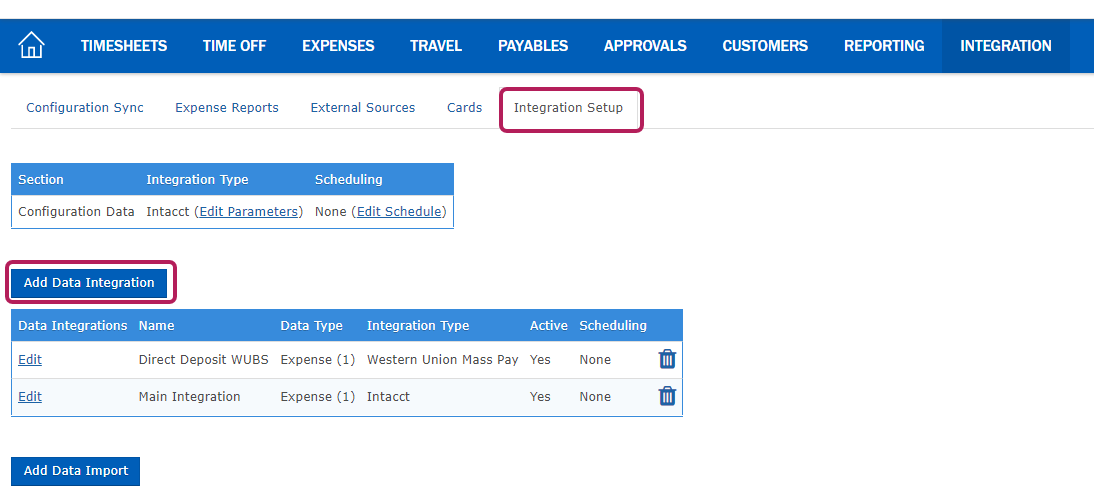
Step 1: Navigate to the Integration tab from the Home screen.
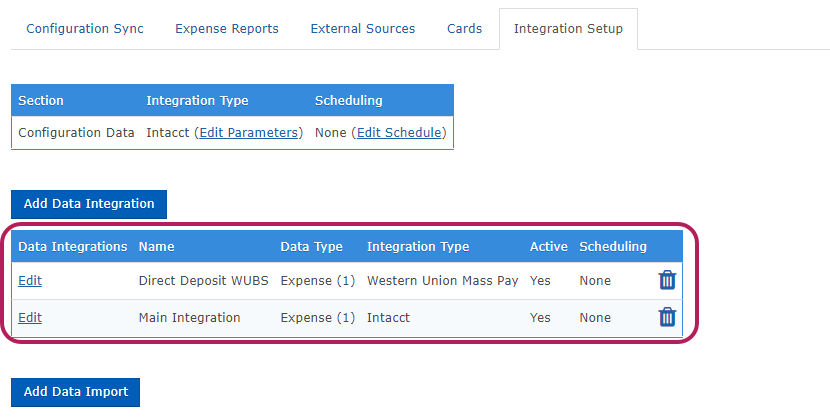
Step 2: Select the Integration Setup tab, then click Add Data Integration.
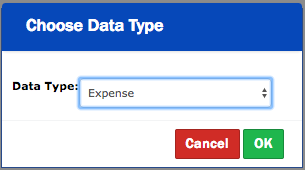
Step 3: In the Choose Data Type window, select Expense.
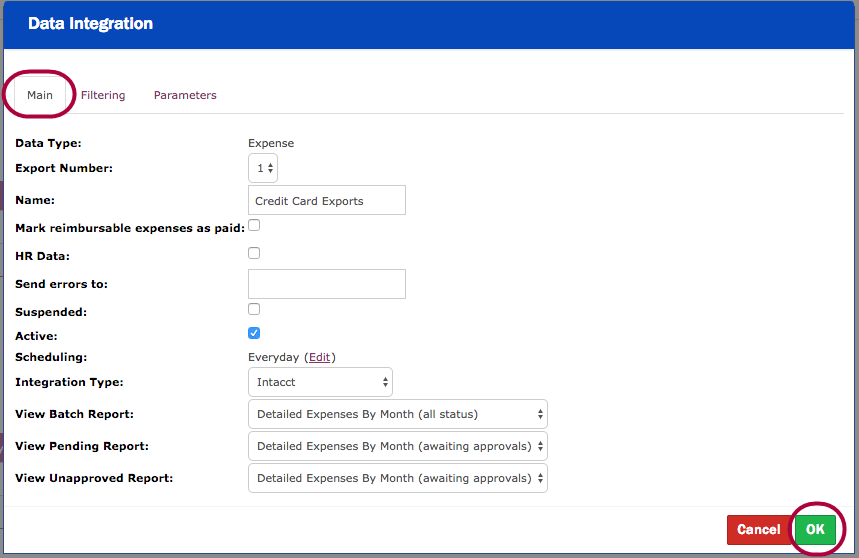
Step 4: In the Data Integration window, enter:
- The Name of the export
- Check the Active box
- Your preferred schedule
- Intacct for the Integration Type
- View Batch Report: select desired report template
- View Pending Report: select desired report template
- View Unapproved Report: select desired report template
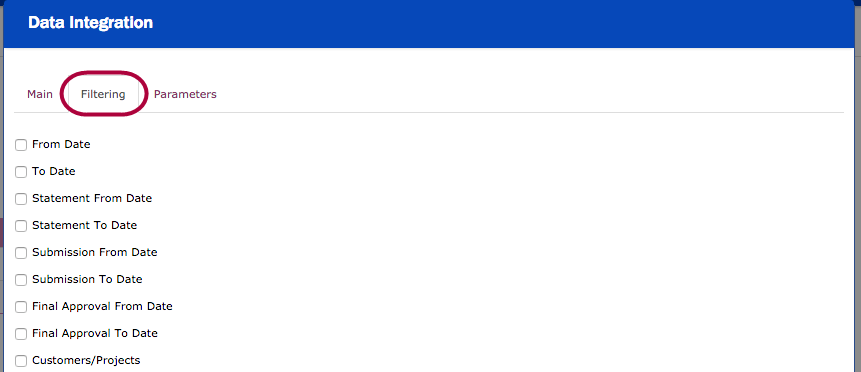
Step 5: In the Filtering tab, select:
- Item Types
- Company-Paid Standard
- Company-Paid Personal
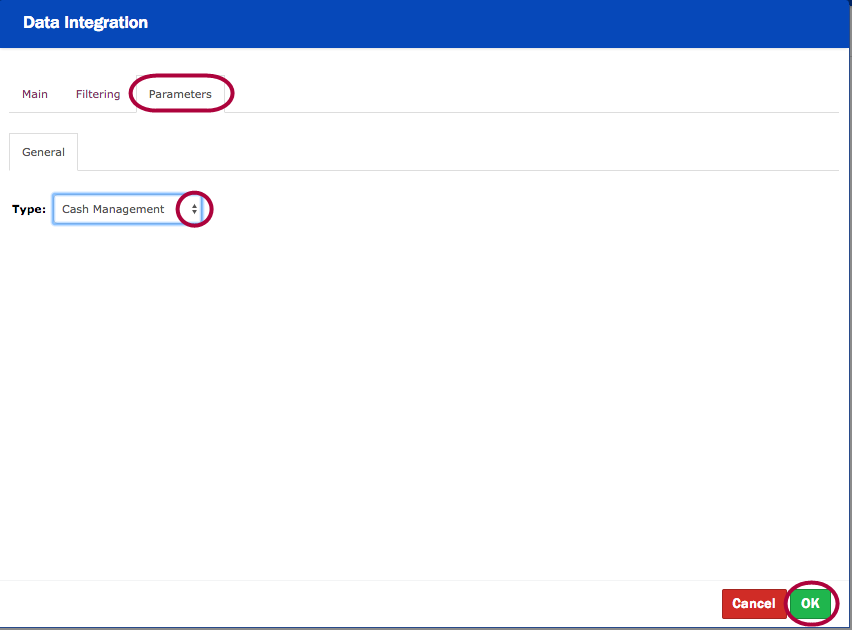
Step 6: In the Parameters tab, select Cash Management. Then, OK to save.
The new Data Integration will appear on the Integration Setup page.
Step 7: Back in the Expense Reports tab, select the Integration from the drop-down menu to view synchronization history or manually sync to Intacct.
Comments
0 comments
Article is closed for comments.