Nexonia Administrators have the option to add new corporate credit cards into the system to start loading applicable transactions into employees' accounts. Employees may then select these transactions to submit on their expense reports. This article shows you, an Administrator, how to add a new corporate credit card into Nexonia.
Step 1: Navigate to the Credit Card Integration tab from the Home screen.

Step 2: Select the Integration Setup tab, then Add Corporate Cards.

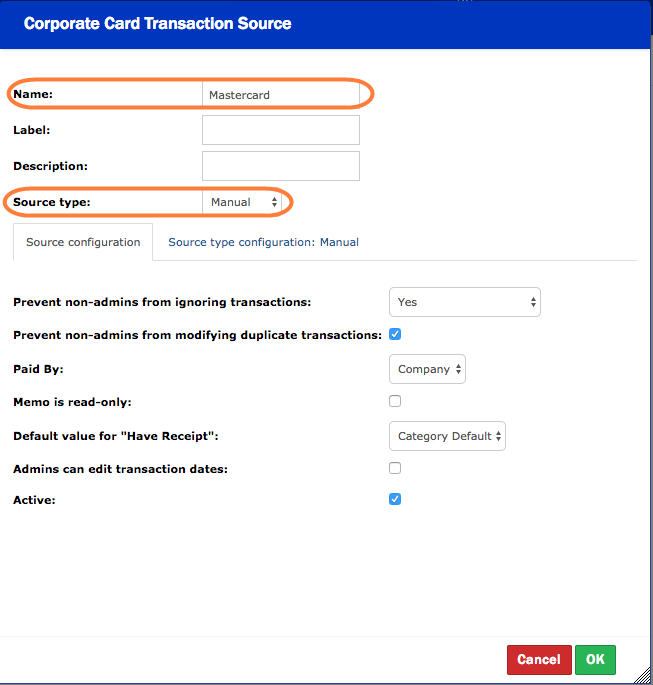
Step 3: In the Corporate Card Transaction Source window:
- Enter a Name for the card
- Enter Manual as the Source type

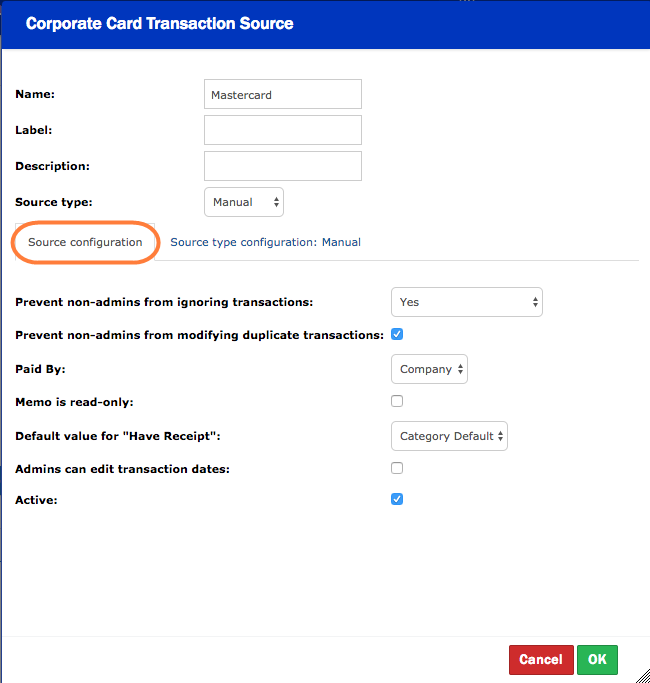
Step 4: Click into the Source configuration tab:
- Prevent non-administrator users from ignoring or modifying transactions
- Select Company if the card is company-paid
- Option for read-only Memo field
- Set a default option for receipt requirements
- Set the card as active or deselect to deactivate

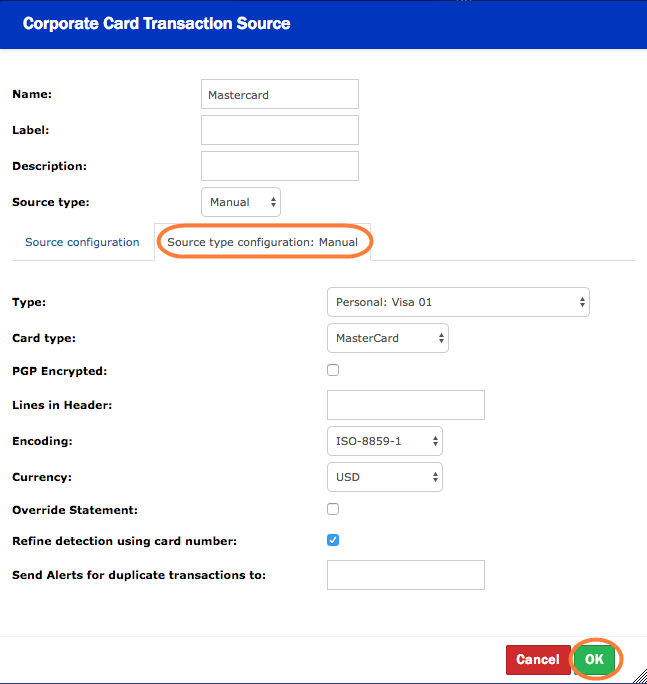
Step 5: Move to the Source type configuration: Manual tab:
- Select which Type of file that the card transactions are from. The Type corresponds to a specific CSV Upload Template.csv (click to download). Review the templates to see if you can find one that matches your bank statement. Otherwise, pick one that is similar to it so that you can copy and paste the transaction data from your statement into that file. If you decide to use the AmEx 2 template for instance, the Type should be set to Corporate: Corporate Amex 02. Note that if the column name has an asterisk, it is an optional column and does not need to contain data.
- PNG Encrypted: this is normally left unchecked.
- Lines in Header: If the bank statement or upload template contains a header row (as all of the upload templates listed in this article do) write the number 1 in this field.
- Select the correct type of card.
- Select the applicable Encoding format (the most used option is ISO-8859-1).
- Select the base currency of the credit card.
- Select Override Statement if the statement date isn't provided, or, you prefer to manually select a fixed monthly statement date.
- Enter an email address if a specific user should receive duplicate transaction alerts.
Click OK.

Step 6: Now that you have created the new manual feed, you can upload transactions to it by following this article.

Comments
0 comments
Article is closed for comments.