All Nexonia users are assigned a "Role". The Role determines the permission and access level each user possesses when utilizing the application. Access permissions for different areas of Nexonia can be configured as "None", "Read", "Edit", or "Administration".
When working to auditors, shareholders or other non-employee stakeholders, a user login with read-only permission can be provisioned to allow data review without the ability to perform modifications.
Users who are assigned to a role with Read-only permissions can review data entered by their any or all of: their subordinates, their project team, users in the same Region or for all users, company-wide.
Read-only access can also be enabled for configuration and reporting pages in Nexonia.
Creating the Read-only role
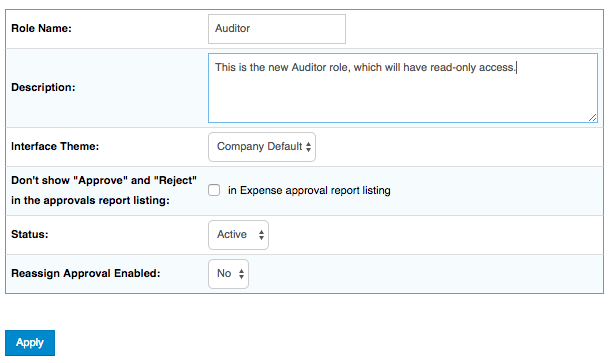
1. Create a new role from Settings >> Users >> Roles >> Add >> Name the role >> Apply.

2. Once the role is created, click Access Levels >> Edit.
3. Choose "Read" access for each Nexonia module / user group as appropriate. For example, "Read" in Expenses row, Subordinates column, gives a user with this role read-only access to their subordinates' expenses. Note that a broader user group will always take precedence over a narrower one (with the exception of "Self"). For example in this case, it is not necessary to grant any access to Subordinates' expenses, because they are covered in "All Users":

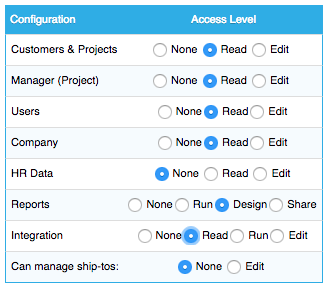
4. Choose Access levels for configuration and reporting. In this example, a user with this role will have read-only access to all Settings pages and Integration logs, as well as the ability to design and run reports from the Reporting page:

5. Click "Apply" at the bottom of the page to save your settings.
Once the role is created, it can be assigned to a user, from Settings >> Users >> choose the user >> Edit >> Role: >> select the role >> Apply.
Comments
0 comments
Article is closed for comments.