Administrators can add new timesheets tasks at any time into Nexonia. Once added, they are ready for use immediately for all Nexonia users to code their timesheets with.
![]() Note for customers using Intacct or NetSuite based integrations: tasks can be created via your configuration sync. This article will cover how to configure the category once it's been integrated into Nexonia.
Note for customers using Intacct or NetSuite based integrations: tasks can be created via your configuration sync. This article will cover how to configure the category once it's been integrated into Nexonia.
To add a new Timesheets task or configure an existing one, navigate to: Settings > Company > Timesheets > Task Categories.

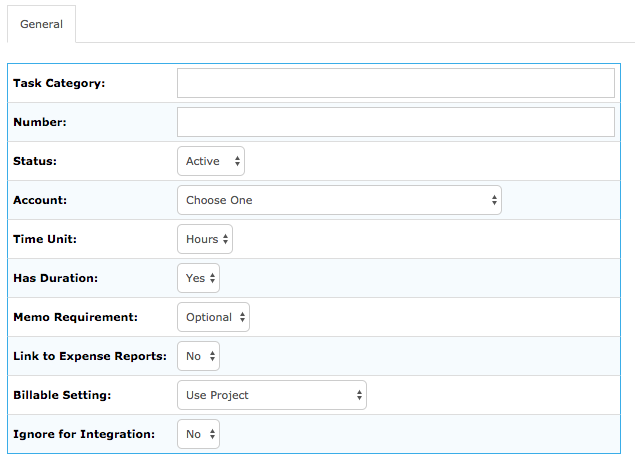
Click Add to create a new task category or click on the  next to the existing task you would like to edit. The following fields are common ones addressed with task categories.
- Task Category: Fill in the name of the task as it will appear for selection when creating timesheets.
- Account (Optional): Select your Service Item from the dropdown list if your Service Items have been uploaded/integrated with Nexonia. This will let the export know which Service Item to use when exporting timesheets to your ERP.
- Memo Requirement: Each timesheet entry can be accompanied by a short description of what accomplished. Often times, this is entered into the memo field. It can be optional or required per task.
- Billable Setting: The billable default for a task can either refer to the Project setting or can be managed at task level. It can be set to billable or non-billable and can be read-only or allow overrides.

Once completed, click Apply at the bottom of the page.

Comments
0 comments
Article is closed for comments.