
Once logged into Nexonia, from the home screen, either click on Purchasing along the navigation bar or click on the Purchase Orders icon on the welcome page.
On your Purchases page, you'll find the following information:
- Adding new Purchases Orders
- A filter to search for a specific Vendor's orders you've created previously
- Status icons
- Internal Nexonia PO reference number
- Vendor selected for the PO
- Employee's name who created the PO
- Approver's name assigned to review PO (if submitted)
- Memo information entered within the PO
- Total value of PO
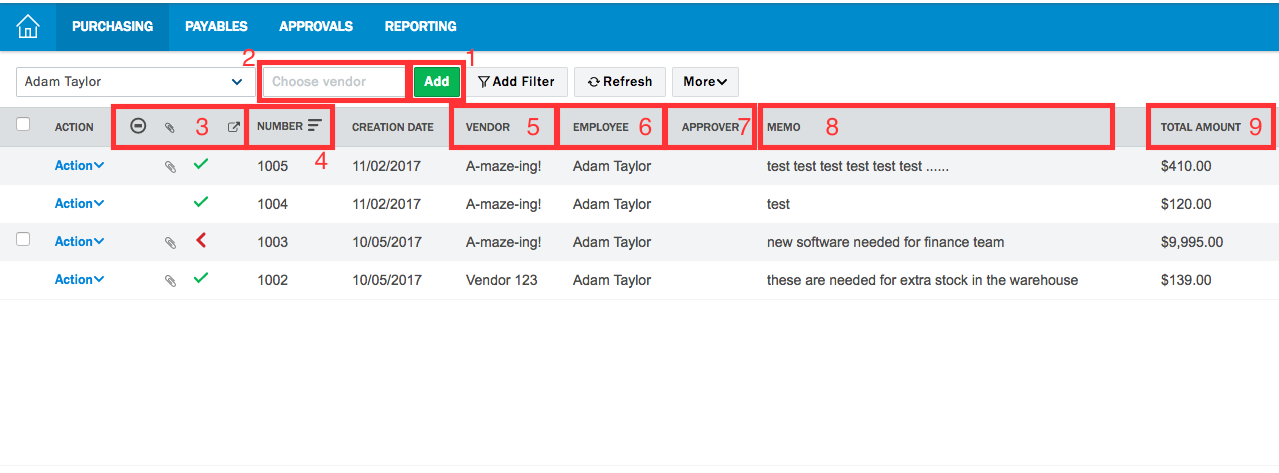
Click the green Add button to create a new purchase order. Double click on an existing order or click the action drop down on the left and select edit to make edits/changes to a purchase order.
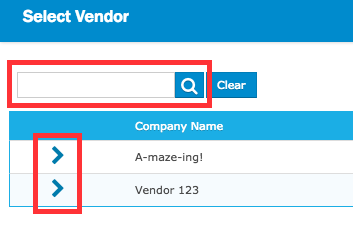
Begin by selecting a Vendor. Click on the magnifying glass next to Choose Vendor to bring up a list of available vendors in your organization.
Search for your vendor by either scrolling through the list or typing their name in the search field. Once you have found your vendor, click the arrow to populate them in the PO.
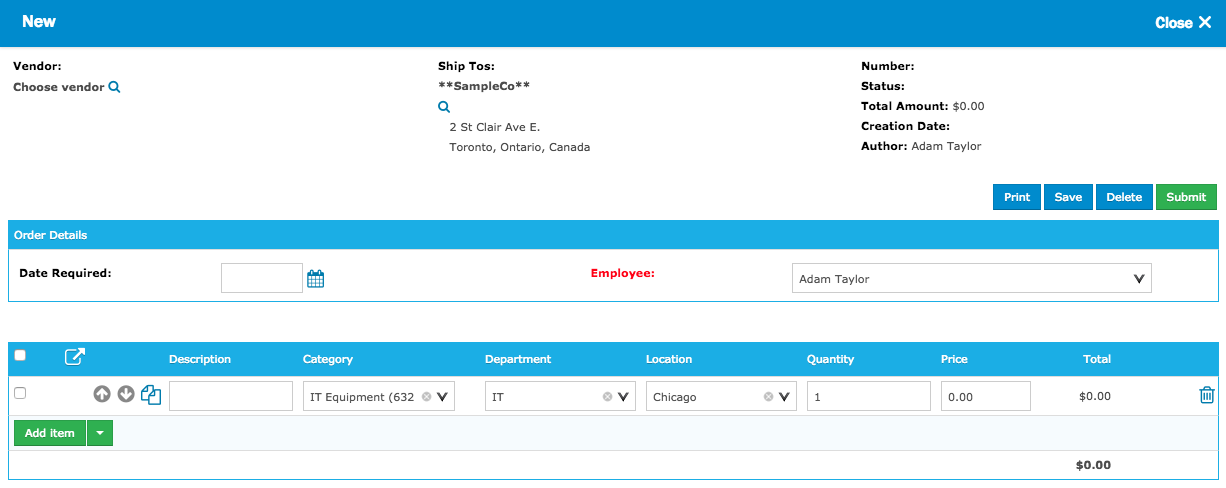
In the Order Details section, the fields you will be asked to fill may vary by organization (if you need help understanding what information needs to be filled in, please speak with your administrator). This information applies to the entire order and will not need to be specified at an item level. (ie. the order is being requested for a single department). Any fields highlighted in red text indicate a mandatory field.
Below the Order Details section will be the Items section. Again, the fields available for you may vary by organization. However, the information entered here can be different on a line by line level. Typically, at very least, you will need to fill in an item description, fill in a quantity and a price per unit.
![]() Note: The quantity will be multiplied by the price to calculate the total for the line item.
Note: The quantity will be multiplied by the price to calculate the total for the line item.
You can add more blank rows by clicking on the Add Item button. The drop down next to it allows you to add a bulk amount of blank rows.
Next, you may be required to enter a Memo for the purchase order. This is typically where additional details go that your approvers or finance teams need to be aware of.
Finally, if made available by your administrators, you can upload attachments to the purchase order after you have entered all the mandatory fields above. Click on Add Attachment > Choose File > Select your file > Open > Ok. You can add multiple attachments and delete ones no longer needed.
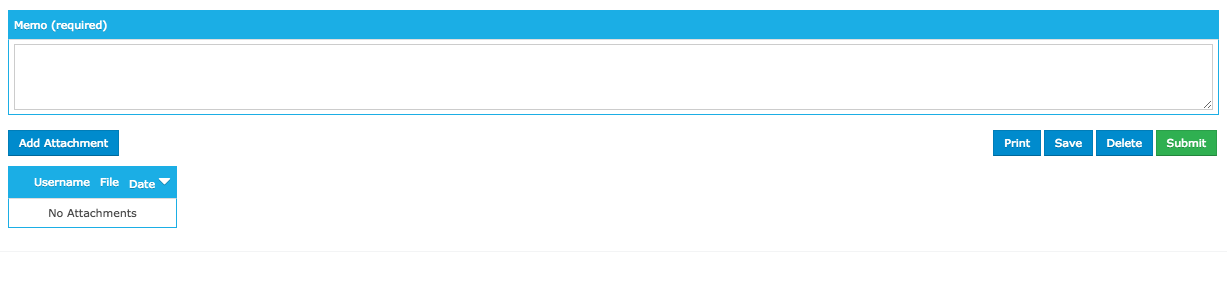
In the top & bottom right corners of the purchase order are options to:
- Print - allows you to print the purchase order
- Save - saves the purchase order in draft status allowing you to close out and come back to the order at a later time.
- Delete - deletes the entire purchase order
- Submit - submits your order into the approval workflow
Comments
0 comments
Article is closed for comments.