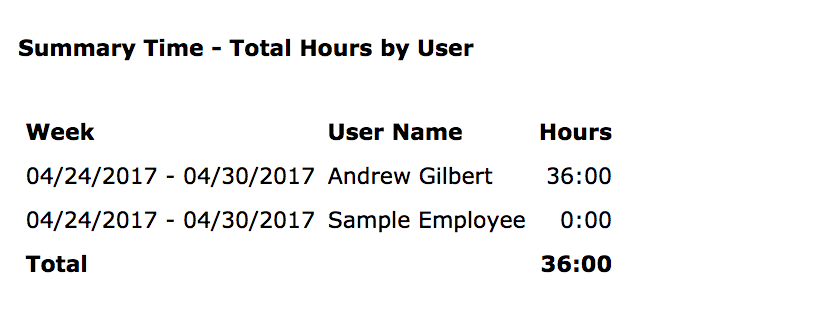
These instructions will assist with building a basic Timesheets report that will show all hours by user over the specified time period.
Separate reports can be created to capture any timesheet users who have zero time created in a given date range or who have created a time entry but not yet submitted the entry or if it's unapproved.
Link: Reporting Template: Timesheet Users with Zero Hours, Summary
Link: Reporting Template: Draft and Unapproved Time Entries, Summary
The ability to build reports is linked to your Role permission. Administrators typically have this permission built in to their role, and can grant it to other roles if needed.
Designing Your Report: Creating the Report Template
Login to Nexonia on the web and navigate to the Reporting module.
Click the Create Report button to start the report configuration.
You'll see the General tab appear. Enter the following:
- Name and Description
- Type - select Time
- Summary - select Yes
Click the Add button.

You should now see the five tabs for configuring the report:
- General - general information and sharing permissions
- Selection Criteria - report template filters and defaults
- Columns - data columns for the report
- Categories - data categorization for the report
- Order - order of the report results
Important: as you update the settings in each tab, it's important to hit Apply to save your changes before moving to the next tab.
General
Most of the information will have been provided on your initial General screen. Here you can also configure:
- Shared - allows the report template to be private, shared with all other users or specific roles
- Header & Footer - you can enter information you'd like to see in the report header and footer, such as the title
Selection Criteria
This tab allows you filtering of the report data to be included. A number of fields can be set as hidden or visible to users running the report, set with defaults, or locked in with a predefined selection.
For this report, the key values are:
- Date Range - establishes the date range range of entries being pulled when this report is run.
- Date Range - Interval - this will be the default date range when a user runs this report.
- People - this will be the list of users whose data will be included in the report. By default it will include everyone visible to you based on your role permission. You can limit this to specific subsets of users or predefine which users will be included.
- Approval - Check off all values. That way all time entries will be reported on regardless of approval status.
- Data for All Users - if set to No, Nexonia can only report on entries that have been created. By setting to Yes, this allows the system to populate a value for each user even if that is 0.
Categories
For summary reports, you'll want to move to the Categories tab next. Categories controls which data values are available in the Columns tab for summary reports.
Click the Add link on the left and select the Category of data to include from the dropdown menu. Include the following:
- User
- Week

Columns (Data)
The Column tab is where you define what information you want to include in the report. We’ve included some columns of data that can be useful, but you can choose to add others, remove columns or sort them in a different order. Click Add, select the column value below and you can rename the column header for verbiage that makes sense for you (see the Label column in the screenshot below).
For this report, include these three values:
- Week
- User - Full Name
- Duration

Order
Order is what order are the results being presented. For example, you could sort the results by Duration, then by User and Status.
You have now completed building your reporting template.
Running Your Report
Under the Reporting module, you should see the reporting template you just built. If you’re not seeing it, double check you don’t have a filter enabled.
Click the Action link to the left of the reporting template and you should see a dropdown menu with the Run option.
You’ll now see your Selection Criteria for the report. Make any selections if needed, and then click “Run”.
 Tip: for the report format, use HTML if you want a pop-up with the results, PDF if you want a copy of the report to print, save or email, and .CSV if you want to open the report in a spreadsheet program such as Excel -this can be useful for filtering the values to only view users with zero hours reported.
Here is a sample of the results:


Comments
0 comments
Article is closed for comments.