Getting Started
A guide to getting started with Emburse
Training Calendar
Submitting & Approving Expenses
Alternating schedule
How to login, upload your receipts, create and expense reports for approval, and approve expenses.
Submitting & Approving Time Off and Timesheets
Alternating schedule
A walkthrough of how to create, submit, and approve Timesheets and Time Off requests.
Reporting Module Overview
Alternating schedule
An overview on how to create and generate reports.
Configuring Expense Settings for Admins
Alternating schedule
How to manage your company's data and settings.
Configuring Timesheets & Time Off Settings for Admins
Alternating schedule
How to manage timesheets and time off settings and policies for your company.
Managing Nexonia with Intacct
Alternating schedule
An overview of how Nexonia is integrated with Intacct. Learn how to import and export data between Nexonia and Intacct, manage users, expense categories and Intacct dimensions.
Managing Nexonia with QuickBooks
Alternating schedule
An overview of how Nexonia is integrated with QuickBooks Desktop or QuickBooks Online. Learn how to import and export data between Nexonia and QuickBooks, manage users, expense categories and QuickBooks dimensions.
Managing Nexonia with NetSuite
Alternating schedule
An overview of how Nexonia is integrated with NetSuite. Learn how to import and export data between Nexonia and NetSuite, manage users, expense categories and NetSuite segments.
Travel Booking & Analytics
Alternating schedule
Review how to book travel, run reports, & view unused tickets.
Watch Nexonia's easy-to-follow brief tutorial videos here.
Training Videos
View Security Documentation in the Emburse Trust Center Connect a Bank Account
-
The Emburse Trust Center is a secure platform that makes it easy for Emburse to share sensitive security and compliance documentation with customers, including W-9 forms, compliance certifications, and frequently asked questions.
1. Navigate to trust.emburse.com.
2. Select Nexonia from the drop-down menu at the top of the page, or from the list in the Emburse Trust Center pane.
3. On this page you may view general documents and policies related to Emburse. To download documents related to Nexonia, including SOC 1, SOC 2, ISO 27001, ISO 27701, and PCI DSS documents, click Get Access at the top of the page or in the Documents pane.
4. Enter your work email address and click Continue.
5. If the domain of your email address matches an existing customer domain name, you will be granted access to view and download specific product information from the Trust Center.
If the domain does not match an existing customer domain, you will be prompted to complete the Request Access form with your email address and company information.
6. The request will be sent to Emburse's Security team for review. If it is approved, you will be emailed a link that can be used to download documentation from the Trust Center.
-
Owners and admins can add a bank account by clicking Bank Accounts under the Admin tab and Connect A Bank Account:
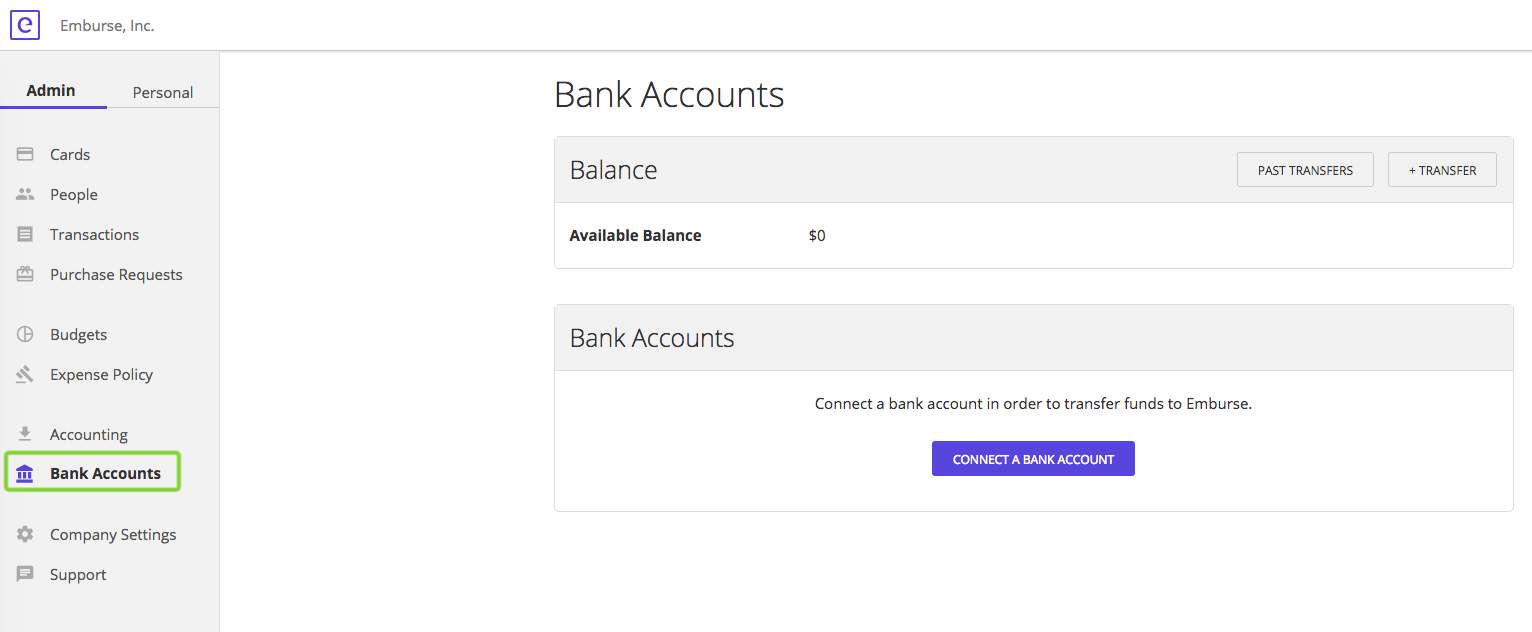
Find the following options to link a bank account:
1. Use Bank Credentials
This option is instantaneous. You can select from a list of popular banks or search for your bank/credit union.
Enter in your credentials to login to the bank, and authorize it, so it can be used with Emburse.
2. Use Account Number - APPROVAL REQUIRED
This option involves entering your account and routing numbers for your bank account. It's delayed verification as small deposits are made to Emburse via ACH. It can take three or more business days to verify the account. Please note when Manual Verification is used the daily transfer limit will be decreased until routine transfers are seen being successful. Please contact Support@Emburse.com to discuss this option.
If you have ACH Fraud Protection on your account please supply your bank with the below ACH ID's that will whitelist Emburse from being able to debit/credit your bank account. Both codes should be provided to your bank:
1800948598
4270465600You also have the option to link more than one bank account to Emburse.
Connected Bank Account
Once you've successfully connected a bank account, you'll see it on your Bank Accounts page and you'll be able to transfer funds from the bank account into Emburse.
You can edit the name of the account by clicking the edit icon. There is an option to remove the account, or connect another bank account too.
A minimum balance may also be set that enables the automatic transfer of funds from the connected bank account into Emburse whenever the Emburse business account reaches a specific low balance.
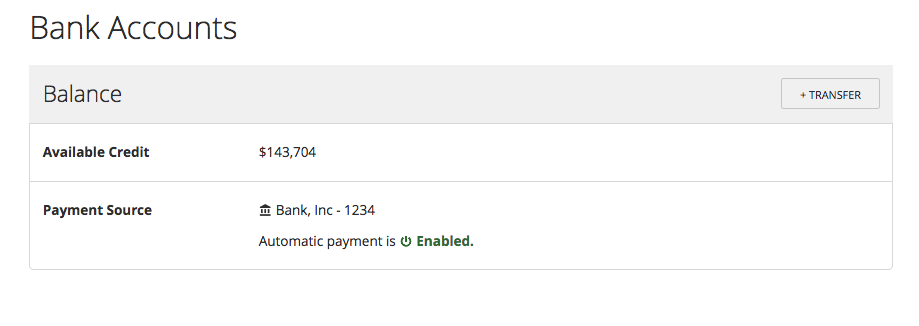
Credit Accounts
If you're using the credit option with Emburse, your connected bank account will likely be used as an automatic payment source for your line of credit.
For example, when your bill is due, Emburse will pay it using the connected bank account.
Need help logging in?
-
Did you forget your password or do you need help logging in? Try reseting your password by following the steps below.
Reset your password
- Visit https://app.emburse.com/reset-password
- Enter in your email address. Makes sure it's the one you used to sign up for Emburse.
- Check your email for the password reset link. If you can't find it, it might be in your spam folder.
- In the password reset email, click "Reset your Password".
- Enter your new password and check your text messages for the phone verification code, then select Change my password.
Note:
Your new password must be at least 8 characters long and use both letters and numbers.